background image


ESC 

Ethernet to Serial Converter 

Description and Use 

The ESC is an Ethernet-RS232 adapter that lets you plug 
TigerStop into an 

ethernet network

, eliminating the need for 

serial port

 on your computer or a short haul modem, and 

permitting communication with TigerStop across your 
network. 


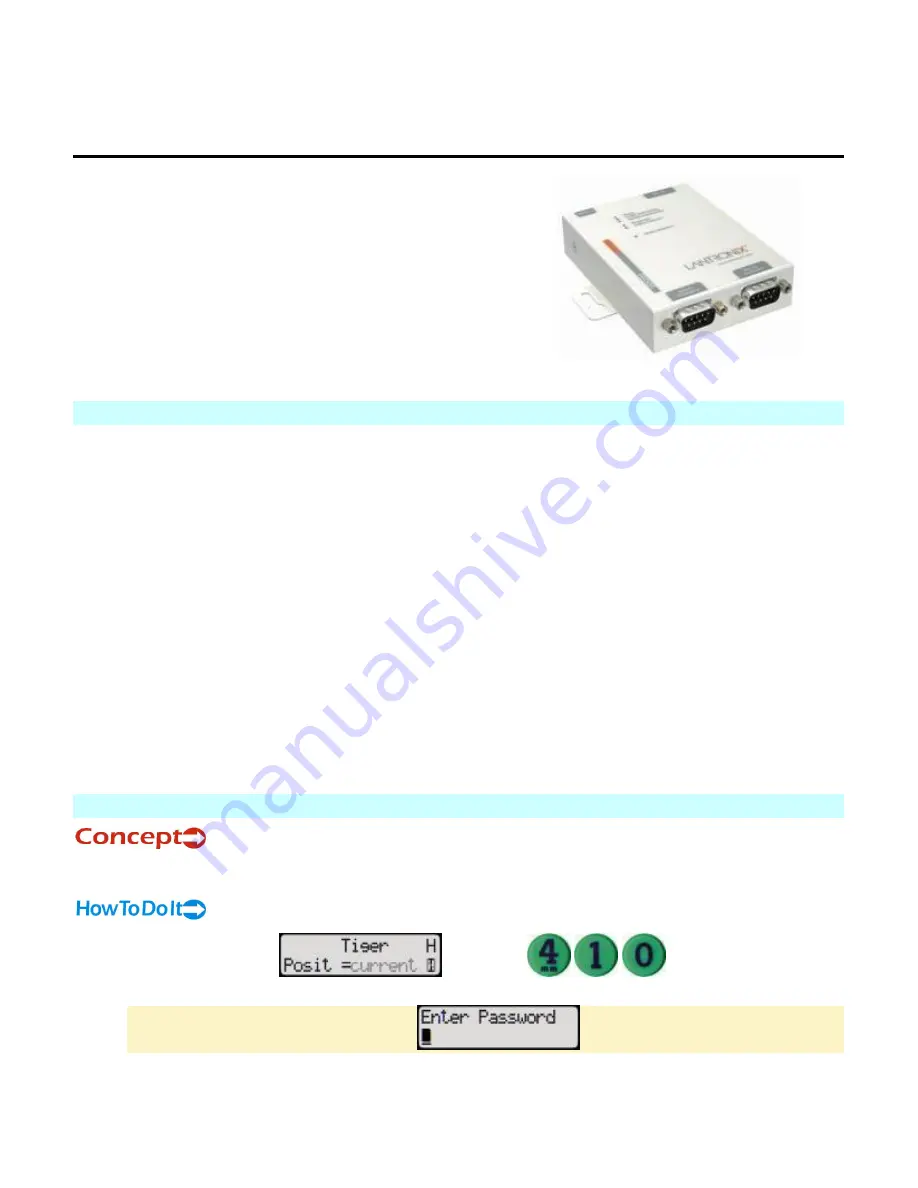
Fig. 1 

System Specification 

The ESC consists of a white adapter box (Fig. 1) and its power cord.  The adapter box has two DB9 serial 
ports, allowing one ESC to connect to two separate TigerStops and to communicate with each one 
separately. One serial cable is included. 

There are two ports on the ESC, permitting simultaneous downloads to each of the two TigerStops. 

The ESC is compatible with


any Ethernet network 


any TigerStop Level 2 (TigerSet) or higher 


TigerLink version 5.0 or higher 

The connection to the TigerStop requires a straight-through serial cable with a male DB9 connector on 
one end, and a female DB9 connector on the other end.  This is the standard cable used to connect a 
TigerStop to a computer, and is available at any electronics or computer store. 

The connection to the network requires a standard straight-through CAT5[e] Ethernet cable with standard 
RJ45 connectors on each end.  This is also available at any electronics or computer store. 

Installation and Setup 

Controller Setup 

On TigerStop

s side of the installation, the controller has no specific setup requirements, 

but the user must know the controller

s baud rate.  The default setting is 115200, but this can be checked 

or changed in the Service Menu.  

To access the Service Menu and change the baud rate


1.


At the Ready screen 

 hold down 


at the same time and 

then quickly release.  

The screen prompts you for a password 

Summary of Contents for TS-DDH

Page 1: ...allation User s Guide ESC Ethernet to Serial Converter SX Serial Extender Contact information TigerStop LLC Assembly Plant 12909 NE 95th St Vancouver WA 98682 Tel 360 254 0661 Fax 360 260 0755 Website www tigerstop com Email service tigerstop com 2006 TigerStop LLC ...

Page 2: ...pecification 1 Installation and Setup 1 Controller Setup 1 ESC Hardware Setup 2 Software Setup 2 Computer Setup 3 Maintenance 3 Use 3 Ethernet Device Installer 4 Run Ethernet Device Installer 7 The Ethernet Redirector 13 ESC Troubleshooting 16 Serial Extender 17 ...

Page 3: ...er TigerLink version 5 0 or higher The connection to the TigerStop requires a straight through serial cable with a male DB9 connector on one end and a female DB9 connector on the other end This is the standard cable used to connect a TigerStop to a computer and is available at any electronics or computer store The connection to the network requires a standard straight through CAT5 e Ethernet cable...

Page 4: ... Setup 1 Plug one end of the power adapter included in the package into the wall and the other end into the ESC This should not be plugged into the same side of a line filter as a TigerStop 2 Connect the female end of the serial cable to either port of the ESC and the male end to the middle port of the TigerStop 3 Connect either end of the Ethernet cable into the Ethernet port on the ESC and the o...

Page 5: ...un The Ethernet Redirector Maintenance The ESC should never need any maintenance If a problem does develop pulling out the power cord for 10 seconds should resolve it Use Ensure that the redirector service is functioning then connect to the virtual port normally HyperTerm TigerLink custom program etc Everything should happen normally after this point See also ESC Troubleshooting ...

Page 6: ...uide is for additional reference Fig 2 Insert the CD into your CD ROM drive If the CD launches automatically continue at step 2 If the CD does not launch automatically 1 Click the START button on your computer task bar and click Run 2 Click Browse and select the CD ROM drive The Browse screen should look like Fig 3 below Fig 3 3 Click Launch exe If you get a message indicating that you need to dow...

Page 7: ...5 Click Next The wizard will insert a default folder Fig 6 in which to install DeviceInstaller Fig 6 and will set permissions to Everyone You can browse for a different folder or set the permissions to Just me but if the defaults are acceptable leave them as they are 6 Click Next The wizard displays the Installation Complete screen Fig 7 ...

Page 8: ...Data Downloading Hardware 6 Fig 7 7 Click Close Run Ethernet Device Installer ...

Page 9: ...l Programs Lantronix DeviceInstaller DeviceInstaller Fig 1 Fig 1 The DeviceInstaller 3 6 window Fig 2 will appear Fig 2 2 Click Search DeviceInstaller 3 6 will display the IP address of every ESC on the local network along with additional icons on the task bar Fig 3 Fig 3 3 Click Assign IP The Assign IP Address screen displays ...

Page 10: ...ettings screen displays In Fig 5 the setting values are only examples Fig 5 5 Enter the IP address subnet mask and default gateway Fig 5 and click Next If you are unsure about these values contact your company s system administrator One more screen Fig 6 appears prompting you to confirm the IP address ...

Page 11: ...ssign The new address will be saved and the Ethernet adaptor will be rebooted Fig 7 Fig 7 7 Click Finish Configure the Ethernet Adaptor 1 Click the START button on the task bar and select All Programs Lantronix DeviceInstaller DeviceInstaller Fig 8 ...

Page 12: ... 8 The DeviceInstaller 3 6 window Fig 9 will appear Fig 9 2 This time click Configure The Configure Device screen Fig 10 displays Fig 10 3 Click Edit Settings The Port Properties screen Fig 11 displays Fig 11 4 Click the Advanced tab ...

Page 13: ...nverter Installation and Setup Controller Setup 6 In the 3 Passive Connection Fig 12 parameters change Local Port to 14001 and click OK 7 The Local Port needs to be 11000 higher than the port setting in the Redirector The other Advanced settings should be left at their factory defaults 8 If you will use two Local Ports go back to step 2 Configure and set up the second port the same way When you ar...

Page 14: ...ttings and reboot the device When in use both ports should have a baud rate matching the controller baud setting 115200 The factory default is 9600 Also be sure that Data bits 8 Parity None Stop bits 1 Flow control none These should be the factory default settings The Ethernet Redirector ...

Page 15: ...13 The Ethernet Redirector Install the Redirector from the CD 1 Choose the destination folder Fig 1 for the Redirector Fig 1 2 Click Next Fig 2 3 Click Next ...

Page 16: ...he box next to the first two Com labels This is usually Com3 and Com4 so the remainder of this guide will assume it is This enables port redirection for these com numbers 4 Select COM3 from the top center Redirect To drop down menu 5 Click the Add IP button 6 Enter the IP address of the first ESC in the Host box 7 Enter 3001 in the TCP port box 11000 less than the number entered for Channel 1 in t...

Page 17: ...top center Redirect To drop down menu 11 Click the Add IP button 12 Enter the IP address of the second ESC in the Host box 13 Enter 3002 in the TCP port box 11000 less than the number entered for Channel 2 in the USD200 s setup 14 Click OK 15 Click Save 16 Restart the computer ...

Page 18: ...in conjunction with other potentially dangerous machinery The use of these components does not make that machinery safe TigerStop LLC s products are not intended to substitute in any manner for safety requirements in general or in conjunction with other machinery These components must be incorporated into machinery by persons qualified to design safety features to make the machine as safe as possi...

Page 19: ...th a new TigerStop will be found next to the accessory box Inside the carton you will find a blue product booklet a serial cable the RS extender sender and receiver and in a small white box the power supply Fig 3 TigerStop adds a second serial cable Fig 4 so you will have everything you need It is also packed in the carton The RS extender receiver is marked with an R and the sender is marked with ...

Page 20: ...Data Downloading Hardware 18 4 Plug the 5v power supply Fig 6 into RS232 Sender 5 Restart your computer only after making all the connections Fig 6 ...

Reviews: