background image

7 Support

E-DOC-CTC-20030814-0001 v1.0

88

7.4 SpeedTouch™ Default Configuration

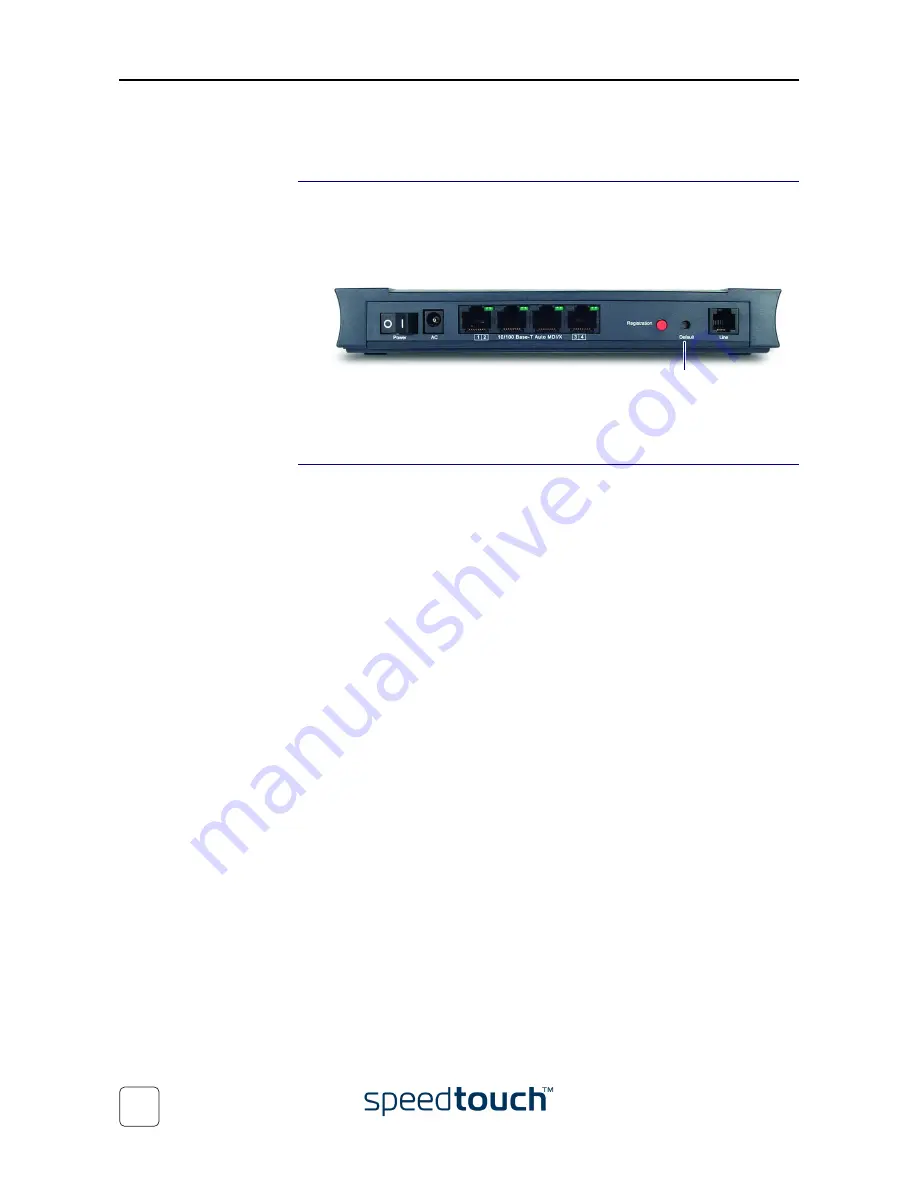
Reset to default

configuration

Proceed as follows:

1

Make sure the SpeedTouch™ is powered on.

2

Use a pencil to press the Default button at the SpeedTouch™ until all the LEDs on 
the front panel start flashing.

3

Release the button. 

The SpeedTouch™ reboots and will come online again with factory settings.

WLAN clients

You will need to re-associate and register your WLAN clients, using the factory defaults 
WLAN settings. See 

“4.1 First-time Wireless Client Association” on page 43

.

Default button

Summary of Contents for SpeedTouch 545

Page 1: ...SpeedTouch 545 570 Multi User ADSL Gateways Setup and User s Guide Release R4 2 1 500 SERIES ...

Page 2: ......

Page 3: ...SpeedTouch 545 570 Setup and User s Guide Release R4 2 1 ...

Page 4: ...t use and communication of its contents is not permitted without written authorization from THOMSON The content of this document is furnished for informational use only may be subject to change without notice and should not be construed as a commitment by THOMSON THOMSON assumes no responsibility or liability for any errors or inaccuracies that may appear in this document ...

Page 5: ... SpeedTouch Internet Connectivity 23 2 1 Internet Connections via SpeedTouch s Embedded PPP Dial in Client 24 2 1 1 Using the MS Windows XP Internet Gateway Device Control Client 25 2 1 2 Using the SpeedTouch Web Pages 27 2 2 Connect to the Internet via a Host PPPoE Dial in Client 29 2 2 1 Using an MS Windows XP BroadBand Connection 30 2 2 2 Using the Mac OS X PPPoE Dial in Client 34 3 Dr SpeedTou...

Page 6: ...74 7 2 Using the Wall Mounting Assembly 76 7 3 SpeedTouch System Software Upgrade 77 7 3 1 Checking for new System Software via the SpeedTouch CD Browser 78 7 3 2 Checking for System Software via the SpeedTouch Web Pages all OSs 80 7 3 3 Upgrade via the SpeedTouch Upgrade Wizard 81 7 3 4 Upgrade via the SpeedTouch Web Pages 86 7 4 SpeedTouch Default Configuration 88 7 5 UPnP on Windows XP Systems ...

Page 7: ... Guide will assist you in getting acquainted with the Speed Touch 545 570 Wireless Multi User ADSL Gateways and in getting connected quickly to the Internet Terminology Generally the SpeedTouch 545 i and SpeedTouch 570 i will be referred to as SpeedTouch in this Setup and User s Guide unless specifically indicated Safety instructions Before connecting the SpeedTouch please read the SpeedTouch Quic...

Page 8: ...edTouch is presented in a desktop housing Front panel LEDs The SpeedTouch is equipped with five LEDs on its front panel indicating the state of the device during normal operation Indicator Description Name Color State LAN Green Flashing Wireless LAN activity Off No Wireless LAN activity Line TX Green Flashing ATM cell transmission on DSL line Off No transmission activity Line RX Green Flashing ATM...

Page 9: ...eless upgrade card see 7 1 Upgrading a SpeedTouch 545 for Wireless Networking on page 74 Back panel layout Depending on the variant you purchased your SpeedTouch is equipped with A single 10 100Base T Half Full duplex MDI MDI X Ethernet port A four port 10 100Base T Half Full duplex MDI MDI X Ethernet switch Power Switch Registration button 10 100Base T Ethernet port DSL port Power Socket Default ...

Page 10: ...y activity A second LED may be provided to indicate the 10 100Base T selection Indicator Description Name LED Status 10 100Base T Optional Off 10Base T Ethernet connection On 100Base T Ethernet connection Integrity Activity Off No connection on this port On Ethernet link up Flashing Data is flowing from to this port Link Integrity Activity 10 100 Base T ...

Page 11: ... service The appropriate DSL service must be available at your premises ADSL service must be enabled on your telephone line As both telephone and ADSL service are simultaneously available from the same copper pair you will need a central splitter or distributed filters for decoupling ADSL and telephone signals Always contact your Service Provider when installing splitters filters Public telephone ...

Page 12: ...ed an external hub or switch to connect multiple computers In case of a SpeedTouch switch you can create a local Ethernet network of up to four devices without needing extra networking devices Note If an external hub or switch is used for wired Ethernet networking please follow the installation instructions supplied with the hub for connections and Ethernet cabling Wireless Ethernet The SpeedTouch...

Page 13: ...will provide you with A user name logon ID A password Other information may be required depending on the ISP s specific requirements and Service profile selection SpeedTouch configuration options The method for configuring the SpeedTouch via the Setup configuration files depends on the Operating System OS of your computer system If your computer system runs A Microsoft Windows Operating System The...

Page 14: ...be installed on your PC s MS Windows 98 MS Windows 98SE MS Windows ME MS Windows NT4 0 SP6 MS Windows 2000 MS Windows XP You may need the MS Windows installation CD ROM during installation The SpeedTouch Setup wizard The SpeedTouch Setup wizard procedure consists of three parts Detection of the SpeedTouch Configuration of the SpeedTouch and PC Additional configuration if needed ...

Page 15: ...en a Run window via Start Run from the Start menu and enter the following path D Menu exe where D stands for the drive letter of your CD ROM drive 2 The Choose Language window prompts you to select a language Select the language of your choice and click OK Note The selected language will also be used as default language in the SpeedTouch web pages See Language on page 66 for more infor mation on h...

Page 16: ... start the SpeedTouch Setup wizard 5 The Welcome to the SpeedTouch Setup Wizard window appears Click Next 6 The Software License Agreement window appears You must accept before continuing Click Yes to accept Note If you accepted this License Agreement in a previous configuration setup this window will not be shown anymore ...

Page 17: ...peedTouch on the network an error window appears In this case check that The SpeedTouch is turned on and fully initialized Your PC is correctly connected to the SpeedTouch or the WLAN client is correctly associated with the SpeedTouch WLAN as described in 4 1 First time Wireless Client Associa tion on page 43 Your PC has a valid IP address i e any IP address but 0 0 0 0 No dedicated firewall devic...

Page 18: ...ct the Reconfigure the SpeedTouch option and click Next 2 The following window invites you to select the appropriate service for your Inter net connectivity Select Region Provider and Service as specified by your Service Provider and click Next to continue Note If the Service Provider has included a separate disk with a dedicated Service profile click Have Disk to navigate to the location of the a...

Page 19: ...ccording to the Service profile You can follow the config uration progress in following window 5 As soon as the SpeedTouch Setup wizard completed the update of the Speed Touch configuration and reconfigured your PC following window will appear Click Finish to close the wizard Note In some cases the SpeedTouch Setup wizard may ask you to restart your computer ...

Page 20: ...ity on page 41 for more information MS Windows IP configuration Most Service profiles will enable the SpeedTouch DHCP server Since by default a PC s Ethernet interface is configured for obtaining its IP configuration dynami cally DHCP client in most cases no additional configuration is required To make sure that all PCs are configured as expected DHCP or fixed IP addresses 1 Re run the SpeedTouch ...

Page 21: ... the wireless network the computer s WLAN client is installed and correctly associated with the Speed Touch wireless network according to 4 1 First time Wireless Client Associa tion on page 43 The computer s Operating System supports TCP IP and it s Ethernet interface is configured for obtaining its IP configuration dynamically Note In case of problems with DHCP you can also configure the computer...

Page 22: ...ote If Easy Setup doesn t start automatically go to Advanced Easy Setup 3 The following window invites you to select the appropriate Service for your inter net connectivity In the Service list select the Service as specified by your Service Provider and click Next to continue Note If only one Service is available this window will not be shown 4 Subsequent screens will guide you through the configu...

Page 23: ...dow 6 As soon as Easy Setup completed the update of the SpeedTouch configuration following window will appear Click Finish to close the wizard Note Due to the reconfiguration the SpeedTouch s IP configuration or wireless Access Point settings may have been changed If this is the case the last window of Easy Setup will not be shown If so refer to the Service Provider s instructions for more informa...

Page 24: ...ireless Client Association on page 43 For additional security of your wireless network it is recommend to personalize your SpeedTouch wireless Access Point settings See 4 Wireless Connectivity on page 41 for more information Computer IP configuration Most Service profiles will enable the SpeedTouch DHCP server Therefore make sure that the computer s Ethernet interface is configured for obtaining i...

Page 25: ...ied connection protocol model depends on the Service profile you selected to configure the SpeedTouch and should correspond with the Service Provider s requirements Dial in access Depending on the SpeedTouch configuration dial in access is provided via The SpeedTouch s Routed PPPoA or Routed PPPoE packet services with embedded PPP client See 2 1 Internet Connections via SpeedTouch s Embedded PPP D...

Page 26: ...PoE dial in client the SpeedTouch needs to be config ured for the Routed PPPoE Service Both Services are available via the SpeedTouch Setup wizard or via the embedded Easy Setup Using SpeedTouch embedded PPP dial in client SpeedTouch s embedded PPP dial in client allows you to establish an Internet connec tion for all or a selection of computers residing on your local network using only one comput...

Page 27: ...nt subcomponent of Windows XP s Networking Services must be enabled on your Windows XP system see 7 5 UPnP on Windows XP Systems on page 89 Make sure UPnP is fully enabled on the SpeedTouch see NAPT on page 59 Starting an Internet session Proceed as follows 1 Click Settings Control Panel on the Start menu 2 The Control Panel window appears Go to Network and Internet Connections Network Connections...

Page 28: ...uch Diagnostics page See Diagnostics on page 56 Terminating an Internet session Proceed as follows 1 Click Settings Control Panel on the Start menu 2 The Control Panel window appears Go to Network and Internet Connections Network Connections 3 The Network Connections window appears 4 Right click the Internet Connection icon and select Disconnect to close the session Note You can also double click ...

Page 29: ...s you the System Information page 2 In the Basic menu click Connections to open the Connections page that allows you to establish dial in in connections 3 Click next to the connection entry you want to establish a connection with As a result the entry will be highlighted 4 Enter your user name and password in the appropriate fields If you want the SpeedTouch to remember your credentials select the...

Page 30: ...tem Information on page 50 The SpeedTouch Diagnostics page See Diagnostics on page 56 Terminating an Internet session To close an active Routed PPP connection 1 Make sure you have access to the SpeedTouch web pages 2 On the Connections page click next to the connection entry you want to close the connection for 3 Click Disconnect As a result SpeedTouch s embedded PPP dial in client will close the ...

Page 31: ...d PPPoE with PPPoE relay via the SpeedTouch Setup wizard or the embedded Easy Setup BroadBand dial in clients To connect to the Internet you can use An MS Windows XP broadband dial in client See 2 2 1 Using an MS Windows XP BroadBand Connection on page 30 for more information A Mac OS X broadband dial in client See 2 2 2 Using the Mac OS X PPPoE Dial in Client on page 34 for more infor mation or A...

Page 32: ...click Settings Control Panel 2 The Control Panel window appears Go to Network and Internet Connections Network Connections 3 In the Network Tasks menu click Create a new connection The New Connection Wizard appears Click Next to continue 4 In the next window select Connect to the Internet Click Next to continue 5 In the next window select Set up my connection manually Click Next to continue ...

Page 33: ...tion that requires a user name and password Click Next to continue 7 In the next window give a name to the connection you are creating e g MyISP 8 In the next window select whether the connection is available to any user or only to yourself Note If you want to share this connection with other users you must select Anyone s use ...

Page 34: ...o complete the configuration The Connect MyISP window see below appears Starting a broadband Internet session Proceed as follows 1 On the Start menu point Connect To and click the name of the connection you ve created e g MyISP Note If you are using the classic Start menu click Start Settings Network and Dial up connections MyISP 2 The Connect MyISP window appears 3 If needed enter user name and p...

Page 35: ...b browser and surf the Internet Terminating a broadband Internet session Proceed as follows 1 On the Start menu point Connect To and click the name of the connection you ve created e g MyISP Note If you are using the classic Start menu go to Start Settings Network and Dial up connections MyISP 2 The MyISP Status window appears 3 Click Disconnect The connection is released As a result no Internet c...

Page 36: ...ppears Click the Network icon 3 The Network window appears Make sure Built in Ethernet is selected in the Show list and click the PPPoE tab 4 Enter the Account Name and Password provided by your Service Provider Note Select Save password in case you want the computer to remember the password for this account name Optionally you can enter a name for this connection in the Service Provider field All...

Page 37: ...ter user name and password for your user account at the Service Provider 4 Click Connect As soon as the connection is established you can open your web browser and surf the Internet Terminating a broadband Internet session Proceed as follows 1 Click the Internet Connect dockling Note If the Internet Connect dockling is not available go to the Applications folder on the system startup disk and doub...

Page 38: ...2 SpeedTouch Internet Connectivity E DOC CTC 20030814 0001 v1 0 36 ...

Page 39: ...Windows ME MS Windows NT4 0 SP6 MS Windows 2000 MS Windows XP Installation Proceed as follows 1 Insert the SpeedTouch Setup CD ROM in your PC s CD ROM drive The SpeedTouch CD Browser will start automatically Choose your language and browse to Initial Setup Install Dr SpeedTouch Note If the SpeedTouch CD Browser window does not appear automati cally open a Run window via Start Run from the Start me...

Page 40: ...und a list of available devices will be provided If this is the case select your SpeedTouch device SpeedTouch 545 or SpeedTouch 570 and click OK 3 Dr SpeedTouch appears Dr SpeedTouch features Dr SpeedTouch consists of two sections Select the General tab to View SpeedTouch device information and status View activity between your computer the SpeedTouch and the Internet Click Diagnostics This allows...

Page 41: ...4 0001 v1 0 39 Select the Performance tab to monitor the downstream and upstream performance of your DSL connection Note For more information on Dr SpeedTouch please click Help in the applica tion or press F1 for context sensitive help ...

Page 42: ...3 Dr SpeedTouch E DOC CTC 20030814 0001 v1 0 40 ...

Page 43: ...available for use which are associated to a slightly different frequency in the allowed range The SpeedTouch supports multiple radio channels and is able to select the best radio channel at each start up The SpeedTouch supports all channels allowed for wireless networking according to the US Asia and most of Europe s regulations However depending on local regulations the number of channels actuall...

Page 44: ...SpeedTouch W LAN envi ronment It is highly recommended that the wireless client adapter is Wi Fi certified to ensure smooth interoperability To use SpeedTouch s encryption security features the wireless client adapters should at least support 64 bit WEP encryption Note For initial wireless connectivity i e SpeedTouch device with default settings a wireless client adapter supporting 128 bits WEP en...

Page 45: ...he DSSS radio channel number is set to automatic Registration is not activated The Access Control List is empty and open Note The default wireless settings may differ from the settings listed above depending on your Service Provider s requirements If this is the case refer to the installation configuration instructions provided by the Service Provider Preparing the first time wireless client Make ...

Page 46: ...fully joined Wireless network SpeedTouch012345 Note Some wireless clients do not automatically join a wireless network If so follow the instructions for the wireless client software to initiate association First time association example Below an example is provided showing how the SpeedTouch wireless network is presented towards an MS Windows XP system When clicking the following window allows you...

Page 47: ...rofile file Optionally the SpeedTouch wireless settings have been personalized Further make sure that The wireless client adapters are installed on the computers you want to connect Depending on the personalized wireless settings In case WEP encryption is enabled on the SpeedTouch you must configure the wireless client to use the same encryption level and WEP key In case SSID broadcasting is disab...

Page 48: ...lient software to initiate the associa tion 2 Push the red Registration button on the SpeedTouch back panel or click Register on the SpeedTouch Wireless web page see Wireless on page 52 for more information The SpeedTouch will now add the wireless client to the Access Control List and save the current configuration Note You can only register one wireless client at a time So you have to push the re...

Page 49: ...ring SpeedTouch Configuration Setup implying that no further configuration on the web interface is needed Access to the SpeedTouch web interface To access the SpeedTouch web pages 1 Start the web browser on your computer 2 Browse to the SpeedTouch at the SpeedTouch s IP address in most cases 10 0 0 138 3 If a system password has been set an authentication window will be displayed You must enter th...

Page 50: ...he links in the Basic topic menu lead you to pages for basic SpeedTouch configuration and maintenance i e the pages for every day use The Advanced topic menu contains the links which allow advanced configuration of the SpeedTouch These pages need only to be accessed for some specific operations The following table lists all Basic topic links BASIC topic menu Click To System Information View the cu...

Page 51: ...ated Help links located at the Topic s web pages ADVANCED topic menu Click To Diagnostics View SpeedTouch diagnostics Easy Setup Configure the SpeedTouch via the embedded wizard IP Addresses View configure the SpeedTouch IP interfaces IP Routing View configure the SpeedTouch IP router NAPT View configure static NAPT entries View configure multi NAT entries Define a default local server for inbound...

Page 52: ... test Click the Service Info tab to view the current physical status of the ADSL line The DSL Statistics allow you to view Line Status this shows whether the DSL link is synchronized Enabled or not Initializing Bandwidth Up Down the maximum available bandwidth of the DSL link in both up and downstream direction Uptime The duration of the current Enabled Line Status kBytes Tx Rx the amount of kilob...

Page 53: ...to identify your SpeedTouch The SpeedTouch Software Release The SpeedTouch Board Name The SpeedTouch Serial Number The SpeedTouch Product Code Note The information above is also listed on the identification label on the bottom of the SpeedTouch Connections Click this link to view the Connections page This page allows you to establish dial in connections if applicable See 2 1 2 Using the SpeedTouch...

Page 54: ...WLAN To ensure the security of your connection it is possible to personalize these SSID settings Proceed as follows 1 Make sure Only stations with correct Network name SSID can connect is selected Note When you enable this option the SSID will not be broad casted Depending on your wireless client the Speed Touch wireless network will no longer be visible in the list of available networks 2 Enter t...

Page 55: ...evel of security you may change the wireless settings on a regular basis However never use obvious keys View the current Access Control List Via this table you can also manually add or delete wireless clients and configure whether wireless clients are allowed to participate in the SpeedTouch wireless IP environment or not To enable disable the registration button select clear Use Register button f...

Page 56: ...l list Note If the registration button is disabled the button must NOT be pressed to register a WLAN station View the Radio Scan table By default the SpeedTouch Wireless access point uses automatic radio channel selection Auto to ensure maximum performance communication speeds and radio reaches To specify a fixed channel select a channel number from the Channel list and click Apply The Radio Scan ...

Page 57: ...5 SpeedTouch Web Interface E DOC CTC 20030814 0001 v1 0 55 System Log Click this link to view the System Log page This page allows you to view the activity on the SpeedTouch since power on ...

Page 58: ...Expand the System section to view some important system information Expand the Lan section to view the LAN configuration Expand subsequently the Wireless and the Site Monitor section to allow the SpeedTouch wireless access point to scan for and locate adjacent wireless networks Note If you are using a SpeedTouch 545 without Wireless Upgrade card installed the Wireless section will not be available...

Page 59: ... sections to view the current DSL state and connection information Click to instantly check all SpeedTouch connections on IP connectivity Easy Setup Click this link to start the SpeedTouch Easy Setup wizard See 1 3 2 Operating System Independent SpeedTouch Configuration Setup on page 19 for more information ...

Page 60: ...rfaces When adding an IP address all essential IP routes will be automatically be added to the SpeedTouch IP routing table The eth0 interface allows you to assign an IP address to the SpeedTouch Ethernet interface IP Routing Click this link to display the IP Routing page This page allows you to view or add delete static IP routes for SpeedTouch s IP router Routing can be useful when subnetting you...

Page 61: ...l peer IP address you should specify 0 0 0 0 as the outside address 3 Click Apply to add the entry to the table Instead of manually configuring the required NAPT entries the NAPT Manager allows you to configure the SpeedTouch NAPT entries semi automatically simply by selecting the application requiring these NAPT entries For more infor mation see 6 SpeedTouch NAPT Manager on page 67 View or add de...

Page 62: ...cific static NAPT entries Configure UPnP The three UPnP configurations are Full The SpeedTouch is UPnP enabled all local hosts are able to detect the SpeedTouch Any local host is able to create port mappings for any local device Secure The SpeedTouch is UPnP enabled all local hosts are able to detect the SpeedTouch A local host is allowed to make port mappings for its own i e a local host is not a...

Page 63: ...HCP feature are enabled and a concurrent DHCP server was found during probing thus causing its own DHCP server to be stopped and a DHCP client on the Speed Touch Ethernet interface eth0 be created and activated DHCP server started In case the DHCP server and its Auto DHCP feature are enabled and no concurrent DHCP server was found during network probing thus starting its own DHCP server on the Spe...

Page 64: ... If no concurrent DHCP server is found the SpeedTouch DHCP server is started No DHCP Disable the SpeedTouch DHCP server If it was running it will be stopped immediately Click the Server Leases tab to view the current leases provided by the Speed Touch DHCP server If needed you can also manually add static DHCP leases for specific hosts To make dynamically assigned leases static select the entry an...

Page 65: ... tab to view the current SpeedTouch DHCP relay status Via this table you can also manually add static SpeedTouch DHCP relay entries for specific interfaces if applicable Click the Relay Interfaces tab to view the SpeedTouch DHCP relay interfaces Click the DHCP Client tab to view the current SpeedTouch DHCP client status Via this table you can also manually add static SpeedTouch DHCP client entries...

Page 66: ... a name for your network printer identified by its IP address you will be able to contact this printer by name rather than by IP address View and or supply the SpeedTouch DNS domain name and to enable disable the SpeedTouch DNS server Note The use of DNS subdomains is supported e g dsl office lan System Click this link to display the Configuration page This page allows you to Upgrade the SpeedTouc...

Page 67: ...d click OK 2 Click Upload to upload and apply the backup configuration 3 Once uploaded the SpeedTouch asks you to confirm that you want the SpeedTouch to effectively apply the uploaded configuration Click Accept to save the new configuration System Password Click this link to display the System Password page This page allows you to configure a system password to restrict access to the Speed Touch ...

Page 68: ... template files are identified by the extension tpl By uploading template files you can extend the number of services listed in the Easy Setup wizard Language Click this link to view the Language page This page allows you to select the SpeedTouch web page language By default the only available language is English Another language can be made available on the SpeedTouch web pages by running the Spe...

Page 69: ...following Microsoft Windows Operating Systems MS Windows 98 MS Windows 98SE MS Windows ME MS Windows NT4 0 SP6 MS Windows 2000 MS Windows XP Using SpeedTouch NAPT Manager The SpeedTouch NAPT Manager procedure consists of two major parts Detection of the SpeedTouch Configuration of the SpeedTouch Detection of the SpeedTouch Proceed as follows 1 Insert the SpeedTouch Setup CD ROM in your computer s ...

Page 70: ...h NAPT Manager E DOC CTC 20030814 0001 v1 0 68 3 The SpeedTouch CD Browser menu appears Click Configuration 4 The following window appears Click Configure NAPT Settings 5 The NAPT Manager window appears Click Next ...

Page 71: ...r this window will not be shown anymore 7 NAPT Manager will search for the SpeedTouch on the network The following window shows the detection progress 8 The NAPT manager should find your SpeedTouch device on the local network This is indicated by the following window If more than one device is found a list of available devices will be provided If this is the case select your SpeedTouch device Spee...

Page 72: ...rewall device or router is placed between your PC and the SpeedTouch No personal firewall software is running on your PC TCP IP is correctly installed on your PC To repeat the search for the SpeedTouch click Back and proceed with step 7 of this procedure Configuration of the SpeedTouch Proceed as follows 1 As soon as the NAPT Manager has detected your SpeedTouch device you can proceed with the con...

Page 73: ...change the proposed IP address Manually add a static NAPT entries Click the Advanced tab Select a protocol in the Protocol list and enter Port and Host IP address in the appropriate fields By default the IP address of the PC from which you are running the NAPT Manager will be taken as host IP address To add a NAPT entry for another PC you must change the proposed IP address Specify a default serve...

Page 74: ...iguration You can follow the progress in following window 6 As soon as the NAPT Manager completed the update of the SpeedTouch NAPT configuration following window will appear Click Finish to close the NAPT Manager Note The NAPT manager allows you to delete or modify configured NAPT mappings via the same procedure ...

Page 75: ...r This chapter contains the following topics Topic Page Upgrading a SpeedTouch 545 for Wireless Networking 74 Using the Wall Mounting Assembly 76 SpeedTouch System Software Upgrade 77 SpeedTouch Default Configuration 88 UPnP on Windows XP Systems 89 Troubleshooting 91 ...

Page 76: ...r device for providing wire less networking by installing the SpeedTouch 010 wireless upgrade card Installing the wireless upgrade card Proceed as follows 1 Make sure the SpeedTouch is turned off 2 Use a pencil to press the button next to the slot The dummy card ejects from the slot 3 Remove the dummy card from the slot 4 Remove the cover cap from the dummy card ...

Page 77: ... card with the label facing up insert the Speed Touch 010 wireless upgrade card completely into the slot Note The card should slide in easily with little resistance If not slowly pull the card back out and check if the cover cap is correctly mounted Your SpeedTouch 545 is now ready for wireless connectivity Proceed with 4 Wireless Connectivity on page 41 to connect the WLAN clients ...

Page 78: ...ting assembly Proceed as follows 1 Mark two hole horizontal positions 134 mm 5 36 inches apart 2 Drill the marked holes with a 6mm 0 24 inches diameter drill bit to a minimum depth of 35mm 1 38 inches 3 Insert the wall plugs in the drilled holes position the wall fixing assembly over the holes insert the screws in the wall plugs and tighten them firmly 4 Remove the covering sticker from the counte...

Page 79: ...ecurity All system software packages for the SpeedTouch are digitally signed and encrypted Packages that may have come corrupted or been altered in any way will not be accepted by the SpeedTouch This way the SpeedTouch or its service can never be corrupted or lost System software upgrades Depending on the operating system your computer is running you can upgrade your SpeedTouch via The SpeedTouch ...

Page 80: ...d as follows 1 Insert the SpeedTouch Setup CD ROM in your computer s CD ROM drive The SpeedTouch CD Browser will start automatically Note If the SpeedTouch CD Browser window does not appear automati cally click Run on the Start menu and enter the following path D Menu exe where D stands for the drive letter of your CD ROM drive 2 The choose language window prompts you to select a language Select y...

Page 81: ... appears and opens the SpeedTouch System Software Upgrade Internet website Follow the instructions to download the latest system software for your SpeedTouch Note You may require a user name and password prior to be able to access the SpeedTouch System Software Upgrade website Contact your Service Provider for more information ...

Page 82: ...ws some information on the currently running sys tem software underneath an Internet link for getting the latest SpeedTouch sys tem software is provided 4 Click the link here to open the SpeedTouch System Software Upgrade Internet website and follow the instructions to download the latest system software for your SpeedTouch Note You may require a user name and password prior to be able to access t...

Page 83: ...and restored after uploading the system software Therefore you do not need to back up the SpeedTouch configuration yourself Upgrade procedure Proceed as follows 1 Insert the SpeedTouch Setup CD ROM in your computer s CD ROM drive The SpeedTouch CD Browser will start automatically Note If the SpeedTouch CD Browser window does not appear automati cally click Run on the Start menu and enter the follo...

Page 84: ...dTouch 5 The Welcome to the SpeedTouch Upgrade Wizard window appears Click Next 6 The SpeedTouch Software License Agreement window appears You must accept before continuing Click Yes to accept Note If you accepted this License Agreement in a previous upgrade this window will not be shown anymore ...

Page 85: ...the Setup wizard does not find any SpeedTouch on the network an error window pops up In this case check The SpeedTouch is turned on and fully initialized Your PC is correctly connected to the SpeedTouch or the WLAN client is correctly associated with the SpeedTouch WLAN as described in 4 1 First time Wireless Client Associa tion on page 43 Your PC has a valid IP address i e any IP address but 0 0 ...

Page 86: ...n and click Next to continue Note If the Service Provider has included a separate disk with dedicated upgrade system software click Have Disk to navigate to the location of the appropriate file In case of a system software downgrade you must specifically acknowledge your decision before being able to proceed 10 The following window allows you to overview your selection Click Next to continue 11 Yo...

Page 87: ...7 Support E DOC CTC 20030814 0001 v1 0 85 12 After upgrading the SpeedTouch a final window appears to announce that the upgrade has been successful Click Finish to close the wizard ...

Page 88: ...peedTouch web pages 2 If needed click Save All to save the current configuration 3 Open the Upgrade page via Advanced System 4 On this page you can find the Software Upgrade box Two fields are shown Active software version displays the SpeedTouch system software currently running Passive software version displays shows the dormant system software version ...

Page 89: ... of the upgrade system software was successful its file name is shown as passive software version Note Uploading the new system software may take up several minutes to complete 8 Click Switch Over to restart the SpeedTouch and activate the newly uploaded upgrade system software During restart the SpeedTouch will switch the passive and active system software and mark the newly uploaded system softw...

Page 90: ...cil to press the Default button at the SpeedTouch until all the LEDs on the front panel start flashing 3 Release the button The SpeedTouch reboots and will come online again with factory settings WLAN clients You will need to re associate and register your WLAN clients using the factory defaults WLAN settings See 4 1 First time Wireless Client Association on page 43 Default button ...

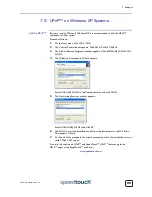
Page 91: ...dd Remove Windows Com ponents 4 The Windows Components Wizard appears Select Networking Services in the Components list and click Details 5 The Networking Services window appears Select Universal Plug and Play and click OK 6 Click Next to start the installation and follow the instructions in the Windows Components Wizard 7 At the end of the procedure the wizard prompts you that the installation wa...

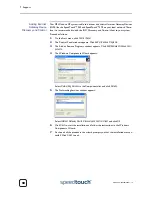
Page 92: ...ol Panel 2 The Control Panel window appears Click Add or Remove Programs 3 The Add or Remove Programs window appears Click Add Remove Windows Com ponents 4 The Windows Components Wizard appears Select Networking Services in the Components list and click Details 5 The Networking Services window appears Select Internet Gateway Device Discovery and Control Client and click OK 6 Click Next to start th...

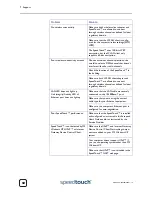
Page 93: ...ure of the problem and provides some plausible solutions Problem Solution SpeedTouch does not work none of the LEDs light up Make sure that the SpeedTouch is plugged into an power socket outlet Make sure that you are using the correct power supply for your SpeedTouch device Make sure the power switch on the SpeedTouch is turned on Wireless client can not participate in the SpeedTouch wireless netw...

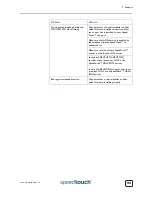
Page 94: ... for local regulatory domain LAN LED does not light up Link integrity Activity LED of Ethernet port does not light up Make sure that the LAN cable are securely connected to the 10 100Base T port Make sure that you are using the correct cable type for your Ethernet equipment Make sure the computer s Ethernet port is configured for auto negotiation Poor SpeedTouch performance Make sure that the Spee...

Page 95: ... ADSL service is enabled on the telephone line the SpeedTouch is connected to Make sure that the correct SpeedTouch variant is used for your DSL service In case of ADSL POTS ADSL PSTN services at your premises ONLY use a SpeedTouch ADSL POTS variant In case of ADSL ISDN services at your local premises ONLY use a SpeedTouch ADSL ISDN variant Bad regular telephone service Check whether a central spl...

Page 96: ...7 Support E DOC CTC 20030814 0001 v1 0 94 ...

Page 97: ......

Page 98: ... 2003 THOMSON All rights reserved E DOC CTC 20030814 0001 v1 0 500 SERIES www speedtouch com Built for excellence ...

Reviews: