background image

Playing discs

15

EN

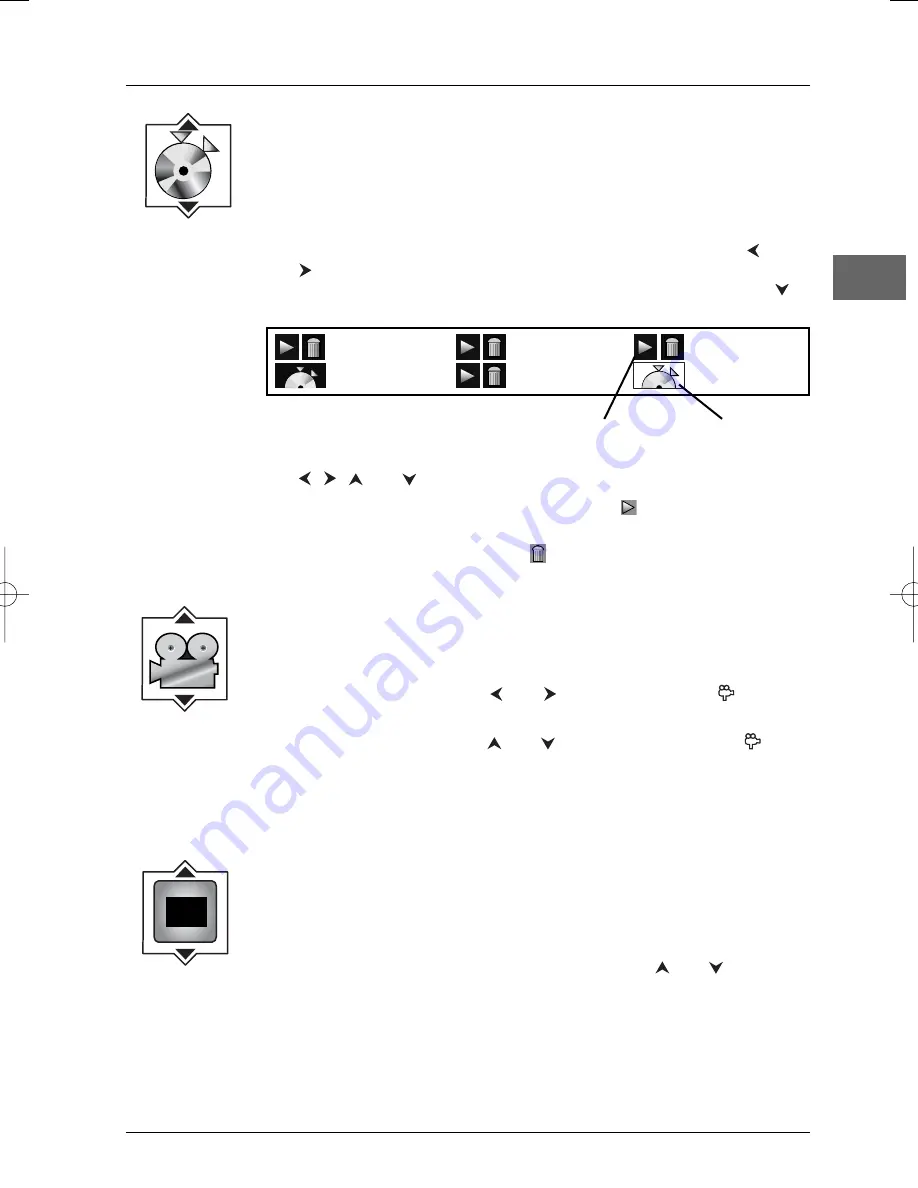
Bookmark (DVD and audio CD)

The player can store up to 12 disc locations as long as the disc remains in the
player and the unit remains switched on.

This function is only available with discs whose elapsed time appears in the

Info

menu.

1.

Press the 

INFO

button, then select the bookmark icon with the 

and

buttons, and press 

ok

to confirm. Another menu is displayed

describing six bookmarks.To display the other bookmarks, press the 
button.

2.

To create a bookmark, select a position shown as “unmarked” using the

,

,

and 

buttons, and then press 

ok

.

3.

To start playback from a bookmark, select the 

button, then press 

ok

to confirm.

4.

To delete a bookmark, select the 

button, and then press 

ok

to

confirm.

Camera angle (DVD)

Some discs offer different camera angles for specific scenes.

1.

To change the camera angle, press the 

INFO

button, then select the

camera angle icon with the 

and

buttons, or press the 

button

on the remote control.

2.

Choose the angle with the 

and 

buttons or else press the 

button several times to view the different camera angles available.

Note:

If the disc was recorded using a single camera angle, this function is not available.
There are very few discs offering more than one angle.

PBC - PlayBack Control (VCD)

The PlayBack Control function offers scenes and information which can be
selected interactively via a menu. It can also be used to display high-resolution
pictures, if the disc contains any.

Press the 

INFO

button, then select PBC info. Press the 

and 

buttons to

enable or disable this function.

00:06:18 C2
Unmarked 4

00:28:04 C4
02:12:56 C12

03:24:09 C24
Unmarked 6

Play button

"Unmarked" icon

1  o f   3

PBC

Bookmark icon

Camera angle

icon

PlayBack Control

icon

DXX110_EN  22/05/03  14:32  Page 15

Summary of Contents for DVD110 - annexe 1

Page 1: ...the same time 17 Chapter 3 Menus Player menus 18 The Play Mode menu 19 Start 19 Random play 19 Program play 19 IntroScan 19 AutoPlay 19 The Parental Control menu 20 Lock 20 Change Password 20 Ratings...

Page 2: ...one is likely to cause condensation on some components inside the appliance Let the condensation disappear of its own accord before turning the appliance on again Before moving the player make sure th...

Page 3: ...ts full capacity CD Rs should be preferably used instead of CD RWs rewritable CDs as in certain cases CD RW playback may be faulty Use reliable good quality CD write software Close all other applicati...

Page 4: ...also connect the DVD player to the receiver s second Scart socket Notes Depending on the video recorder or satellite or cable receiver this type of connection may affect the quality of the pictures pr...

Page 5: ...sion set s AUDIO L and R sockets using audio cables provided Note If your television set only has one audio socket connect it to the DVD player s left socket white Coaxial digital audio output DIGITAL...

Page 6: ...apter or a track Front panel controls buttons appear left to right below Front panel display Elapsed time DVD in hours minutes seconds audio CD in minutes and seconds Appears when a disc is loaded The...

Page 7: ...layer s Info menu appears as a bar at the top of the screen while the disc is playing During this time press the INFO button on the remote control to display and hide the Info menu Player menu If no d...

Page 8: ...nfo menu see page 14 green Access the subtitle function of the Info menu see page 13 INFO yellow Access the Info menu see page 12 TITLE blue Access the disc menu purple Access the camera angle functio...

Page 9: ...text function available 0 9 Select a channel For 2 digit channels first press 0 Functions in VCR mode VCR Select the video recorder Adjust the sound volume mute Mute and restore the sound RETURN Exit...

Page 10: ...button on the remote control to open the disc tray 2 Put the disc in with the printed side upwards in the case of a single sided disc 3 Press OPEN CLOSE again to close the disc tray Play starts automa...

Page 11: ...ress the PAUSE button once PAUSE is displayed 2 Press the REV or FWD button a number of times to vary the speed and direction of the slow motion Changing chapter While the disc is playing press the or...

Page 12: ...buttons on the remote control to scroll through the options Note When one of the icons is greyed out this means that the relevant function is not available on the disc being played The invalid symbol...

Page 13: ...hoose a number using the and buttons or enter a number directly with the numeric buttons Note Many discs only have one title Subtitles DVD Subtitles are disabled by default You enable the subtitle fun...

Page 14: ...option using the and buttons then press ok DVD play modes standard program title repeat chapter repeat A B repeat Notes Program Play mode is only available if a programmed list has been created see p...

Page 15: ...fferent camera angles for specific scenes 1 To change the camera angle press the INFO button then select the camera angle icon with the and buttons or press the button on the remote control 2 Choose t...

Page 16: ...sing the and buttons on the remote control then press ok to display the list of files or press PLAY to start playing all the files contained in the folder 5 Select a file using the and buttons then pr...

Page 17: ...an also select a folder containing JPEG and mp3 files using the and buttons then press PLAY In this case the player starts playing the pictures and music at the same time beginning with the first file...

Page 18: ...es Other menu options also followed by arrows can be used to enable or disable an option Example when you select the option AutoPlay from the Play mode menu each time you press the ok button you enabl...

Page 19: ...udio CD select a track using the and buttons or select All to start playing all the tracks 1c mp3 and WMA CD select a folder using the and buttons then press the button to access the list of files the...

Page 20: ...ption 4 Enter your password 5 Select the Lock function and press ok to confirm Change Password 1 To change the password select this option and press ok to confirm 2 Enter the four digits of your new p...

Page 21: ...format films in full on a 16x9 screen 2 Press ok to confirm Front Display This option lets you choose how the front display of the DVD player appears Four settings are available Dim for Movies the fr...

Page 22: ...propriate digital signals If the device connected to the DIGITAL AUDIO OUT socket does not support Dolby or DTS signals neither Dolby Digital nor DTS must be selected Select one or two option s Dolby...

Page 23: ...sc menus choose the language using the and buttons and press ok to confirm Audio 1 To change the dialogue language choose the language using the and buttons and press ok to confirm 2 To change the lan...

Page 24: ...TV The picture is of poor quality with snow or lines Check the connections see pages 4 and 5 There is no sound or the sound is of poor quality Check the connections see pages 4 and 5 It may be necess...

Page 25: ...ect it from the mains supply To completely isolate the equipment remove the plug from the mains socket as some components remain connected to the electrical supply If you notice any burning or smoke d...

Page 26: ...avoiding circular motions which could cause scratches and interference during playback Guarantee The type and production number of your appliance are printed on the guarantee certificate delivered wi...

Reviews: