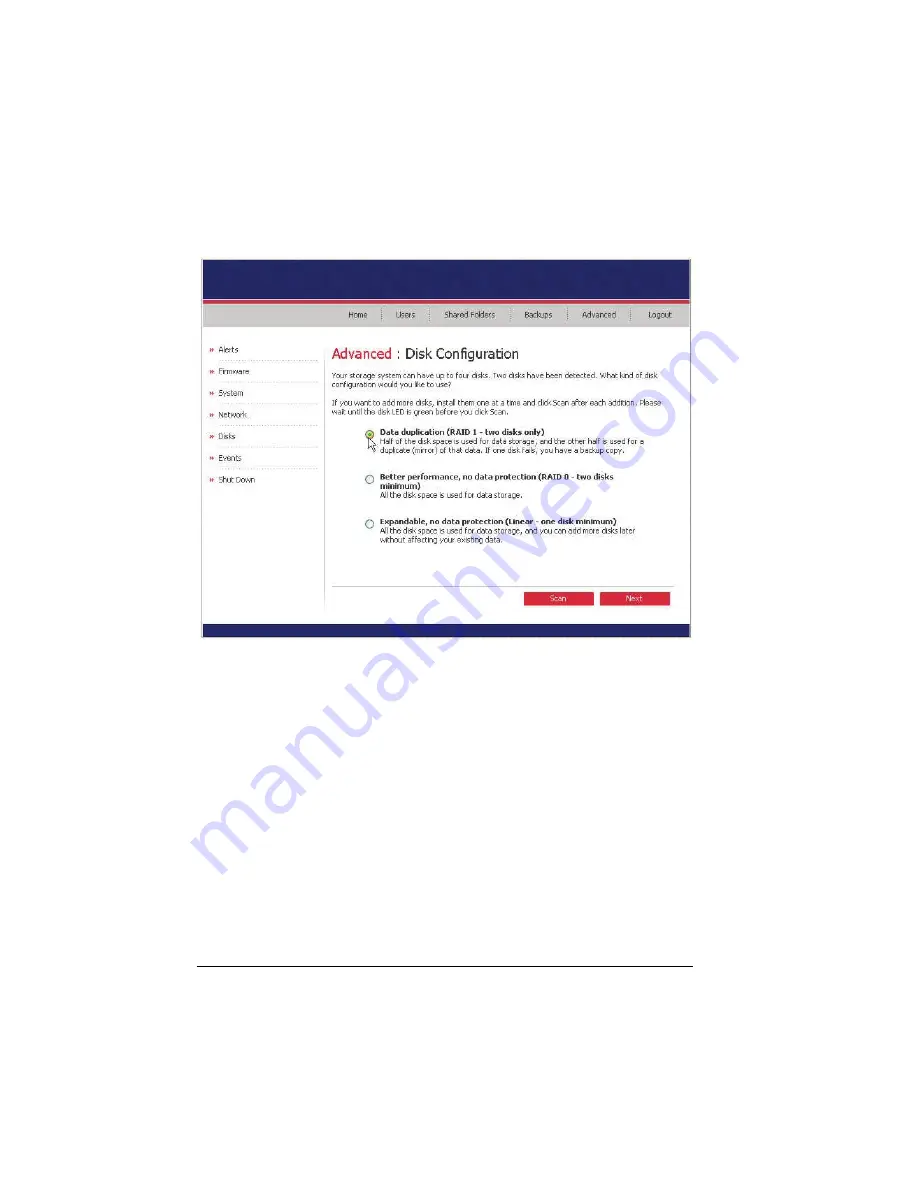
If you have two disks installed, the following screen appears.
5.
If you want to add or remove hard disks, do so one at a time and click on
Scan
after each action. If you are adding disks, wait until the disk LED is
green before you click on
Scan
.
To accept the default disk configuration (which will provide the best level
of data protection available for the number of hard disks currently installed),
click on
Next
.
If you want to change the disk configuration, select the desired RAID level
and then click on
Next
.
56
Summary of Contents for Muse NAS-RAID N0001LN
Page 1: ...User Manual ...
Page 5: ...Swapping Hard Disks 76 Transferring Hard Disks to a New Storage System 76 iv ...
Page 27: ...5 The following screen appears Click on Scan 22 ...
Page 29: ...7 Click on Upload and the following screens would appear in sequence 24 ...
Page 30: ...8 The system will reboot 25 ...
Page 33: ...13 The following screen appears Set the network settings then click on Next 28 ...
Page 38: ...19 The system will reboot 33 ...
Page 48: ...3 Click on Assign Access and the following screen appears For Windows Mac OS X user CIFS 43 ...
Page 68: ...To use the Web Management later click on Log In 63 ...


