ADC32RF80 Quick-Start Procedure (Digital DDC Block - Decimation Plus NCO) External Clocking
19
SLAU620A – April 2016 – Revised May 2016
Copyright © 2016, Texas Instruments Incorporated
ADC32RF45/RF80 EVM Quick Startup Guide
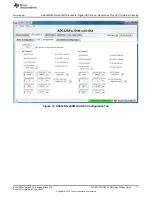
Figure 16. Connecting to TSW14J56
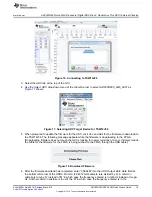
3. Select the
ADC
tab at the top of the GUI.
4. Use the
Select ADC
drop-down menu at the top left corner to select
ADC32RF80_LMF_8821
as
shows.
Figure 17. Selecting ADC Target Device for TSW14J56
5. When prompted to update the firmware for the ADC, click
Yes
and wait for the firmware to download to
the TSW14J56. The following message appears while the firmware is downloading to the FPGA.
(Downloading firmware does not mean the GUI is looking for newer revisions at ti.com. It simply means
the bitfile for the firmware for the FPGA is being pushed to the FPGA through the USB cable.)
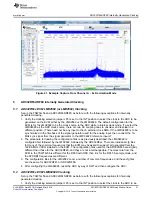
Figure 18. Download Firmware
6. After the firmware download has completed, enter “368.64M” into the
ADC Output Data Rate
field at
the bottom left corner of the HSDC Pro GUI (2.94912 GHz sample rate divided by 8). A common
mistake is to type 'm' instead of 'M' in which case the frequency entered is in milli-Hz instead of mega-
Hz. Another common mistake is to omit the 'M' in which case the frequency entered is in Hz.


