background image


                  10521 Gulfdale, San Antonio, TX 78216  I   

www.terrawave.com

  I  Email: 

[email protected]

  I  Phone:  210-375-8482


Version 1.1 - Page 9 


Attachment


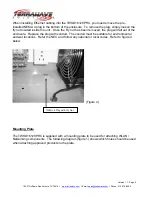
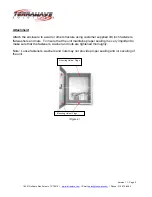
Attach the enclosure to a wall or other structure using customer supplied 3/8 inch fasteners, 
flat washers and nuts.  To insure that the unit maintains proper sealing it is very important to 
make sure that the fasteners, washer and nuts are tightened thoroughly. 
 
Note:  Loose fasteners, washers and nuts may not provide proper sealing and /or securing of 
the unit.  


(Figure 2) 


Mounting Holes / Plugs 

Mounting Holes / Plugs 

Summary of Contents for TWSD16128PHC

Page 1: ...10521 Gulfdale San Antonio TX 78216 I www terrawave com I Email sales terrawave com I Phone 210 375 8482 Version 1 1 Page 1 Installation Instructions TWSD16128PHC...

Page 2: ...always be followed to reduce the risk of electric shock fire and injury to persons including the following All wiring that connects to this equipment must meet applicable local and national building...

Page 3: ...es not operate normally when following the operating instructions The TWSD16128PHC has been damaged The TWSD16128PHC exhibits a distinct change in performance Heater FAN The TWSD16128PHC includes a he...

Page 4: ...ailure of the unit Figure 6 WARNING To prevent the risk of electric shock and equipment damage disconnect any and all power supplies to the enclosure before installing maintaining or trouble shooting...

Page 5: ...lling WLAN Networking Components The TWSD16128PHC will accommodate WLAN Networking products to be installed inside the unit This equipment should be installed on the mounting plate in the unit Wire Ca...

Page 6: ...the unit Once the Fly nut has been removed the plug will fall out of the enclosure Replace the plug with conduit The conduit must be suitable for environmental and wet locations Refer the NEC and foll...

Page 7: ...5 10 563 0 313 12 563 0 313 Terminal Block C D D B B C B B I I E F G H H J J J J D D Nothing higher than 4 from bottom 0 25 3 125 3 375 3 875 4 125 4 625 5 75 5 875 6 375 6 875 2 687 3 312 3 375 3 437...

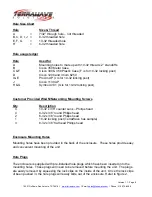
Page 8: ...Customer Provided WLAN Networking Mounting Screws Qty Description 4 10 32 x 3 8 counter sunk Philips head 4 8 32 x 3 8 round Philips head 2 6 32 x 3 8 round Philips head 1 10 32 locking post TerraWav...

Page 9: ...ther structure using customer supplied 3 8 inch fasteners flat washers and nuts To insure that the unit maintains proper sealing it is very important to make sure that the fasteners washer and nuts ar...

Page 10: ...he supply line used to feed power to the feeder circuit should be rated for outdoor use Refer to the NEC and local codes as applicable WARNING To prevent the risk of electric shock and equipment damag...

Page 11: ...I Email sales terrawave com I Phone 210 375 8482 Version 1 1 Page 11 Figure 8 Cord Gland Bushing nut on inside of enclosure DO NOT OVER TIGHTEN Cord Gland Bushing on outside of enclosure Ensure that...

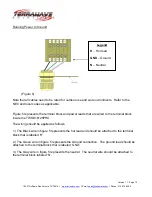
Page 12: ...power leads that are wired to the terminal block inside the TWSD16128PHC The wiring should be applied as follows 1 The Black wire in figure 5 represents the hot lead and should be attached to the term...

Reviews: