


TW-EA510 version 4 ADSL2+, WLAN 802.11g, VPN, Firewall Router
Chapter 2: Installing the router
9
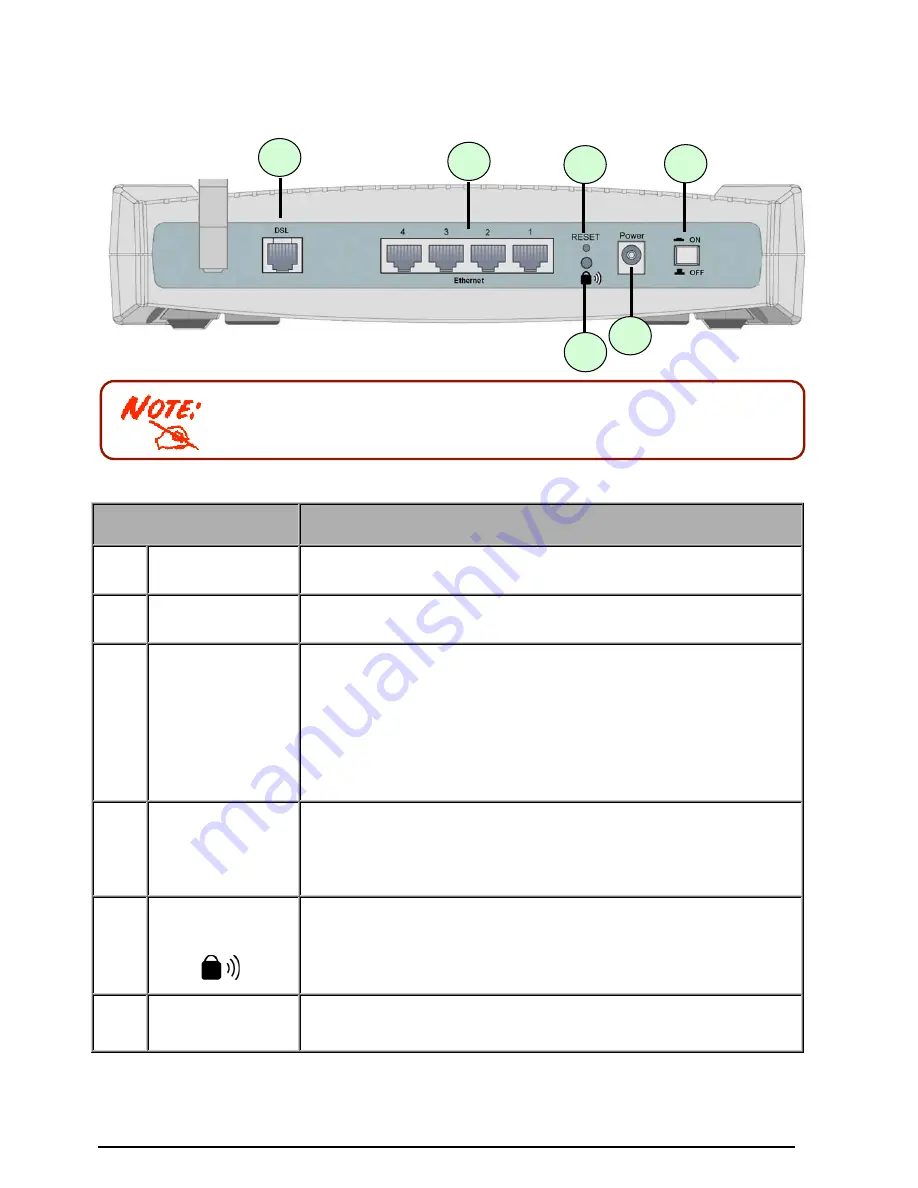
The Ethernet Port # 4 can be used as a console port. You need a special
console tool that already includes in the package to connect with LAN port 4
and PC’s RS-232 port (9-pin serial port).
The Rear Ports
Port
Meaning
1
Power Switch
Power ON/OFF switch
2
Power
Connect the supplied power adapter to this jack.
3 RESET
To be sure the device is being turned on
press RESET button for:
1-3 seconds
: quick reset the device.
6 seconds above, and power off, power on the device
: restore to
factory default settings. (Cannot login to the router or forgot your
Username/Password. Press the button for more than 6 seconds).
Caution
: After pressing the RESET button for more than 6 seconds, to be
sure you power cycle the device again.
4
Ethernet Port
1X — 4X
(RJ-45 connector)
Connect a UTP Ethernet cable (Cat-5 or Cat-5e) to one of the four
LAN ports when connecting to a PC or an office/home network of
10Mbps or 100Mbps.
Caution
: Port 4 can be either a LAN or Console port at a time but not both.
5
WPS Push Button
WPS (Wi-Fi Protected Setup) is designed to ease set up of security-
enabled Wi-Fi networks in the home and small office environment.
Note: This feature is suppted later by software update. Press WPS Push
Button to activate WPS feature.
6
DSL
Connect the supplied RJ-11 (“telephone”) cable to this port when
connecting to the ADSL/telephone network.
2
5
6
1
3
4


