background image

16

5.4 Fibre introduction into the fusion splicer and 
splicing process

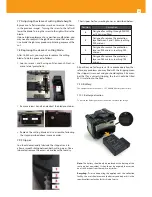
- Open the protective cover to place the fibre .

- Lift the fibre clamps .

-  Put the cleaved fibres on the V-grooves . Insert them from 

top to bottom (avoid fibre contact with other elements 

present in the fusion splicer) .

-  Check that fibres stick out from the V-groove, and that 

they sit half-way between the V-grooves and the electro-

des (too close to the electrodes will produce a processing 

error) . Before closing the cover, make sure that no fibre is 

seen on the screen . This would mean that the fibres are 

too close to the electrodes .

-  Check that the fibres on the V-groove are not misaligned, 

since they may be slightly bent .

-  Lower the fibre clamps and the protective cover; the equi-

pment will start the splicing process .

*  If the option “automatic start” is disabled, you will have to 

push the  

 key .

   Either way, you should have previously entered the “Start” 
menu with the 

 key . The fusion splicer will not work un-

less you are on that menu .

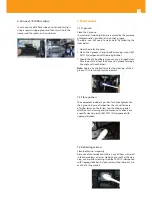
Check the fibres hanging from the fusion splicer are not 

blocked by the cover or held by the installation (fibre should 

be loose enough to allow the equipment to move it) .


Correct positioning


Incorrect positioning

The splicing process consists on the following steps:
- Fibre positioning .

- Fibre cleaning .

- Adjustment of the distance between fibres .

- Fibre-core alignment .

- Electric arc fusion .

- Loss estimation and tensile test .

Should any error display on the screen, the process will stop 

until the anomaly is fixed .
Should the fusion fail to complete:

1) 1) Check the adjustment of the distance between fi-

bres: 

Despite the fusion splicer automatically bringing the 

fibres together, it has a minimum and a maximum range . 

If the fibres are not close enough to each other, the equip-

ment will not be able to bring them together .

2) Check the fibres are not dirty: 

Clean both, fibres and 

V-groove if necessary .

3) Check the lenses are free of dirt:

 Lenses need to be 

kept clean, since the equipment uses them to align the fi-

bres . Some of the fusion errors are due to the presence of 

dirt on the lenses . In addition, there are two complemen-

tary mirrors on the fusion splicer cover (over the lenses) 

that also need to be kept in good condition (clean) . See 

section 7 (Maintenance) .

5.5 Heat-shrink protection

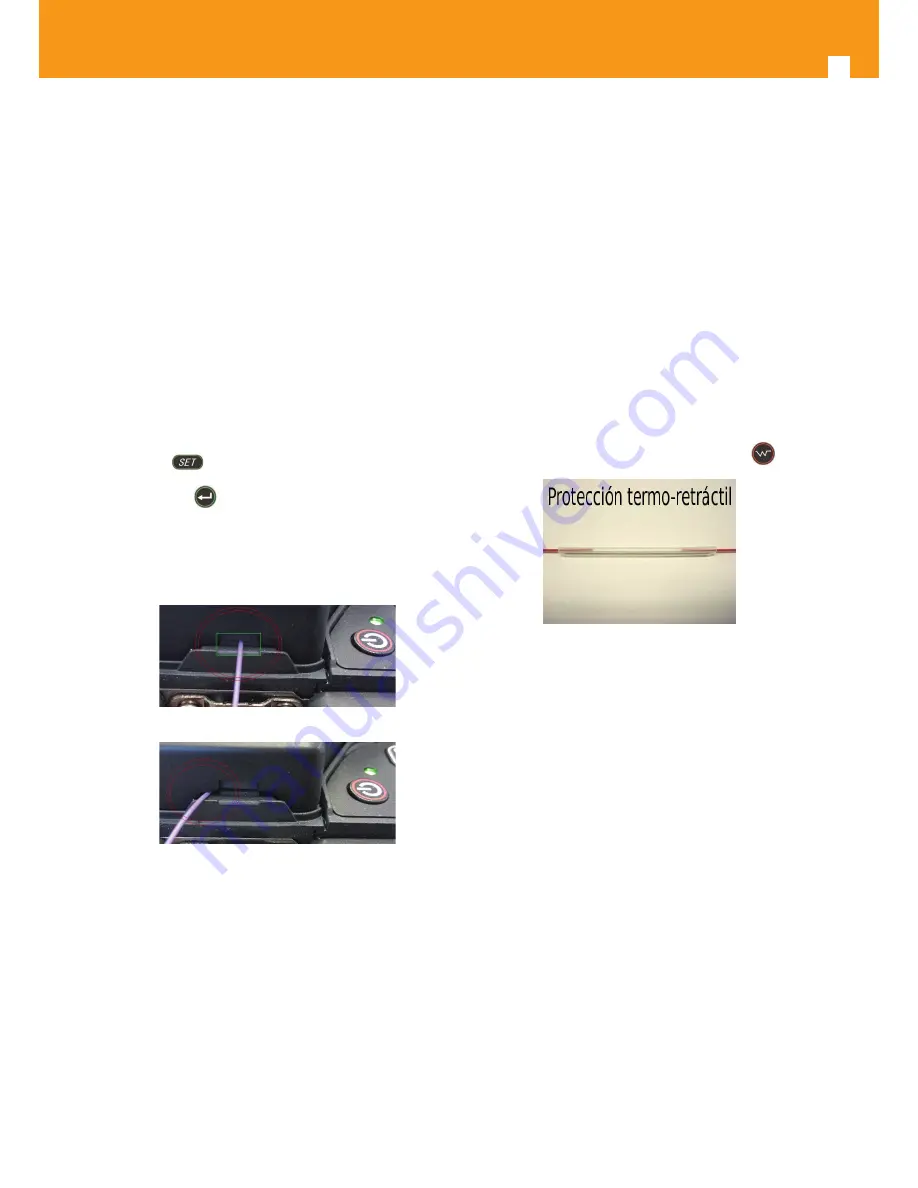
Before you proceed with the process preparation, you need 

to introduce a heat-shrink protection on one of the fibres to 

protect the operation .

After the fusion has taken place, slip the heat-shrink protec-

tion along the fibre until it fully covers the fusion area . The 

process final step will be to introduce this heat-shrink pro-
tection into the equipment's "OVEN" and hit the 

 key .

Keep in mind that while the oven's red LED is on, the oven 

is near its maximum operating temperature .  When this LED 

turns off (a beep will be produced), the temperature will 

have reached its maximum value, but the process will still 

be on-going . Wait until you hear a second beep (indicating 

the oven has reached its minimum temperature), to take 

the tube out of the oven and place it on the cooler . 

It is likely that the equipment's internal fans turn on while 

the oven is being used .

This process manages the temperature of the oven's com-

ponents to enhance durability .

Summary of Contents for Fusion splicer 232103

Page 1: ...Electric arc fusion splicer EN Ref 232103 Art Nr OSSGN Operating instructions w w w t e l e v e s c o m ...

Page 2: ......

Page 3: ...4 6 6 Change electrodes 15 4 6 7 Self test 15 4 6 8 Electrode limit 15 4 6 9 Maintenance information 15 5 Splicing process 16 5 1 Electrode and element inspection 16 5 2 Fibre preparation 16 5 3 Fibre type 16 5 4 Introducing the fiber into the fusion splicer 17 5 5 Heat shrink protection 17 6 Annexes 18 6 1 Annex A 18 6 2 Annex B 18 6 3 Annex C 19 7 Maintenance 19 7 1 V Groove 19 7 2 Fibre pushers...

Page 4: ...and immediately remove the battery Then contact the Technical Support department of Televés to proceed with its inspection or repair 3 Internal manipulation of the fusion splicer involves losing the product warranty do not take the equipment apart 4 4 Any errors in the equipment s external maintenance could damage the fusion splicer or result in injury to the operator ca refully follow the mainten...

Page 5: ... optical loss it helps the operator ensure the fusion was performed correctly Thanks to its battery interchangeable from the outside it allows working in places lacking VAC power supply This is complemented with a feature that allows working with the fusion splicer while the battery is charging Types of fibre the fusion splicer can work with SM Single mode Single mode G 652 G 657 MM Multi mode Mul...

Page 6: ...e views Keyboard 2 Cover Lashing eyelet LCD screen Keyboard 3 Unlock mechanism for battery release Battery indicator push button Lashing eyelet Power supply connector USB port Keyboard 1 Oven Fibre clamps Electrodes V Groove x2 Camera lens x2 Mirrors ...

Page 7: ...nd menu description To switch the fusion splicer on or off press and hold the key Once switched on press to access the Main menu Once there you will be able to access the different confi gurations Options Description Start You need to access this menu to per form the splicing Splicing mode Selection of fibre type and working mode Oven mode Selection of fibre type and working mode Settings Equipmen...

Page 8: ... the button again to save the changes Parameter description Parameter Description Fibre type Allows you to select 11 different types of fibre splicing If you are not working with any of the pre defined options you should copy one of them and paste it into an empty register you can then modify the different parameters as you wish The equipment is factory configured with the Manual option Title 1 Mo...

Page 9: ...c duration Pre arc discharge power in ms Overlap Mounting or pushing a fibre on top of another at fusion time in μm It controls the thickness of the fibre at the fusion spot once the splicing is done Power Arc 2 Discharge power of the backup arc or 2nd arc Duration Arc 2 Discharge duration for the backup arc or 2nd arc Secondary arc Switch on Pulse μs Never modify its value Secondary arc Switch of...

Page 10: ...eration durations over 100 seconds is not recommended it considerably reduces the oven s operating lifetime Heating temp Sets the maximum heating tempe rature Configurable between 100ºC and 240ºC Final temperature Sets the minimum oven switch off temperature once the heating time is over Configurable between 60º and 140º You are advised not to perform manual programming of the oven without appropr...

Page 11: ...r de fábrica 0 10 dB Estimated loss With this option enabled the fusion splicer checks whether the value of the loss after splicing is lower or higher than the factory set acceptable value 0 10 dB Blister With this option enabled the fusion splicer will display an error whenever blisters are detected in the fusion area either due to external elements or to a bad adjustment of the arc discharge Fib...

Page 12: ...tory set value is 11 500 4 4 5 Language This option allows you to configure the language Available languages are Spanish and English 4 4 6 Schedule This option allows you to configure the equipment s date and time they will be displayed at data download 4 4 7 Factory settings This option allows you to go back to the factory set values for all the parameters of the fusion splicer In case you per fo...

Page 13: ...ibre used despite all fibre types being manufactured to a standard you must take the tolerances into account Arc calibration procedure 1 To perform the arc calibration you need to have pre viously selected on Splicing mode the fibre type you wish to calibrate the splicer for 2 Once the fibre selected access the ARC Calibr menu 3 Strip clean and cut 2 fibres just as if you were going to perform a f...

Page 14: ...done push the button to complete the proce dure 4 6 6 Change electrodes The electrode replacement procedure should be carried out whenever you detect wearing of the electrodes or any fusion problems associated with the discharge arc The average lifetime of the electrodes is around 3 000 splicing operations depending on the working conditions When your electrodes are worn out follow the steps of th...

Page 15: ...ess of 900 microns see example on the image below Lower rail For fibres with an initial thickness of 250 microns Proceed to cutting the fibre with the cleaver Leave ap proximately 16mm of fibre uncovered after cleavage see picture In case you were not able to perform the cleaving check and make sure that 1 Both fibre protections are correctly removed 900 and 250 microns 2 The cutting blade is neit...

Page 16: ...the fusion fail to complete 1 1 Check the adjustment of the distance between fi bres Despite the fusion splicer automatically bringing the fibres together it has a minimum and a maximum range If the fibres are not close enough to each other the equip ment will not be able to bring them together 2 Check the fibres are not dirty Clean both fibres and V groove if necessary 3 Check the lenses are free...

Page 17: ...the head in the cleaver 2 Insert the connector on the head 3 Install the new head on the cleaver without screw and proceed with the cleaving 4 Exchange the fibre clamp of the splicer with the new head To do this extract the fibre clamp s screw and re move the clamp as shown in the image 5 Install the new head without screw 6 Place the fibre on the right fibre clamp and proceed with the splicing 7 ...

Page 18: ...to push it out put the fibre and V groove forming a 45o angle with each other Note Apply a controlled force for the cleaning of the V groove It is a sensitive precision element 7 2 Fibre pushers The equipment includes 2 pushers for fibre alignment on the V groove In case of impurities the risk will increase of higher losses on the fusion You should pay special attention to its cleaning and mainten...

Page 19: ...ceed as follows 1 Unscrew and remove the screw securing the pusher s body 2 Extract the screw securing the pusher take care not to release the spring underneath 3 Replace the pusher Bear in mind that it has a mounting direc tion right or left side defined by the protrusion shown in the following image Finally proceed with the assembly going through the previous steps in reverse order 7 6 Changing ...

Page 20: ...y The stripper has four working zones as described below Position Description 4 Designed for cutting through 900 250 or 125 micron fibres 3 Designed to remove the protection layer between 3 and 1 6mm reaching 900 microns 2 Designed to remove the protection layer on 900 microns reaching 250 microns 1 Designed to remove the protection layer on 250 microns reaching 125 microns All positions are facto...

Page 21: ...640x480 Tensile test 2N standard Tubes heat shrink 60 50 45 40 30 y 25mm Electrode duration 3 000 approx 6 000 with the spare supplied Battery duration 250 fusion baking cycles and 300 to 500 load cycles approx Internal sensors Internal temperature atmospheric pressure elevation and oven tempe rature External interface Mini USB Up to 5000 Log update and download Power supply unit Input 100 240V 50...

Page 22: ...22 ...

Page 23: ...ES 23 ...

Page 24: ...televes com ...

Reviews: