background image

© 2006 TeleType Co.

WorldNav 3000 XL

72

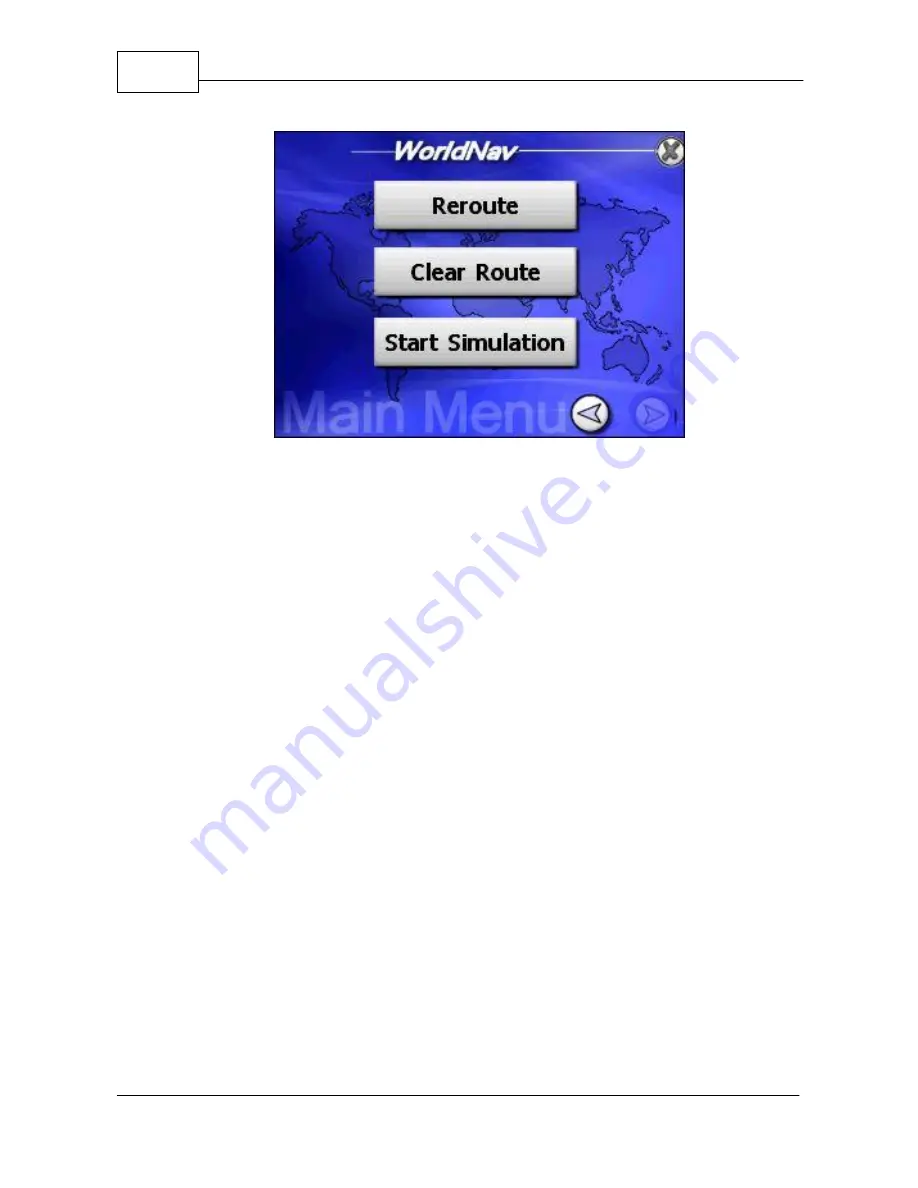
Start Simulation Button

3.

To end the simulation, press <Menu>, then
<Route>, navigate to the second screen and
press the <End Simulation> button.

6.7

Exit

Pressing the <Exit> button allows you to exit the
navigation program but does not shut off the GPS
altogether. You may want to use this function to allow
access to the MP3 player or feature demo.

Summary of Contents for WorldNav 3000 XL

Page 1: ...WorldNav 3000 XL 2006 TeleType Co User Guide...

Page 2: ...he author make no claim to these trademarks While every precaution has been taken in the preparation of this document the publisher and the author assume no responsibility for errors or omissions or f...

Page 3: ...em 4 8 Quick Start Method 5 14 Getting started with your 3000XL Part II 14 Review the main menu 1 16 Set a route from home 2 21 Routing to an intersection 3 25 Routing using POIs 4 28 Finding or routi...

Page 4: ...Waypoint 1 48 Mark waypoint at current position 2 49 Editing Waypoints 3 51 Deleting a Waypoint 4 53 Preferences Part V 53 Selecting a brightness level 1 54 Choosing a system of units 2 55 Selecting...

Page 5: ...ht Mode 2 68 Trip Information 3 69 Calibration 4 70 Map Information 5 71 Simulating a Route 6 72 Exit 7 73 Installing and uninstalling maps 8 76 Changing adapter fuse 9 78 Warnings and Cautions Part V...

Page 6: ...Part I...

Page 7: ...ent of an accident Do not mount the TeleType GPS WorldNav 3000 XL in a place where the driver or passengers are likely to impact it in an accident or collision The mounting hardware supplied by TeleTy...

Page 8: ...LUSION OF INCIDENTAL OR CONSEQUENTIAL DAMAGES SO THE ABOVE LIMITATIONS MAY NOT APPLY TO YOU 1 2 Welcome Congratulations on purchasing the TeleType WorldNav 3000 XL This document will provide you with...

Page 9: ...3000 XL GPS System Front and Back of your WorldNav 3000 XL Clockwise from Lower Left Front of GPS Back of GPS A Mark Waypoint Button H Stylus insert B Power Button I Adapter hole C D Zoom In and Zoom...

Page 10: ...e Deluxe or Premium WorldNav version it includes a Secure Digital Card which has already been inserted into the GPS you can see it at the top of the GPS The Deluxe version 1 gigabyte card has been pre...

Page 11: ...on Rest the GPS on the dash to help stabilize it against vibration 4 Flip the built in receiver up and pointed towards your windshield The WorldNav 3000 XL will automatically lock into your GPS positi...

Page 12: ...6 If the GPS has not yet locked into position you will see Where To and Menu at the top of the map screen The map will display your last position centered in the target area Press Where To on the scr...

Page 13: ...or POI point of interest 8 The map route from your current location to the selected location should be displayed Routing from your last known position 9 If the GPS is locked into position you will hea...

Page 14: ...2006 TeleType Co WorldNav 3000 XL 12 Sample Routing Screen with Navigation Panel...

Page 15: ...Part II...

Page 16: ...see the names of most roadways on the 3D view but the map will look more realistic Brightness to change the brightness of the touch screen Calibration allows for the calibration of the screen using th...

Page 17: ...our trip including timer distance to go odometer heading satellite info and time Night switches from a night screen to a day screen and vice versa POI Show puts you into a POI Display screen to show a...

Page 18: ...allows user to have the volume change with speed 2 2 Set a route from home Your home address has been preset into the GPS but can be changed in the My Points Submenu by pressing Set Home Office Follo...

Page 19: ...Route Menu 2 You are sent to the Find Wizard and prompted to press one of the following Address POI Intersection My Points History or Home Select Address Note You can also get to the Find Wizard Menu...

Page 20: ...2006 TeleType Co WorldNav 3000 XL 18 3 Put in the address starting with the state then the city the street name and the street number Entering State Entering City...

Page 21: ...Getting started with your 3000XL 2006 TeleType Co 19 Entering Street Name Entering Street Number 4 WorldNav 3000 XL will search for possible choices Select one...

Page 22: ...5 Press Route To The map with your route shown in blue is displayed You can use the or buttons on the GPS to zoom in or out on your route Your route displayed in blue 6 Drive The GPS will prompt you...

Page 23: ...can also see the written route by pressing Route and then View Route View Route Results 2 3 Routing to an intersection This allows you to create a route to any intersection if you don t know the exac...

Page 24: ...2006 TeleType Co WorldNav 3000 XL 22 Main Menu and Find 2 This will put you into the Find Wizard where you can press the area labeled Intersection Find Wizard Menu...

Page 25: ...treet name Press Next between adding the various components of the address until you get to street name Press next to input the second street in the intersection 4 You must enter the second street and...

Page 26: ...eet 5 Look at the list of possible selections Pick one and select Show to see the intersection on a map Select Correct Intersection 6 You can choose the Route to space once you have selected the inter...

Page 27: ...ing started with your 3000XL 2006 TeleType Co 25 Map of Route Shown in Blue 2 4 Routing using POIs A POI is a point of interest such as a restaurant or gas station 1 Select Menu and then Find Find Wiz...

Page 28: ...zard select POI or point of interest 3 You will be prompted to select By Nearest or By Address Select one POI Search Options 4 Select By nearest for the purposes of this tutorial Use this when you don...

Page 29: ...Type Co 27 Choosing Distance around Center of View 5 Select a range of 5 or 20 mile radius 6 Select a category such as automotive food and drink business education etc Select POI Category 7 Select Foo...

Page 30: ...from a list of possible choices Press Route to or Show to show a map of the route to the place you have selected If you need to see the route press Route to 2 5 Finding or routing to a city You can fi...

Page 31: ...treet name and number leaving those spaces blank 3 A list of choices will pop up Select one and press show Select a City 4 A map of the city you selected is available for you to search and explore usi...

Page 32: ...Press Show for a map of the city or Route To and you will get a route from your last known position to the selected city 2 6 Finding a waypoint If you have created a waypoint to be explained later yo...

Page 33: ...Find Wizard Menu 2 Select the My Points space 3 Select Find to view the list of all waypoints Finding a Waypoint 4 Select the one you want and press Show You will see the selected point centered on a...

Page 34: ...Points space on the Main Menu which will pull out the My Points Menu There you can press Manage and get a list of your Waypoints There you can Edit the waypoint press Go To to see it on a map or Delet...

Page 35: ...1 Press the Address button You will be prompted to enter an address in the usual fashion beginning with the State 2 Select the address from a list that fits with the one you want Press Route to or Sho...

Page 36: ...enu and provides a history of your recent addresses used in routing routes so that they can be repeated Just select one of the items from the list that you want displayed This is a good way to recreat...

Page 37: ...ion must be locked motionless when you activate this function It will create a new route based on your current position If you want to clear the route you have created press Clear Route Note that the...

Page 38: ...GPS Settings GPS Information Press Menu to get to the main menu and then press GPS This gives you the GPS information screen showing your latitude longitude elevation speed heading direction of trave...

Page 39: ...Part III...

Page 40: ...ed You must first connect your device to the computer The device will automatically turn on You must always press I Agree to the disclaimer upon starting the WorldNav 3000 XL 2 Insert the provided DVD...

Page 41: ...3 Player 2006 TeleType Co 39 3 If your WorldNav 3000 XL is not firmly attached to the computer you will see the following screen Recheck your connections and press Retry WorldNav Installer Not Connect...

Page 42: ...2006 TeleType Co WorldNav 3000 XL 40 WorldNav Installer Connected 4 Press the Music icon found at the bottom of the installer screen The music transfer screen will open...

Page 43: ...and press Open 7 The selected MP3s have now been installed into your WorldNav 3000 XL They will appear on the list under Music Already on Device 3 2 Play your MP3s You can play your MP3s only in your...

Page 44: ...o WorldNav 3000 XL 42 Menu then Exit to return to the main menu 2 Press the Music Icon in the middle left corner of the main screen MP3 Player Button 3 Your MP3s will now be visible in a list on the M...

Page 45: ...s B Play Pause F Close MP3 Player C Back G Cycle Repeat D Next H Volume Button 4 Select the song you wish to play and press the play button 5 To play the next song in the list press the Next icon 6 To...

Page 46: ...to play 9 To repeat your entire list press the Cycle Icon at the top of the screen To play through the list only once press the Repeat Icon 3 3 Uninstall MP3s 1 To uninstall MP3s you first need to con...

Page 47: ...MP3 Player 2006 TeleType Co 45 WorldNav Installer Maps Music and More 3 Press Music Maps and More 4 Press the Music Icon in the Installer screen...

Page 48: ...Screen 5 The Music Transfer Screen will be opened Select the music you want removed 6 To uninstall the MP3s from your device click on the Remove Music button 7 The selected MP3s have now been removed...

Page 49: ...Part IV...

Page 50: ...s of whether the GPS device is active or inactive If you are centered on a position that you would like to create a waypoint for press the waypoint button off the screen on the lower left of the devic...

Page 51: ...ll now be recorded as a waypoint and will appear on the screen as the icon you selected 4 3 Editing Waypoints To edit your waypoints press Menu and then My points This will take you to the My Points m...

Page 52: ...av 3000 XL 50 Editing your Waypoints 2 Change the name of the waypoint by pressing the Name field and entering a new name Changing Name of Waypoint 3 When you are finished with any edits to that parti...

Page 53: ...r the waypoint on the screen by pressing Go To 4 4 Deleting a Waypoint 1 Press Menu and then My Points Manage My Points Menu 2 In the My Points Menu press Manage This will show you a list of your desi...

Page 54: ...Part V...

Page 55: ...ferences 2006 TeleType Co 53 5 Preferences 5 1 Selecting a brightness level Main Menu Brightness 1 Press Menu and then Brightness 2 Adjust the slider to increase or decrease the brightness of the scre...

Page 56: ...av 3000 XL 54 Brightness Screen 5 2 Choosing a system of units Specify whether the WorldNav should display measurements in Metric or English units Main Menu System of Units 1 First press Menu and then...

Page 57: ...English Select one and then press OK System of Units Preferences 5 3 Selecting route preferences This allows you to have your routes selected as the quickest path the shortest path or a route that av...

Page 58: ...006 TeleType Co WorldNav 3000 XL 56 Route Menu 2 Select the routing mode you prefer If your state has a ferry system you can select whether or not you want to make use of the ferry system Route Settin...

Page 59: ...ferences Press Menu and then Navigation Panel Navigation Panel Preferences Navigation Panel While Driving 1 The navigation panel is located in the right lower corner of your route It shows information...

Page 60: ...nel Menu you can scroll the Upper and the Lower panel to select one of the following trip information items Arrival time Estimated time of arrival DIST to go Distance to go Heading Degree Directional...

Page 61: ...lows you to choose the types of POIs for example the restaurant types you would like shown on the screen For the purposes of this tutorial let s decide the restaurant types you like 1 Press Menu and t...

Page 62: ...you to a scroll menu where you can select the types of restaurants you want displayed as a POI on the map Select as many as you like and then press OK Restaurant POI Display Preferences 4 You can do...

Page 63: ...ap 5 6 Setting volume preferences Press Menu and then Volume This takes you to the volume screen where you select whether or not the volume changes with speed and at what speed the volume increases Ma...

Page 64: ...2006 TeleType Co WorldNav 3000 XL 62 1 Press Menu then Route and then Route Setting Route Menu 2 Check the Enable Auto Zoom box to turn on the Auto Zoom feature Uncheck the box to turn it off Auto Zoo...

Page 65: ...nging the Time This allows you to change the time by hours Your position must be locked in 1 This Menu then GPS Main Menu GPS 2 This will bring you to the GPS Information screen Click on the center bu...

Page 66: ...2006 TeleType Co WorldNav 3000 XL 64 GPS Status Screen 3 Click on the and buttons to change the hour accordingly Adjust Hours Screen...

Page 67: ...Part VI...

Page 68: ...arly marked This looks like a regular map For 3D mode only the main streets are labeled but the map more clearly displays what your route looks while driving Routing in 3D Mode Press Menu and either t...

Page 69: ...pear in the same section when you reach your destination The bottom two panels can be customized to display desired information see section 5 1 Selecting navigation panel preferences 6 2 Day Night Mod...

Page 70: ...3000 XL 68 Night Vision Screen 6 3 Trip Information Review trip statistics such as speed distance to go estimated time of arrival time odometer and timer simultaneously Press Menu and then Trip to see...

Page 71: ...tatistics Screen 6 4 Calibration Use your stylus to press a series of cross hatches that will appear on your screen to calibrate your screen display You can repeat the process periodically to optimize...

Page 72: ...2006 TeleType Co WorldNav 3000 XL 70 Calibration Screen 6 5 Map Information If you press Menu and then Info the GPS will display the best estimate of your current location Map Information Screen...

Page 73: ...a Route You can simulate a previously created route to preview what it will look like while you are driving 1 Press Menu then Route Route Menu 2 Navigate to the second screen and press the Start Simul...

Page 74: ...ress Menu then Route navigate to the second screen and press the End Simulation button 6 7 Exit Pressing the Exit button allows you to exit the navigation program but does not shut off the GPS altoget...

Page 75: ...ain Menu 6 8 Installing and uninstalling maps The WorldNav 3000 XL can be used throughout the United States TeleType Co also offers an enhanced points of interest database containing over 12 million b...

Page 76: ...cameras that can be inserted into the top of the device 2 Using the provided USB cable and the installed Secure Device card connect your WorldNav 3000XL to your PC or laptop computer 3 Insert the pro...

Page 77: ...ng Maps On the GPS device you must first press Menu and then Exit to exit out of the navigation program 6 Insert your Secure Digital card into the device and connect the device to your PC Put in the p...

Page 78: ...the GPS you can replace the fuse The end of the cigarette lighter adapter unscrews revealing a fuse just inside the cover Replace the fuse with a functioning fuse an extra fuse is provided with your W...

Page 79: ...Part VII...

Page 80: ...ns Warning The Global Positioning System GPS is operated by the United States Government which is solely responsible for its accuracy and maintenance The system is subject to changes which could affec...

Page 81: ...ntain full surveillance of all driving conditions at all times and not become distracted by the GPS system to the exclusion of safe driving practices It is unsafe to operate the controls of the GPS sy...

Page 82: ...Part VIII...

Page 83: ...or LCD 320x240 Pixels Memory 64MB SDRAM 512MB Built In Storage Expansion Slot SD MMC Slot for map and music storage Audio Built in Speaker 0 5w 3 5mm Stereo Headphone Jack Input Method Stylus Pen Touc...

Page 84: ...Part IX...

Page 85: ...er conditions you may need to warm the windshield or moisten the suction cup for maximum seal 3 Why can t I get power via the USB cable This must be a tight connection so if it isn t working properly...

Page 86: ...ter which your true location will be shown 8 I can t get power on my car adapter If you can get power on the USB cable but not in your car it is likely that the fuse inside the adapter is blown Twist...

Page 87: ...8 Change destination 83 Clear route 35 Create a route from home 16 Create a waypoint 48 D Day Mode 67 Delete a waypoint 51 Device specifications 81 Disclaimer 5 Distance to go 57 68 Driving preference...

Page 88: ...y 34 Hours 63 I Info 70 Information 70 Install maps 73 Install music 38 Installer 38 Intersection 21 L Latitude 36 Longitude 36 M Main menu 7 14 Main menu buttons 14 Map Information 70 Map screen 7 Ma...

Page 89: ...OI 25 Route to a street address 32 Route to a waypoint 30 Route to an intersection 21 Route via ferry 55 S Satellite info 57 Secure Digital Card 8 Selecting brightness level 53 Set home address 16 Set...

Page 90: ...Nav 3000 XL Troubleshoot 83 U Uninstall maps 73 Uninstall MP3s 44 Uninstall music 44 USB cable 6 V Volume preferences 61 W Warnings 78 Waypoint 30 48 Waypoint routing 30 Waypoints 7 Welcome 6 Windshie...

Page 91: ...Notes...

Page 92: ...Notes...

Reviews: