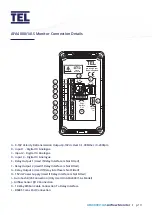
AFA4000/1/AS
Airflow Monitor /
p.4
1.
Ensure that the sensor hose is connected correctly at the side wall and rear of the sensor.
2.
Ensure that the extract fan is running and the Fume Cupboard is balanced before
calibrating the monitor.
3.
Take extra time (at least 15 to 20 seconds) to wait for the airflow to settle before capturing
the airflow samples. This will minimize the chance of a calibration error due to turbulence
or fluctuations.
4.
Avoid movement in front of the Fume Cupboard whilst calibrating the monitor.
5.
The Low and High air samples must be at least 0.3m/sec (60 fpm) apart to calibrate the
monitor. This is to avoid inaccuracy in the calibration sue to insufficient difference between
the samples. The minimum difference can be changed in the “Low High diff” parameter in
the Cal Config menu.
6.
Do not use fully open and fully closed sash positions for the calibration points, the
recommended positions are normal operating height (e.g. 500mm 20”) for the first sample
and approximately half the sash opening (e.g. 250mm 10”) for the second sample.
The MONITOR CONFIG menu includes the following coms parameters: -
1.
PROTOCOL – Sets Modbus RTU, BACnet MS/TP or TEL protocol.
2.
MODBUS SETTINGS – Sets Slave ID, Baud Rate and Parity for the Modbus protocol.
3.
BACnet SETTINGS – Sets the Device Instance, Station ID, Baud Rate, Parity and Max Masters
for the BACnet protocol.
The TEL protocol is used to connected to TEL Config Manager software and the TEL AFA5000
Room Space Controller, the Modbus Slave ID is used when set to TEL protocol.
Airflow Monitor Calibration Tips
Airflow Monitor Coms Settings


