


,
Step
4.
-
Glue and screw the end panels into place flush
top of the legs as
shown
in Diagram D.
RAILS
Step 5.
-
Measure and cut the bottom panel
to width. Glue and screw into position.
Step
6.
-
At
this stage your bench could be painted
if
desired.
Step
7. - Load
up
the interior with bags of sand, bricks or rocks. (First position
it
in the
workshop).
-
Bolt your lathe
to the bench top. Make sure your bowl blank
clear the
top
rails and legs when it is swivelled through
for larger turnings.
Step 9.
-
Bolt the bench top
to
the top rails.
There are many variations and alterations that could be
so
long as the basic
sheet bracing effect is retained, a strong, rigid bench should result.
Finally the area of the side panel between the legs could make a convenient place to
.
rack chisels, faceplates
or other accessories.
9
1
-93
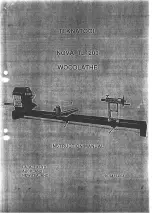
STAND PLANS
FOR N O V A
and
N O V A
WOODLATHES
SIMPLE
CONSTRUCTION, LOW COST MATERIALS, ROBUST DESIGN.
LATALEX LIMITED
.
65
The Concourse, Henderson
Summary of Contents for NOVA TL1200
Page 1: ......