OPERATING YOUR WINE COOLER
AND SETTING THE TEMPERATURE CONTROL
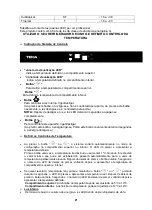
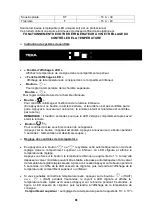
Control System Instruction
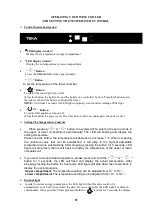
“
LED display window”
Display the set temperature in upper compartment.
“LED display window”
Display the set temperature in lower compartment.
“ ” Button
To set the
temperature
of the upper chamber
.
“ ” Button
To set the temperature of the lower chamber.
“
”
Button
To control the inner light turn on/off.
(Press this button, the light is on, and the light is not controlled by door. Press this button again,
the light is off, and the light is controlled by door.)
NOTE:
It will take 3 seconds for LED light completely went out after turning off the light.
“
”
Button
To control this
appliance turn on/off.
(Press this button, the power is on. Press this button with 3 seconds again, the power is off.)
Setting The Temperature Controls
When pressing “ ” or “ ” button, the system will be entering the set up mode in
the upper or lower compartment automatically. The LED will flashing and display the
setting temperature.
Press once the button, the temperature will decrease or increase 1
℃
. When exceeding
the minimum value that can be established, it will jump to the highest adjustable
temperature value automatically. After stopping pressing the button for 5 seconds, LED
figure will stop flash, then revert back to display the temperature of the upper or lower
compartment.
If you want to reveal actual temperature, please press and hold the " " or " "
button for 3 seconds, the LED will flash and display the actual temperature. After
stopping pressing the button for 5 seconds, LED figure will stop flash, then revert back to
display the set temperature.
Upper compartment
: The temperature setting can be adjusted from 5
℃
to 10
℃
.
Lower compartment:
The temperature setting can be adjusted from 10
℃
to 18
℃
.
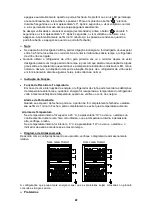
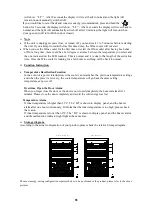
Internal light
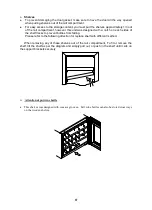
In order to reduce energy consumption, the LED light within this wine cooler will
automatically switch off when closed the door. If you would prefer the LED light to remain on
continuously, this is possible. Please press and hold the
“
”
bottom for 5 seconds, the display
35
Summary of Contents for RVI 20046 GBK
Page 1: ...User Manual www teka com ES PT EN FR DE RO RVI 20046 GBK...
Page 2: ......
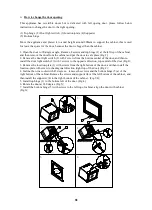
Page 11: ...9 1 3 4 180 6 4 5 5 4 5 support 2 1 2 3 4 5...
Page 54: ...52 1 3 4 180 6 4 5 5 4 5 support 2 1 2 3 4 5...
Page 70: ...68 1 3 4 180 6 4 5 5 4 5 support 2 1 2 3 4 5...
Page 91: ......
Page 92: ...www teka com...

