Owner’s manual
17
EN
OPERATION
Power on
Plug the appliance into power supply mains and press power button. The power indicator
will be illuminated, and the low steam level indicator, regarded as default one, will blink.
Note:
when there’s no water in the tank, after powering on, the power indicator and water
shortage indicator will be illuminated.
Power off
Press and hold the power button, both the power indicator and steam level indicator will be off.
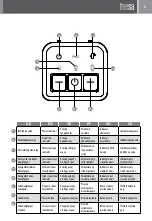
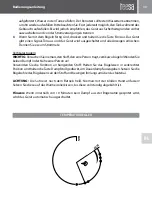
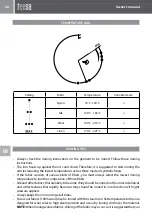
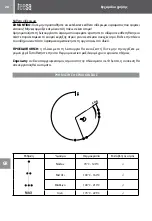
Temperature knob
Turn the knob to set ironing temperature.
Temperature indicator
When the iron is heating up, the temperature indicator will be illuminated. Once the iron has
reached the selected temperature, it will extinguish. The temperature indicator will be cycled
on and off as the iron maintains the selected temperature during ironing.
Steam level control
The steam level can be selected low, medium or high with the steam level control buttons.
After powering on the device, the low steam level indicator, regarded as default one, will
blink. To change steam level, press the - / + button. After few minutes, the indicator will be
changed to constant light. Once the indicator shines constant light, user can press the steam
burst button to emit steam.
Steam burst button
Press the steam burst button, the steam will be emitted from the soleplate as long as the
button is pressed.
Water shortage indicator
If there is not enough water in the tank, the indicator will be illuminated. It prompts you need
to add water into the tank.
Filling aperture cap
User can refill water tank at any time during operation, but it is suggested to turn off and
disconnect the device from power supply beforehand for safety reasons.
If there is not enough water in the tank, grasp the water tank (press the release button under
the tank’s handle at the front of the device) and pull to detach the tank. Open the aperture
cap and fill water. After filling, close the aperture cap, place the tank in its original place.
Cord clamp
When not in use, the steam hose and power cord shall be stored. Pull out the clamp first, after
winding the cord and the hose around the unit base, push the clamp back.
Summary of Contents for TSA2035
Page 2: ......
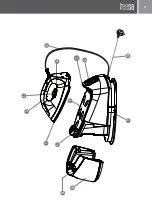
Page 3: ...3 4 3 6 5 7 10 13 12 11 8 2 1 9...
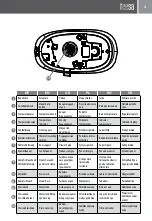
Page 23: ...GR 23 TEESA 1 2 3 4 5 6 7 8 8 9 10 11 12 13 14...
Page 24: ...GR 24 15 16 17 18 19 20 21 22 23 24 25 26 27...
Page 25: ...GR 25...
Page 26: ...GR 26 1 2 3 4 5 6 7 8 30 1 2...
Page 27: ...GR 27 1 1 7 MAX 2 3 4 5 6 7 8 3...
Page 28: ...GR 28 10 70 C 120 C 100 C 160 C 140 C 210 C 170 C 225 C MIN M A X...
Page 29: ...GR 29 100...
Page 31: ...GR 31 LECHPOLELECTRONICSSp zo o Sp k ul Garwoli ska1 08 400Mi tne...
Page 59: ......
Page 60: ...www teesa pl...

