_ 12_
Specifications
AUDIO
Number of Channels:
2
Frequency Response:
1 – 20,000 Hz ± 0.3 dB (RCA)
20 – 20,000 Hz ± 0.3 dB (XLR)
Signal-to-Noise Ratio:
Better than 110 dB (1 kHz)
Dynamic Range:
Better than 99 dB (1 kHz)
Harmonic Distortion:
0.0015 % (1 kHz)
Wow and Flutter:
Unmeasurable (Quartz accuracy)
Channel Separation:
Better than 108 dB (1 kHz)
Output:
Analog; 2.2 V rms (RCA)
2.2 V rms (XLR)
Digital; 0.5 Vp-p/75 ohm (Coaxial)
–15 dBm— –21 dBm (Optical)
D/A Converter:
1/16 shift 20 bit 4 DAC
Digital filter:
8-times oversampling 25-bit
digital filter
Analog filter:
3rd order Butterworth filter
SIGNAL FORMAT
Error Correction:
CIRC
Sampling Frequency:
44.1 kHz
Quantization bit:
16-bit linear/channel
Channel Modulation Code:
EFM
Channel Bit Rate:
4.3218 Mb/sec
PICKUP
Type:
Objective lens drive, optical 3-beam
laser pickup
Objective Lens:
2-dimensional parallel drive
Laser Type:
GaAIAs type semiconductor laser
Wave Length:
780 nm
GENERAL
Power Requirements:
120 V AC, 60 Hz (U.S.A./Canada Model)
230 V AC, 50 Hz (Europe/UK Model)
Power Consumption :
18 watts
Dimensions (W x H x D):
442 x 153 x 344 mm (incl. foot base)
(17-3/8” x 6” x 13-9/16”)
Weight (net):
16.5 kg (36-6/16 lbs)
Standard Accessories:
Wireless Remote Control Unit
(RC-657; for Gold-finish version or
RC-658; for Black-finish version) x 1,
Battery (SUM-3, "AA", "R6" type) x 2,
Lock Key x 1, Foot Base x 4,
AC Power Cord x 1
O
Improvements may result in specifica-
tion or feature changes without notice.
O
Illustrations may differ slightly from
production models.
Remote-Controlled Operation
When operating the remote control unit,
point it towards the remote sensor on the
front panel display window of the unit.
ª
Battery Installation
Remote Control Unit
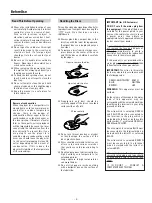
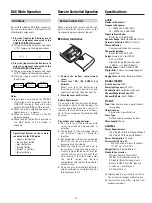
1. Remove the battery compartment
cover.
2. Insert two “AA” (R6, SUM-3) dry
batteries.
Make sure that the batteries are
inserted with their positive
±
and
negative
—
poles positioned correctly.
3. Close the cover until it clicks.
Battery Replacement.
If you notice that the distance between
the remote control unit and the player for
correct operation becomes shorter, it
indicates that the batteries are exhaust-
ed. In this case replace the batteries with
new ones.
Precautions concerning batteries
…
Be sure to insert the batteries with
correct positive
±
and negative
—
polarities.
…
Use batteries of the same type. Never
use different types of batteries
together.
…
Rechargeable and non-rechargeable
batteries can be used. Refer to the
precautions on their labels.
…
When the remote control unit is not to
be used for a long time (more than a
month), remove the batteries from the
remote control unit to prevent them
from leaking. If they leak, wipe away
the liquid inside the battery
compartment and replace the batteries
with new ones.
…
Do not heat or disassemble batteries
and never dispose of old batteries by
throwing them in fire.
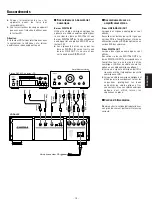
DAC Mode Operation
By using the built-in DAC (D/A converter),
you can use this unit as a D/A converter for
other digital components.
1. Press the [input select] button once to
select a component connected to the
COAXIAL DIGITAL IN terminal.
O
The input sampling frequency and Input
1 ("I
n
-1") appear in the display window.
2. Press the [input select] button twice to
select a component connected to the
OPTICAL DIGITAL IN terminal.
O
The input sampling frequency and Input
2 ("I
n
-2") appear in the display window.
O
Pressing it again returns this deck to
the CD mode.
Notes:
O
Input signals received by the DIGITAL
IN terminals will be output from the
LINE OUT terminals. They will not be
output from the DIGITAL OUT terminals.
O
When the input sampling frequency is
kept unlocked, "- -" appears.
O
When the power is turned on, the CD
mode is engaged.
O
When the play [
∏
] button is pressed in
the DAC mode, the CD mode is
engaged.
CD mode
COAXIAL
OPTICAL
DAC Mode
Operational buttons on the remote
control unit in the DAC mode
• [input select] button
• [open/close] button
• play [
∏
] button
• [muting] button
• [output –/+] buttons
• [display] button

