background image

13

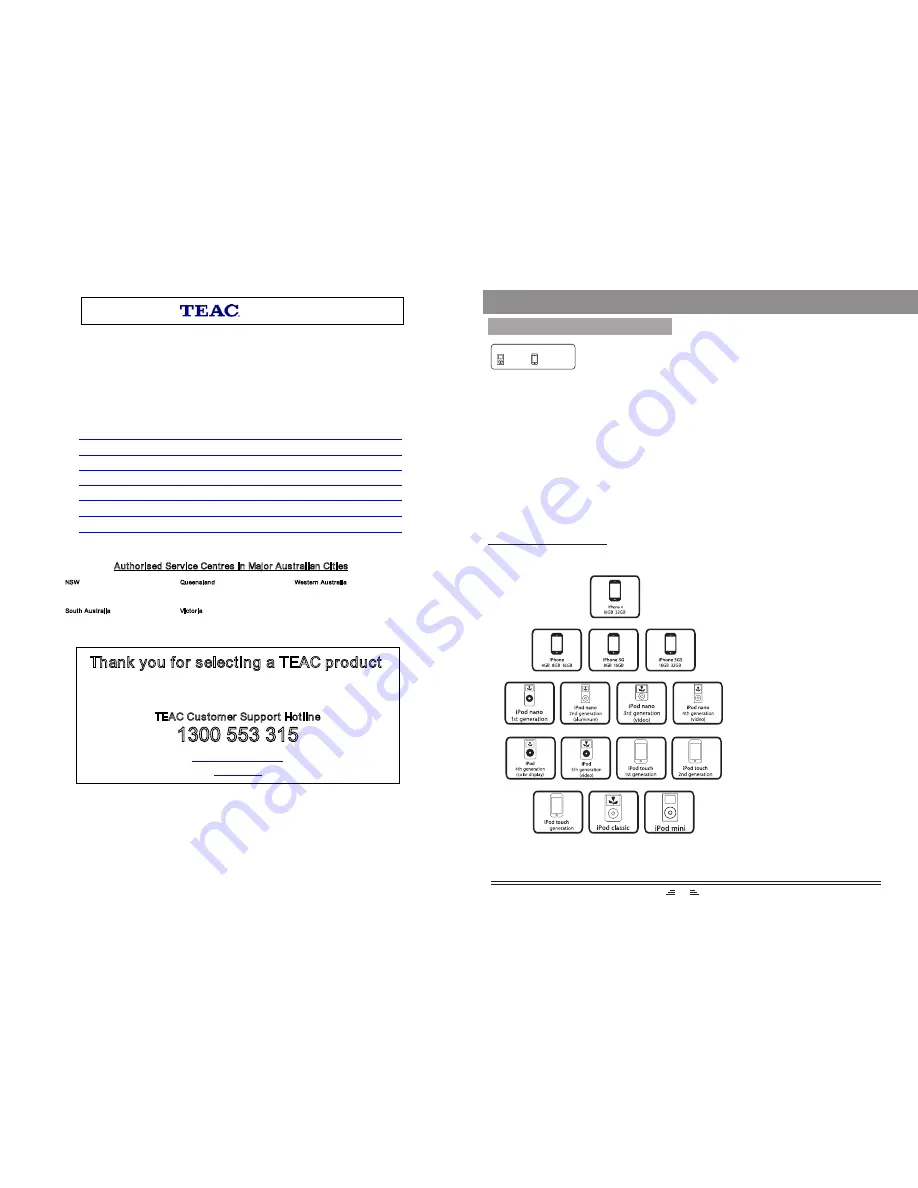
COMPATIBILITY INFORMATION

3rd

Compatibility information

* ``Works with iPhone`` and ``Made for iPod`` means that an electronic accessory have 
    been designed to connect specifically to iPhone/iPod and have been certified by the 
    developer to meet Apple performance standards. 

* Apple is not responsible for the operation of this device or its compliance with safely 
   and regulatory standards.

* iPhone and iPod are trademark of Apple Inc., registered in the U. S. and other countries.

* Please note that the use of this accessory with iPod, iPhone or iPad may affect wireless
   performance.

iPod

iPhone

Made for


WARRANTY PROCEDURE

v1.5.2: DEC 2011

Please read the owner’s manual carefully and ensure that you have followed the correct installation and operating

procedures.

1.

Please read this warranty card.

2.

Keep your purchase receipt to enable you to proceed quickly in the event of a Warranty Service.

3.

If you require Warranty Service, please contact the TEAC Customer Support Hotline at 1300 553 315 for 

assistance. Please ensure that you have the model number, serial number and purchase receipt ready when

you call.

Please complete the section below and keep this information for your own records.

Owner’s Name

Owner’s Address


                           Postcode

Model Name/No.                                                                           Serial No.

Dealer’s Name

Dealer’s Address

                                                                                                         Postcode

Authorised Service Centres in Major Australian Cities

NSW

151 Arthur Street

Homebush West, NSW 2140

Queensland

Unit 1, 320 Curtin Ave West

Eagle Farm, QLD 4009

Western Australia

Unit 2, 50 Pilbara Street

Welshpool, WA 6106

South Australia

11 McInnes Street

Ridleyton, SA 5008

Victoria

282 Normanby Road

South Melbourne, VIC 3205

Thank you for selecting a TEAC product

.

If you should require assistance with your product regarding its setup

or operation, or if any difficulties arise, please call us directly for advice

between Monday to Friday at 8.30AM – 6PM AEST at the

TEAC Customer Support Hotline

1300 553 315

[email protected]

www.teac.com.au

Summary of Contents for iTB500iP i-TALLBOY

Page 1: ...iTB500iP i TALLBOY iPod iPhone Made for TEAC CUSTOMER SUPPORT HOTLINE TCS 1300 553 315 Between Monday to Friday AEST 8 30AM to 6PM ...

Page 2: ...0mm 180mm 220mm 10 7 kg Remote control batteries 2 AAA LR03 Note Specifications subject to change without prior notice Weight and dimensions are approximate Outputs L R speaker power and impedance Subwoofer power and impedance Tuner frequency range FM 87 50 108 00MHz 30W 6 Ohm 2 15W 4 Ohm Net weight 9 7 kg Gift box dimensions 333mm 262mm 902mm Y Pb Pr Component Video and Composite Video connection...

Page 3: ... not repairable on site TEAC can complete the repair by taking the product to a TEAC Authorised Service Centre Where In Home service Pick up is not available the purchaser is required to send the product to the nearest TEAC Authorised Service Centre for repair In this event proof of purchase is required to support a warranty claim After the repair the product will be available for collection by or...

Page 4: ...rranty Service 3 If you require Warranty Service please contact the TEAC Customer Support Hotline at 1300 553 315 for assistance Please ensure that you have the model number serial number and purchase receipt ready when you call Please complete the section below and keep this information for your own records Owner s Name Owner s Address Postcode Model Name No Serial No Dealer s Name Dealer s Addre...

Page 5: ...equency that you want The range of FM frequency is from 87 50MHz to 108 00 MHz 2 Select the band by pressing Tune button press these buttons to adjust the frequency up or down a step The step of FM is 0 05 MHz 3 Select saved stations by pressing number buttons For example press 10 button twice 5 button once you may select the 25th saved station Press the Skip button to switch the next or previous ...

Page 6: ...r system to read the contents of media device In some cases reading time may be as long as 60 seconds This is not a malfunction 3 Even when they are in a supported format some files may not play depending on the content It is possible to listen to audio files using the USB or CARD interface of this unit 1 Connect the USB device or CARD with this unit 2 Press the USB SD button on the remote control...

Page 7: ...mber of the required frequency or band For more information see RADIO OPERATION iPod AUDIO FM BUTTONS 1 Connect the iPod with this unit then press iPod button on the remote control to enter the iPod mode 2 Correctly connect audio facility eg PC with this unit then press AUDIO button on the remote control to enjoy the external audio input sources function 3 Press FM button on the remote control to ...

Page 8: ...ying mode In iPod mode long press the or button to fast rewind or fast forward Note These buttons are unavailable in Audio Input mode If you press the MUTE button while playing the sound output will be switch off Press the MUTE button again or the VOL buttons to resume the previous volume level PREPARATION 1 Before the unit is turned on please check if all the connections are correct Then connect ...

Page 9: ...playing the video files connect the blue jack on rear panel of the unit to the video input jack of TV set Note the default of this unit is composite video output VIDEO CONNECTION RED GREEN BLUE 2 Pr Y Pb Component Video Output Transfer to Pr Y Pb component video output from composite video output to make the picture more natural following operations need to be performed 1 Press the SAVE VIDEO butt...

Page 10: ...Make sure that there are no obstacles between the remote control and the remote control sensor RDS STOP STANDBY USB SD iPod AUDIO INPUT FM F FWD F RWD TUNE PLAY PAUSE DIRECTION BUTTONS SEARCH SAVE VIDEO MUTE NUMBER BUTTONS FREQUENCY SKIP NEXT PREVIOUS TONE VOLUME TIME MONO STERO MENU PC Before connecting acoustic equipment pay attention to the picture below Each connection must be safe and firm Di...

Reviews: