background image

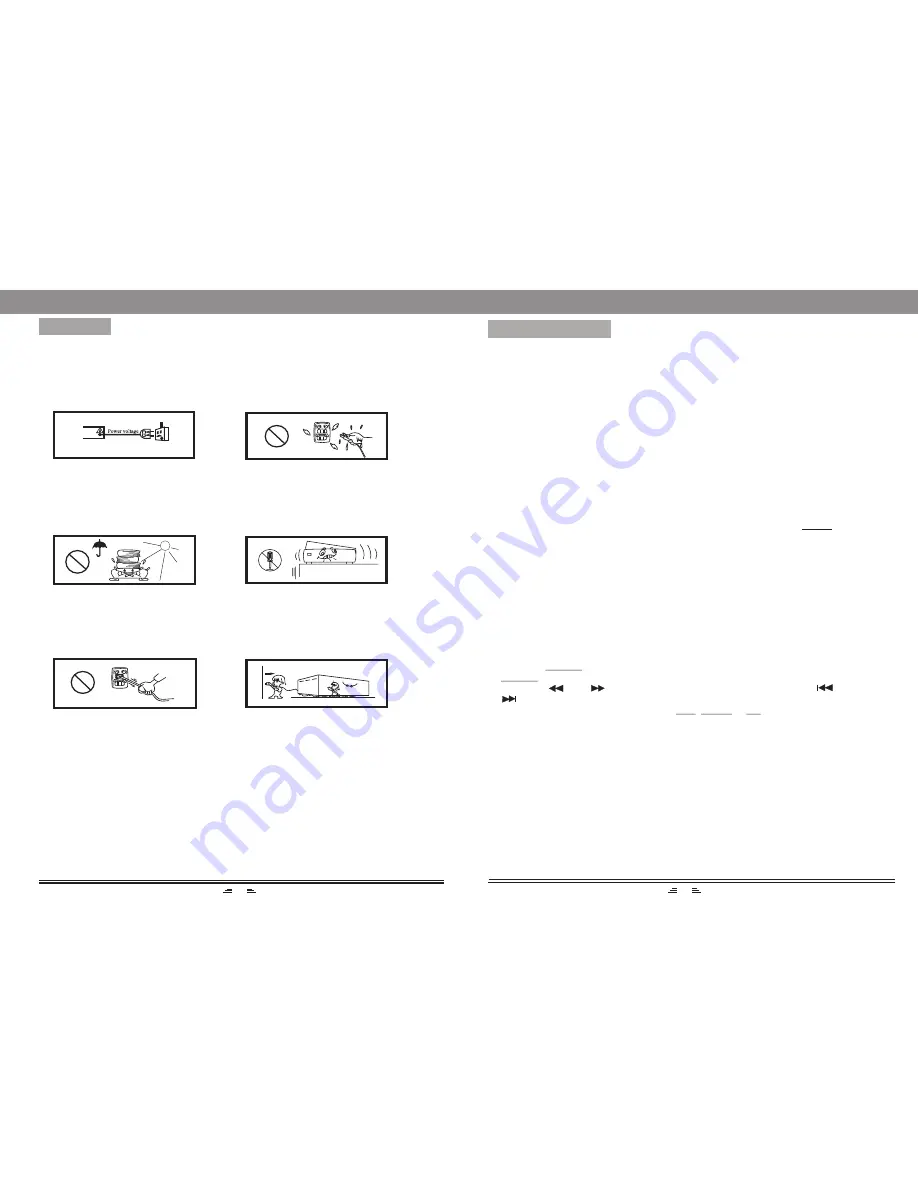
Please read and understand all the following warnings and those marked on the unit. 
This unit has been designed and manufactured to assure personal safety.

Connect only to appropriate mains 
power as indicated on the unit or 
User s Manual.

Keep the unit and power plug 
away from wet area.

Avoid direct sunlight and 
heat source.

Never open the cover, avoid 
dropping metal objects into the unit, 
such as needle, hairpin, coin etc.

Protect power cable: avoid stress
and keep out of walk ways; do not
pull & bend excessively.

Unplug the set from the outlet
when you do not use it for a 
prolong period.

WARNING

2

11

Note: 
1. If you do not touch any buttons for 5 seconds, the unit will exit to the station selection
   screen.
2. When Alarm time is out, the unit will automatically enter to iPod mode( if there is an
    iPod/iPhone connected to this unit), otherwise, it will default to FM mode.

USB/MEDIA SD CARD

Note: 
1) USB-Extension cable supported max. length of 25cm.
2) Depending on the amount of data and media speed, it may take longer for system
     to read the contents of media device. In some cases, reading time may be as long
     as 60 seconds. This is not a malfunction.
3) Even when they are in a supported format, some files may not play depending on 
     the content.

It is possible to listen to audio files using the USB or CARD interface of this unit.

1. Connect the USB device or CARD with this unit.
2. Press the USB/SD button on the remote control to play the USB or CARD. Press
    USB/SD button again to switch between USB and CARD modes.
3. Press the            or          button to fast rewind or fast forward; Press the            or
             button to go to the previous or next audio files.
4. To exit the USB/CARD mode: Press the iPod, AUDIO or FM button, and switch
    to other modes.

LISTENING TO AN IPOD/IPHONE

Connecting an iPod/iPhone to this unit

1. Remove the plastic cover from the dock.

2. Insert the iPod/iPhone to the dock. This unit is designed to make use of the adaptor
    supplied with your iPod/iPhone.

3. Press the iPod button on the remote control (or repeatedly press the INPUT button 
   on the unit), switch to iPod mode.

When activating the iPod/iPhone mode, the screen will display

Authenticating

and then 

success

. Then the unit will automatically play the content of iPod/iPhone.

BASIC OPERATION 

Summary of Contents for iTB500iP i-TALLBOY

Page 1: ...iTB500iP i TALLBOY iPod iPhone Made for TEAC CUSTOMER SUPPORT HOTLINE TCS 1300 553 315 Between Monday to Friday AEST 8 30AM to 6PM ...

Page 2: ...0mm 180mm 220mm 10 7 kg Remote control batteries 2 AAA LR03 Note Specifications subject to change without prior notice Weight and dimensions are approximate Outputs L R speaker power and impedance Subwoofer power and impedance Tuner frequency range FM 87 50 108 00MHz 30W 6 Ohm 2 15W 4 Ohm Net weight 9 7 kg Gift box dimensions 333mm 262mm 902mm Y Pb Pr Component Video and Composite Video connection...

Page 3: ... not repairable on site TEAC can complete the repair by taking the product to a TEAC Authorised Service Centre Where In Home service Pick up is not available the purchaser is required to send the product to the nearest TEAC Authorised Service Centre for repair In this event proof of purchase is required to support a warranty claim After the repair the product will be available for collection by or...

Page 4: ...rranty Service 3 If you require Warranty Service please contact the TEAC Customer Support Hotline at 1300 553 315 for assistance Please ensure that you have the model number serial number and purchase receipt ready when you call Please complete the section below and keep this information for your own records Owner s Name Owner s Address Postcode Model Name No Serial No Dealer s Name Dealer s Addre...

Page 5: ...equency that you want The range of FM frequency is from 87 50MHz to 108 00 MHz 2 Select the band by pressing Tune button press these buttons to adjust the frequency up or down a step The step of FM is 0 05 MHz 3 Select saved stations by pressing number buttons For example press 10 button twice 5 button once you may select the 25th saved station Press the Skip button to switch the next or previous ...

Page 6: ...r system to read the contents of media device In some cases reading time may be as long as 60 seconds This is not a malfunction 3 Even when they are in a supported format some files may not play depending on the content It is possible to listen to audio files using the USB or CARD interface of this unit 1 Connect the USB device or CARD with this unit 2 Press the USB SD button on the remote control...

Page 7: ...mber of the required frequency or band For more information see RADIO OPERATION iPod AUDIO FM BUTTONS 1 Connect the iPod with this unit then press iPod button on the remote control to enter the iPod mode 2 Correctly connect audio facility eg PC with this unit then press AUDIO button on the remote control to enjoy the external audio input sources function 3 Press FM button on the remote control to ...

Page 8: ...ying mode In iPod mode long press the or button to fast rewind or fast forward Note These buttons are unavailable in Audio Input mode If you press the MUTE button while playing the sound output will be switch off Press the MUTE button again or the VOL buttons to resume the previous volume level PREPARATION 1 Before the unit is turned on please check if all the connections are correct Then connect ...

Page 9: ...playing the video files connect the blue jack on rear panel of the unit to the video input jack of TV set Note the default of this unit is composite video output VIDEO CONNECTION RED GREEN BLUE 2 Pr Y Pb Component Video Output Transfer to Pr Y Pb component video output from composite video output to make the picture more natural following operations need to be performed 1 Press the SAVE VIDEO butt...

Page 10: ...Make sure that there are no obstacles between the remote control and the remote control sensor RDS STOP STANDBY USB SD iPod AUDIO INPUT FM F FWD F RWD TUNE PLAY PAUSE DIRECTION BUTTONS SEARCH SAVE VIDEO MUTE NUMBER BUTTONS FREQUENCY SKIP NEXT PREVIOUS TONE VOLUME TIME MONO STERO MENU PC Before connecting acoustic equipment pay attention to the picture below Each connection must be safe and firm Di...

Reviews: