


Y
P
B
/C
B
P
R
/C
R
C
O
M
P
O
N
E
N
T
V
G
A
D
V
I
R
S
-2
3
2
A
e
ri
a
l
A
N
T
7
5
L
R
A
U
D
IO
L
R
A
U
D
IO
-
7
-
Selecting a location for the TV
1)Place TV on the floor or on a sturdy platform in a location where light does not directly hit the screen.
2)Place TV far enough from the walls to allow proper ventilation. Inadequate ventilation may cause
overheating, which may damage the TV.
NOTE: Please contact local dealer for wall mounting.
Preparation for using your new TV
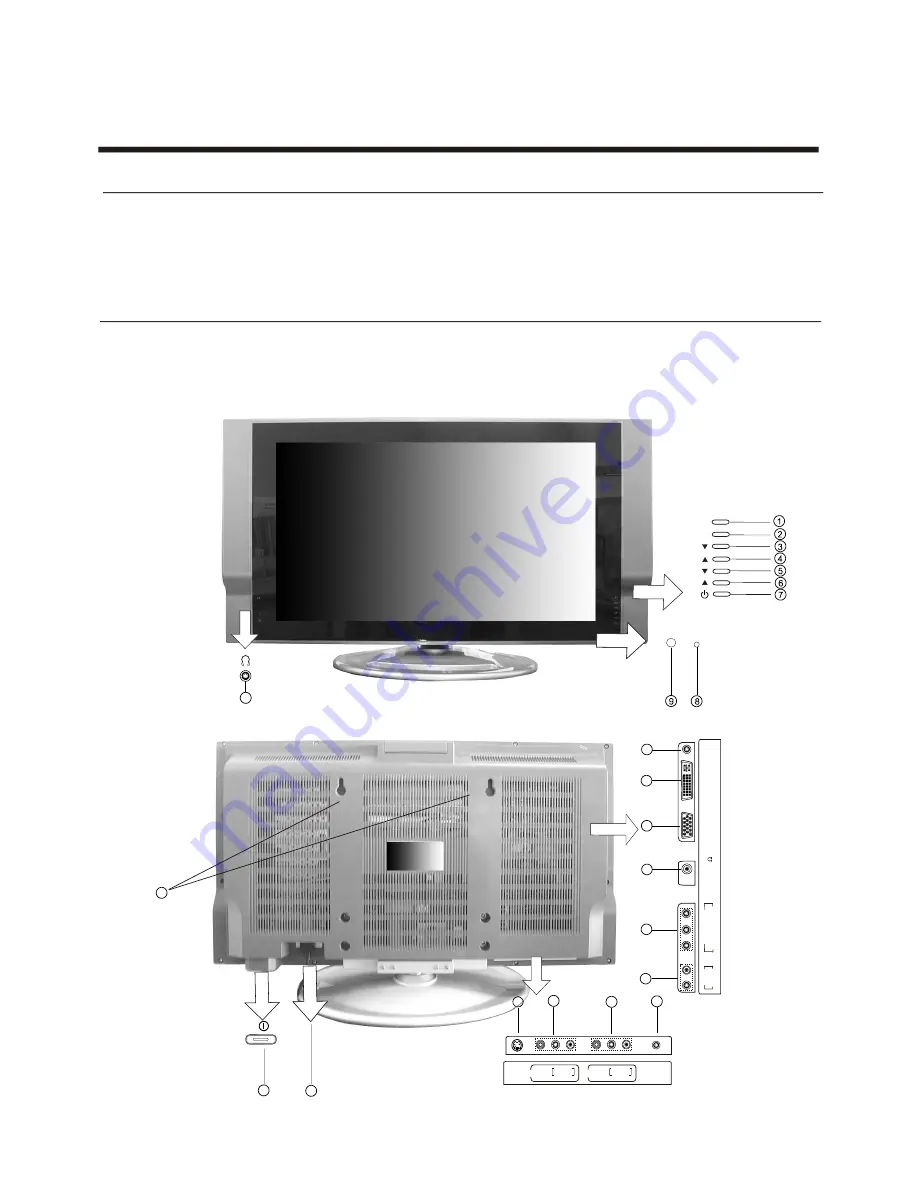
Learning about your TV
You can operate your TV by using the buttons on the front panel or on the remote control. The terminals
on the backside provide all the connections you will need to connect other equipment to your TV.
Front Controls
Note: The above figures are for reference only, please refer to the actual units to determine their appearance.
Back Connections
MENU
SOURCE
VOL
22
20
15
16
17
18
19`
14
CH
VOL
CH
13
0
11
12
1
21
23
S-VIDEO
VIDEO
L
R
AUDIO
IN
VIDEO
L
R
AUDIO
OUT
PC AUDIO
INPUT


