background image

ª

Recording (Deck II only)

ª

Recording from Radio

1. Set FUNCTION to RADIO position.

2. Select the desired radio station.

3. Load a cassette tape in Deck II.

4. Press RECORD (

º

) to start recording.

5. Press STOP/EJECT to stop recording.

Note:

Sometimes when recording the radio program, you
may hear a whistling noise due to interference between
the radio signal and the built-in AC bias circuitry of the
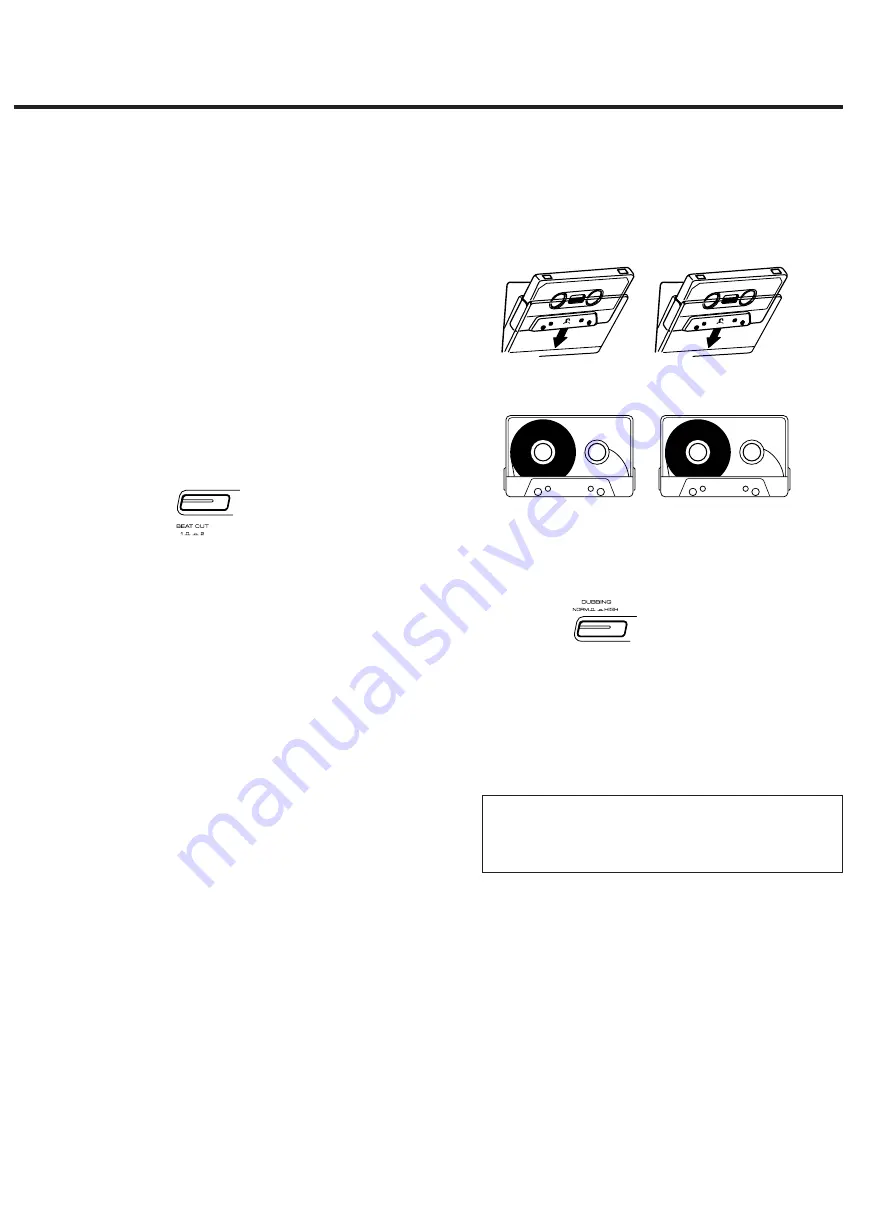
recorder. If this happens, try to change the BEAT CUT
selector from 1 to 2 or vice versa, which alters the
recording bias frequency and may reduce such interfer-
ence.

ª

Recording from a Record (Analog Disc)

1. Set FUNCTION to PHONO position.

2. Set a desired record (analog disc).

3. Load a cassette tape in Deck II.

4. Start playback of the record, then pressing RECORD

(

º

) to start recording.

5. Press STOP/EJECT to stop recording.

ª

Recording from a CD

1. Set FUNCTION to CD position.

2. Set a desired CD.

3. Load a cassette tape in Deck II.

4. Press RECORD (

º

) of Deck II, then press PLAY/PAUSE

(

Áπ

) of CD player.

Deck II will start recording the CD.

5. Press STOP/EJECT of Deck II to stop recording.

- 13 -

ª

Dubbing 
(Tape copy from Deck I to Deck II)

The DC-D2700 can duplicate a cassette tape at normal
or high speed.

1. Load the pre-recorded cassette into TAPE I and a

recordable cassette into TAPE II.

2. Fully rewind both cassettes so their tapes are taken

up on their left reels.

3. Set FUNCTION to TAPE position.

4. Choose the DUBBING SPEED selector from NORMAL

and HIGH.  

5. Press PLAY (

Á

) of Deck I and RECORD (

º

) of Deck II

simultaneously.
Dubbing will start.

To stop dubbing:

Press STOP/EJECT on both decks.

CAUTION:

Recording pre-recorded tapes, records, or other pub-
lished or broadcast material may infringe copyright
laws. Check before recording.

Summary of Contents for DC-D2700

Page 1: ...1900 This appliance has a serial number located on the rear panel Please record the model number and serial number and retain them for your records Model number Serial number WARNING TO PREVENT FIRE O...

Page 2: ...l 20 Damage Requiring Service Unplug this product from the wall outlet and refer servicing to qualified service personnel under the following conditions a when the power supply cord or plug is damaged...

Page 3: ...ation is shown 1 CAUTION DO NOT REMOVE THE PROTECTIVE HOUSING USING SCREWDRIVER USE OF CONTROLS OR ADJUSTMENTS OR PERFORMANCE OF PROCEDURES OTHER THAN THOSE SPECIFIED HEREIN MAY RESULT IN HAZ ARDOUS R...

Page 4: ...e disc out holding it carefully by the edges How to remove the disc How to hold the disc Fingermarks and dust should be carefully wiped off the disc s recorded surface with a soft cloth Wipe radially...

Page 5: ...rted with their positive and negative poles positioned correctly 3 Close the cover until it clicks Battery Replacement If the distance required between the remote control unit and main unit decreases...

Page 6: ...6 Locations of Buttons and Controls Front Panel Turntable Rear Panel...

Page 7: ...te Door a Deck I Control buttons s Disc tray CD d Display CD f INTRO button CD g SEARCH buttons CD h SKIP buttons CD j SHUFFLE RANDOM button CD k REPEAT button CD l PROGRAM button CD PLAY PAUSE button...

Page 8: ...forma tion 3 Adjust the volume to a comfortable listening level with VOLUME UP DOWN a knob on the panel or but tons on the remote control unit Other functions Graphic equalizer You can alter the sound...

Page 9: ...H button once The unit will search the station automatically and the search stops at the first strong station being received Repeat until your desired station is being received Notes To terminate Auto...

Page 10: ...ckward Pressing the SKIP forward button causes the player to jump to the next track Pressing the SKIP backward button causes the player to jump to the beginning of the current track Press the either o...

Page 11: ...ss INTRO again Cautions Ensure all the disc are removed and the carousel is stilled before tuning off the unit If a malfunction occurs during operation reload the disc Keep all foreign objects out of...

Page 12: ...it Basic Playback You can choose either Deck I or Deck II for playback as you like 1 Set FUNCTION toTAPE position 2 Load a cassette tape in Deck I or II 3 Press PLAY The playback starts To stop playba...

Page 13: ...CORD to start recording 5 Press STOP EJECT to stop recording Recording from a CD 1 Set FUNCTION to CD position 2 Set a desired CD 3 Load a cassette tape in Deck II 4 Press RECORD of Deck II then press...

Page 14: ...attempt to stop the platter by hand Moving the unit without securing the tonearm may damage the needle Tonearm 7 EP Record adaptor Speed Select switch Tonearm Rest Clamp Headshell Center Spindle Turnt...

Page 15: ...ume is set to minimum Adjust the volume properly RECORD button cannot Erase prevention tab is Cover the slot with adhesive tape be pressed removed Low volume or weak sound Head is dirty Clean the head...

Page 16: ...t has been tested and found to comply with the limits for a Class B digital device pursuant to Part 15 of the FCC Rules These limits are designed to provide reasonable protection against interference...

Reviews: