


- 10 -
Listening to CD
The DC-D2700 offers the carrousel type CD changer
which can be loaded up to 3 discs in the independent
disc trays.
1
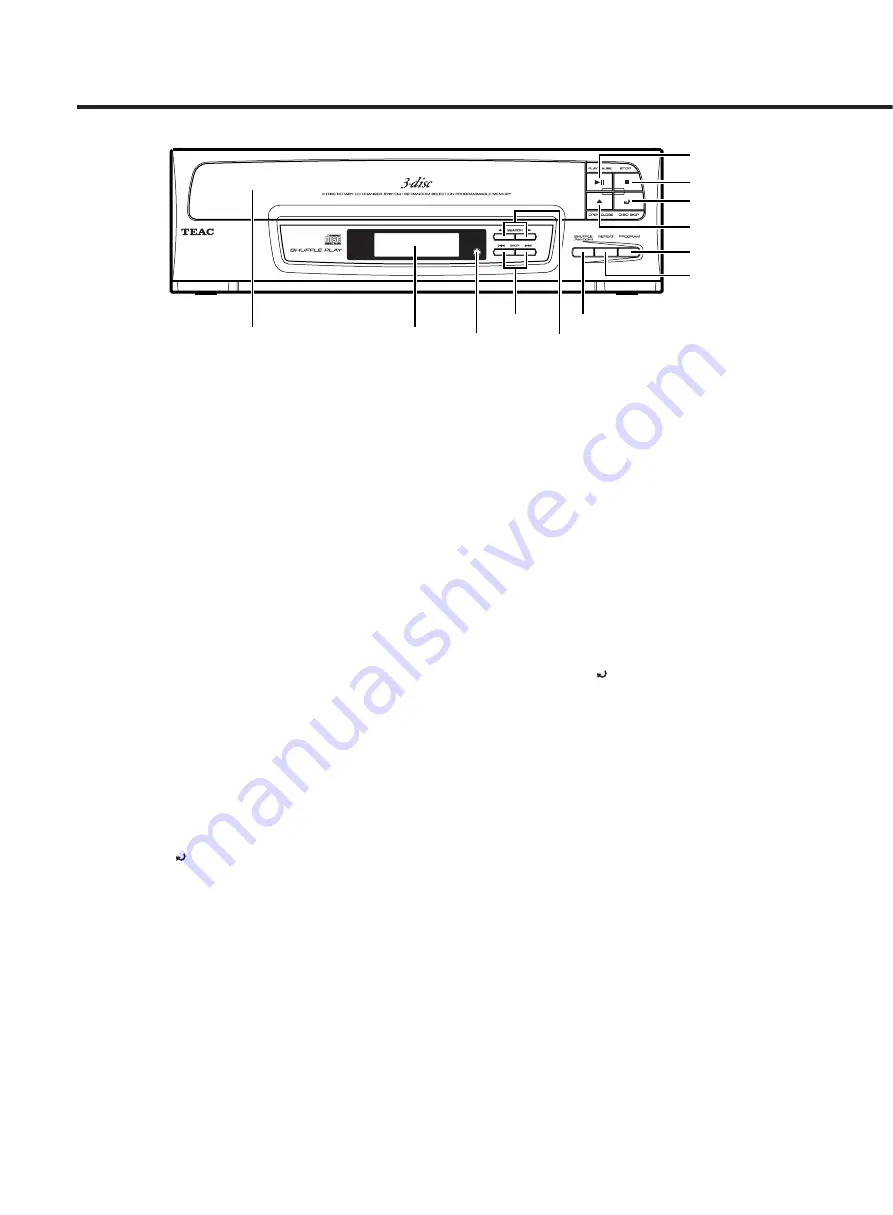
OPEN/CLOSE
(
ø
)
:
Opens and closes the disc tray.
2
PLAY/PAUSE
(
Áπ
)
:
Starts playback. Pressing it during playback pauses
playback.
3
PROGRAM :
Sets the program mode.
4
SHUFFLE (RANDOM) :
Plays all tracks of the set discs randomly.
5
INTRO :
Plays the first 10 seconds of each track.
6
STOP
(
ª
)
:
Stops playback.
7
SKIP
(
Â
/
¯
) :
Selects tracks. (Backward/forward track selection)
8
SEARCH
(
Ô
/
) :
Fast backward/fast forward.
9
REPEAT:
Sets the repeat mode.
0
DISK SKIP (
) :
Specifies disc skip.
ª
Basic CD Playback
1. Set the FUNCTION selector to CD.
2. Press OPEN/CLOSE (
ø
) to open the disc tray.
3. Place CD(s) with the label side up onto the carousel.
Up to 3 discs can be set.
4. Press OPEN/CLOSE (
ø
) to close the disc tray.
5. Press PLAY/PAUSE (
Áπ
) to start playback.
The player starts playback.
To stop playback:
Press STOP (
ª
).
To pause playback:
Press PLAY/PAUSE (
Áπ
) .
Pressing it again resumes playback.
To skip forward or backward
Pressing the (SKIP (
¯
) forward) button causes the
player to jump to the next track.
Pressing the (SKIP (
Â
) backward) button causes the
player to jump to the beginning of the current track.
Press the either of SKIP (
Â
/
¯
) buttons as many
times as required until jumping to the desired track.
To change the playback disc:
Press DISC SKIP (
).
Notes:
…
Make sure that the transit screw on the rear panel is
removed before using the first time.
(See "Preparation of Use" on page 5.
…
Make sure to push STOP before turning the power off
or changing the FUNCTION switch.
…
Do not turn the power off while the CD playing is
playing. Otherwise, the disc and mechanism may be
damaged. Also we recommend that all discs are
removed before turning the power off.
ª
Program Play
You can enjoy CD playback of the tracks in any preferred
sequence using the Program function.
1. While the disc is in stop, press PROGRAM.
The "PROGRAM" indicator will appear, and the DISC
number and TRACK number will become "--" and
flashing.
2. Press DISC SKIP to select the desired disc.
3. Locate the desired track using the SKIP buttons.
6
STOP
0
DISC SKIP
1
OPEN/CLOSE
3
PROGRAM
Disc tray
Display
8
SEARCH
7
SKIP
5
INTRO
9
REPEAT
4
SHUFFLE (RANDOM)
2
PLAY/PAUSE


