Energy 2510 B
Vers. 001
GB
10
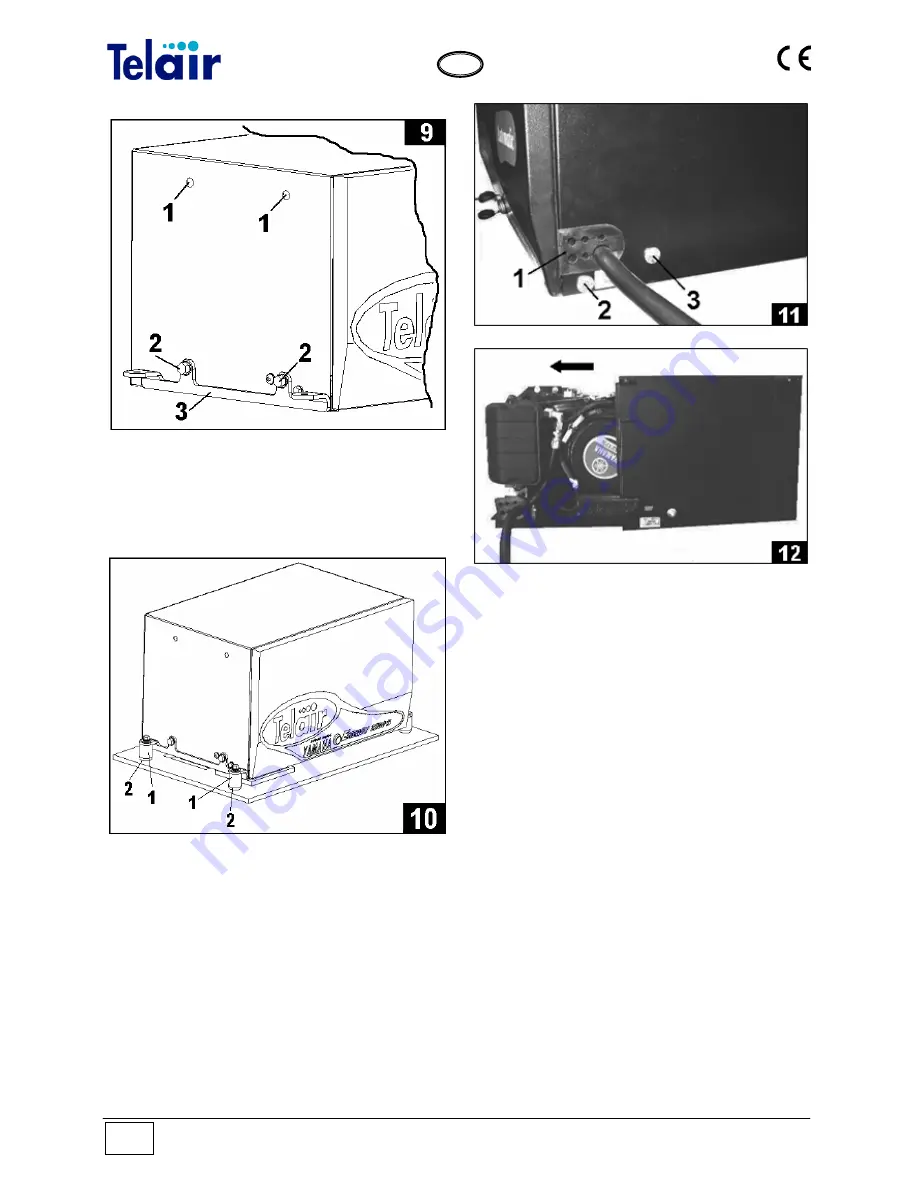
The generator can now be located on the
previously drilled surface (fig.7) using the suitable
vibration-damping cylinders (fig. 10 ref. 1) and
spacers (fig. 10 rif.2)
4.3 Wiring connection instructions
By using the special key to open the lock,
remove the front door.
Then remove the bottom surface locking screws
(Fig. 11 Ref. 2) on both sides.
Take out the bottom surface with the engine all
the way to the mechanical stop (Fig. 12).
If you wish to completely remove the engine
surface, screw out the locking screws (Fig. 11
Ref. 3), too.
4.4 Battery
connection
To start up the generating set, connection to the
battery of the vehicle must be provided using a
sheathed power cable up to current standards,
with the cross-section shown in Table 1.
To this end, the generating set is provided with
two special terminals (Fig.13 Ref.2) used to
connect the positive and negative poles of the
battery.
Connect the cable of the positive pole (red cable)
to the terminal already having a red cable and
the cable of the negative pole (black pole) to the
terminal already having a black cable. The cable
of the negative pole must be of the same cross-
section as the positive cable, and must be
connected both to the negative pole of the
battery and to the vehicle chassis.
Make sure there is good contact; remove any
paint or rust from the contact surface, and protect
the connection by applying grease.
The capacity of the battery to be used for starting
up must not be less than
100 A/h
.
The soundproofing box is equipped with two
cable outlets used to let through the battery
connection cables (Fig. 11 Ref. 1).
The cable presser block is used to prevent water
seeping into the power generating set.
Summary of Contents for Energy 2510B
Page 29: ...Vers 001 Energy 2510 B 29 GB DRAWING FOR SPARE PARTS LIST ENERGY 2510 B ...
Page 30: ...Energy 2510 B Vers 001 30 GB ...
Page 31: ...Vers 001 Energy 2510 B 31 GB ...
Page 39: ...Vers 001 Energy 2510 B 39 GB Notes ...
Page 40: ......


