408-9930
Rev G
2
of 4
3.
DIE INSTALLATION AND REMOVAL
Select the desired die assembly, remove the die retention screws from the tool jaws, and proceed as follows:
3.1.
Shouldered Dies
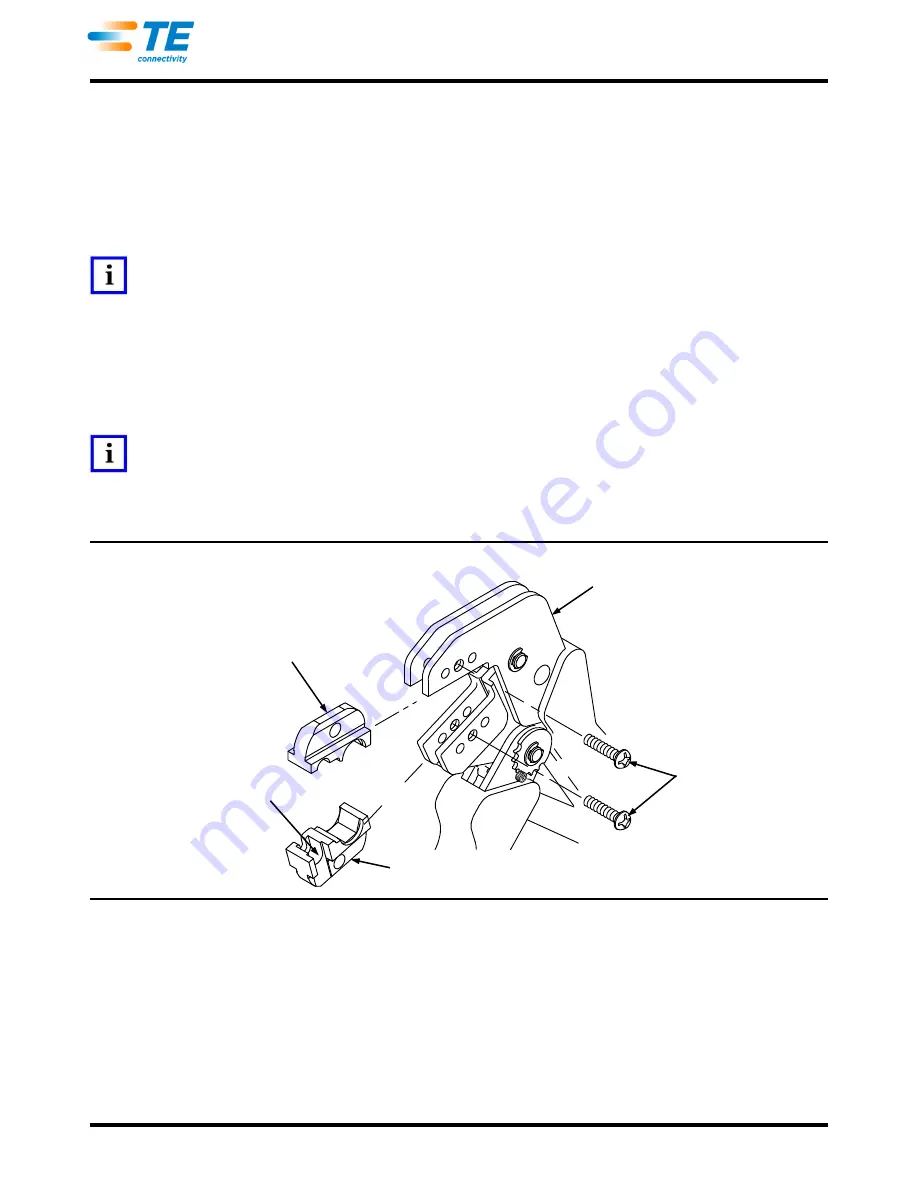
(See Figure 2)
1. Place the upper die in the stationary jaw of the tool frame.
2. Insert a die retention screw through the jaw and die, and tighten the screw so that the die is held in
place, but that the screw is not completely tighten at this point.
NOTE
Install die assemblies with center contact crimping chamber with the center contact crimp chamber toward the front of the tool
jaws as shown in Figure 2. If indicated otherwise in another document, follow the specific die requirements demonstrated in
that document.
3. Place the lower die in the moving jaw of the tool frame. Install a die retention screw through the jaw
and die, and tighten the screw so that the die is held in place, but that the screw is not completely
tighten at this point.
4. Slowly close the tool handles, allowing the dies to mate and/or align. Continue closing the tool handles
until the ratchet makes the seventh "click," then tighten both die retention screws until snug.
NOTE
The tool ratchet has detents that are audible in eight
“clicks”
as the handles are closed. The ratchet releases on the eighth
“click”.
5. To remove the die assembly, close the tool handles until the ratchet releases, and allow the handles
to open fully. Loosen and remove the die retention screws and slide the dies out of the tool jaws.
Figure 2
3.2.
Pinned Dies
(See Figure 3)
1. Install the wire and insulation anvil dies with the chamfers facing the front of the tool and the die
markings facing outward into the movable jaw of the tool frame.
2. Insert the die retaining pins and the short die retention screw. Do not tighten the screw completely.
3. Install the wire and insulation crimper dies with the chamfers facing the front of the tool and the die
markings facing outward into the stationary jaw of the tool frame.
4. Insert the die retaining pins and the long die retention screw. Do not tighten the screw completely.
Shouldered Dies
Upper Die
Lower Die
Center Contact
Crimping Chamber
Tool Frame
Die Retention
Screws


