


PLAYING PAD
7
TURN ON THE POWER
(1) Turn down the external audio device connected
with the drum.
(2) Press the POWER button while don
¡¯
t strike pad
or press the Hi-Hat control pedal.
(3) Turn on external devices connected.
(4) Strike the pad and adjust the volume to a proper
level.
PLAYING PADS
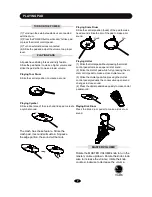
Playing Snare Drum
Strike the central position (head) of the pad to make
head sound, strike the rim of the pad to make a rim
sound.
Playing Cymbal
Strike rubber area of the crash and ride pad to create
a cymbal sound.
The crash has choke feature. Strike the
crash pad, its sound will sustain. Squeeze
the edge portion, the sound will be mute.
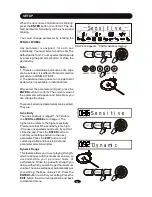
All pads have striking force sensitivity feature.
Strike the pad harder to make a higher volume and
strike the pad softer to make a lower volume.
Playing Tom Drum
Strike the central position to create a sound.
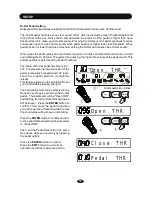
Playing Hi-Hat
(1) Strike the Hi-Hat pad without pressing the Hi-Hat
control pedal to make an open Hi-Hat sound.
(2) Strike the Hi-Hat pad while fully pressing the Hi-
Hat control pedal to make a close Hi-Hat sound.
(3) Strike the Hi-Hat pad while pressing the Hi-Hat
control pedal gradually, the consecutive open sound
changes to close sound.
(4) Press the Hi-Hat pedal down quickly to make Hi-Hat
pedal sound.
Playing Kick Drum
Press the Kick drum pedal to make a kick drum
sound.
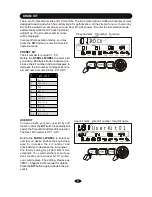
Rotate the MASTER VOLUME knob to turn the
master volume up/down. Rotate the knob clock-
wise to increase the volume; rotate the knob
counter-clockwise to decrease the volume.
MASTER VOLUME
Head
Rim


