2800 Laura Lane • Middleton, WI 53562 | 800.288.9383 • fax: 608.836.9044 | www.tcsbasys.com
12
13
2800 Laura Lane • Middleton, WI 53562 | 800.288.9383 • fax: 608.836.9044 | www.tcsbasys.com
12
13
Configuration
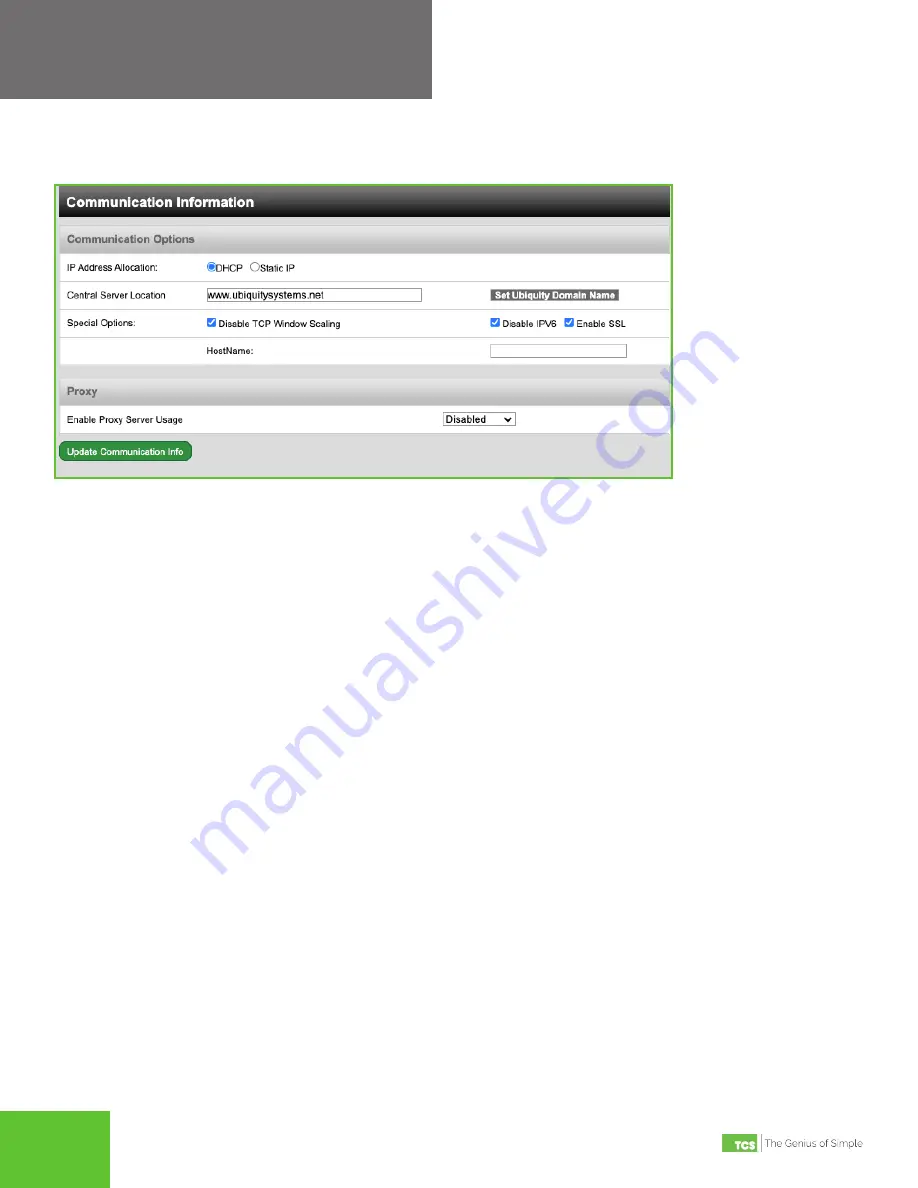
Communication Information
This section contains settings which control how the QD2040c connects through the Internet. All of these settings are
determined by your local network administrator or IT department.
Communication Options
Communication Options
The QD2040c supports both static IP and Dynamic Host Configuration Protocol (DHCP) IP address allocations. Enter
the Ubiquity Cloud Server location (www.ubiquitysystems.net) by clicking the “Set Ubiquity Domain Name” button. Select
whether to enable or disable special options. Enter host name if needed (typically left blank).
Network
Select the desired IP allocation (DHCP addressing or static IP addressing). When using static IP addressing, it is neces
-
sary to enter the IP Address, Gateway, Subnet, DNS1 and DNS2 settings; these settings are established by the LAN/ WAN
network administrator prior to installation. When utilizing DHCP addressing, the IP address settings are automatically
assigned when communication is established.
MTU Adjustments
Adjusting the MTU down may allow gateways to communicate with smaller TCP packet sizes. This may be useful if you
are using cell modems not capable of passing a TCP packet with a size of 1500.
Proxy
If a proxy is required, select Static Proxy from the drop-down menu and enter all the related details in the fields that ap
-
pear. When you are finished entering information in this section, click the Update Communication Info button.
Security Information
This section contains settings which control the security of the device within the QD2040c and whether it can be ac-
cessed through the web interface.
If Secure Mode has been enabled and you need access, call TCS Technical Support (800-288-9383, ext. 2) for assistance.
Here is where you change the default login credentials used to access the Configuration Page. TCS recommends chang
-
ing these credentials. Once you are finished entering information in this section, click the Update Security Info button.
•
Lockdown Mode:
(Default Unchecked) When the option is checked it will disable all remote interfaces.
•
Secure Mode: (Default Unchecked) When the option is checked it will disable the Web UI.
•
Password:
(Default NA) Password Change for admin account.


