background image

10

DVR250-DT User Manual

4.  Operation

Control of the DVR250 is divided between the hardware unit and the plug-in 

window. All commonly-used parameters of the DVR250 are accessible through 

the hardware device, including parameters that control major parts of the effect 

such as reverb decay, delay time, and much more. Secondary parameters that are 

needed less often are handled in the plug-in window. 

4.1  Hardware Controls

Meters

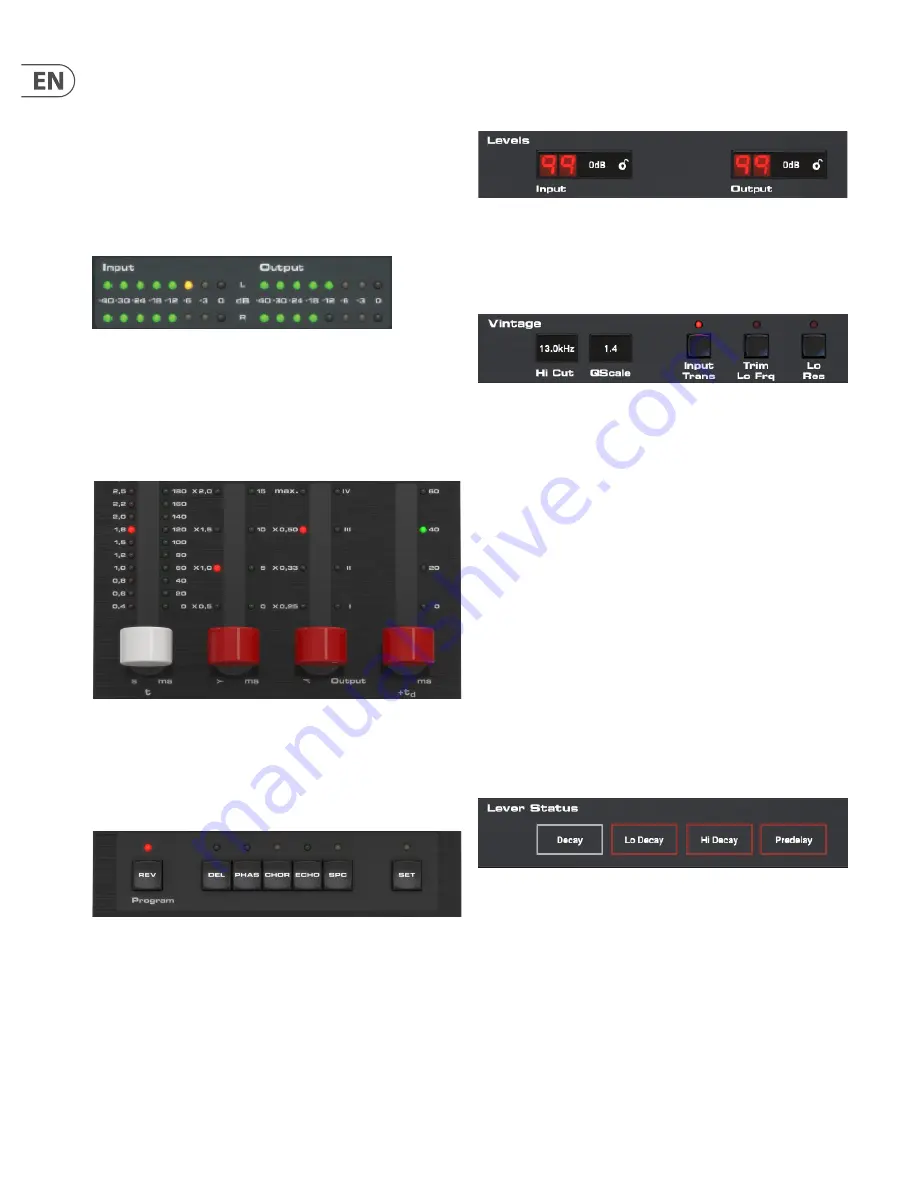
The meter section gives feedback about the incoming and outgoing audio 

signals. The input level displays the audio as it enters the plug-in, and is not 

affected by adjustments to the input level control or any other parameter. 

The output meter is affected by the results of the effect as well as the output 

level control parameter.

Levers

Use the 4 levers to make primary parameter adjustments. The function of each 

lever depends on the effect selected and the state of the SET button. A quick 

reference of the active parameters can be viewed in the Lever Status section of 

the plug-in, and full descriptions are detailed in chapter 4.3. 

Program Buttons

Activate an effect with the program buttons. The currently-selected effect will be 

indicated by a lit LED. Only one effect can be activated at a time. 
Pressing an already-lit button will bypass the effect and cause the LED to flash. 

Pressing again or selecting a different effect will reactivate the effect. 
The SET button accesses a 2nd tier of parameters that can be adjusted with 

the levers. 

4.2  Plug-in Controls

Levels

Click and drag up or down to adjust the input and output levels from 0 to 99. 

A setting of 0 is -∞, and a setting of 1 is -96 dB. The level increases in 3 dB 

increments at lower settings, and by 0.5 dB increments above -40 dB.

Vintage

These parameters are emulations of the classic hardware unit on which this 

plug-in is based. If desired, the sound can emulate limited bandwidth and bit 

resolution to achieve a more authentic, slightly grainy sound. 
Adjust the Hi Cut frequency to roll off some of the upper frequencies. The QScale 

parameter emulates internal EQ adjustments found on classic reverb units, 

and can be used in conjunction with the Hi Cut to tailor the high end. 
The Input Trans emulates the sound of input transformers typically found in 

vintage reverbs. Use it to create warm, vintage sounds, especially when using 

short decay times. 
The Trim Lo Frq button engages subtle attenuation of certain low frequencies. 
Use the Lo Res button to simulate a lower bit resolution for a grainy, 

vintage sound.
The Vintage settings that emulate the original EMT 250 are: Hi Cut 11 kHz, 

QScale 1.2, Lo Res On.
The settings of the Vintage section affect all effect types selected with the 

Program buttons on the hardware unit. This enables creative possibilities like 

setting a Hi Cut for only the detuned part of the signal in the Chorus effect, 

and hereby ensuring modulation only on low frequencies. 

Lever Status

This section indicates the parameters that are adjustable with the levers for the 

currently-selected effect. An additional layer of parameters can be accessed by 

engaging the SET button. 

Summary of Contents for DVR250-DT

Page 1: ...User Manual DVR250 DT Digital Vintage Reverb with Inspiring Hardware Interface 2018 11 22 Rev 1 1...

Page 2: ...3 1 Introduction 4 2 Plug in Installation 5 2 1 Installation on a PC 5 2 2 Installation on a Mac 6 3 Connection and Setup 7 4 Operation 10 4 1 Hardware Controls 10 4 2 Plug in Controls 10 4 3 Paramet...

Page 3: ...glightningstormsor whenunusedforlongperiodsoftime 14 Referallservicingtoqualifiedservicepersonnel Servicingisrequiredwhentheapparatushasbeen damagedinanyway suchaspowersupplycordorplug isdamaged liqui...

Page 4: ...cluded the five additional effects that the original boasted namely chorus echo delay phasing and space Making the DVR250 involved engineers and specialists within a multitude of design disciplines Ha...

Page 5: ...s your operating system The latest firmware for the DVR250 unit will be included in the software as well 2 1 Installation on a PC Open the zip file and double click the executable file Follow the step...

Page 6: ...ick the installer icon Proceed through the prompts to begin installation A default location will be selected for installation or you can select another folder manually If you have administrator author...

Page 7: ...effect types which probably includes many stock plug ins that are included with the DAW There should be a submenu to view general VST AU AAX options The plug in will likely be found in a dedicated TC...

Page 8: ...cessing Only Full Fuctionality Processing controls available for 60 days countdown Processing Only Full Fuctionality Restored 60 day count down Download and install the plug in Link to product page wi...

Page 9: ...ng made between the DVR250 unit and the plug in accompanied by Connecting text If the hardware unit is disconnected from the computer but the countdown has not yet expired a yellow chain icon without...

Page 10: ...be adjusted with the levers 4 2 Plug in Controls Levels Click and drag up or down to adjust the input and output levels from 0 to 99 A setting of 0 is and a setting of 1 is 96 dB The level increases...

Page 11: ...the plug in instance will be named after the track name The instance can be renamed by clicking the pencil icon If you install the plug in without connecting the hardware unit to your computer a red...

Page 12: ...Sets the amount of delay before processing takes effect selectable between 0 20 40 and 60 ms Secondary parameters enable SET 1 Mix Determines how much of the processed signal is mixed with the dry sig...

Page 13: ...ry parameters enable SET 1 Mix Determines how much of the processed signal is mixed with the dry signal A setting of 50 yields an even blend of wet and dry signals 0 mix corresponds to setting 0 4 25...

Page 14: ...nd organized as you d like When recalling a default or saved preset the name will appear in plain text However as soon as you make an alteration to any of the parameters in that preset the text change...

Page 15: ...all Factory and User presets or only Favorites depending on the Browse Favorites Only setting Browse Favorites Only This option filters the presets that appear in the main preset list so that only fav...

Page 16: ...ion is checked inside the update menu the red dot will appear on the settings icon when a new plug in is available Click the gear icon and select Check for Updates to perform a scan Click the Upgrade...

Page 17: ...c delay Reverberation Reverberation 0 60 ms 1st Reflection I IV III II t1 t17 t19 t2 t16 tV tN tN tN L t 0 60 ms tI 0 3 5 ms tIV 0 3 5 ms R L R t 0 60 ms tIII 0 3 5 ms tII 0 3 5 ms IV II III I 0 60 ms...

Page 18: ...t occur in a particular installation If this equipment does cause harmful interference to radio or television reception which can be determined by turning the equipment off and on the user is encourag...

Page 19: ......

Reviews: