


6
GeTTInG sTarTeD
X-COUPLED ETHERNET CABLE
100-240V AC
DB-8
PC or Mac
25PIN DSUB TO XLR
8 x XLR FOR DIGITAL I/O
TV TRANSMISSION PROCESSOR /
DB-8
RESET
SUPPLY 2
SUPPLY 1
DUAL POWER REDUNDANCY
STATUS
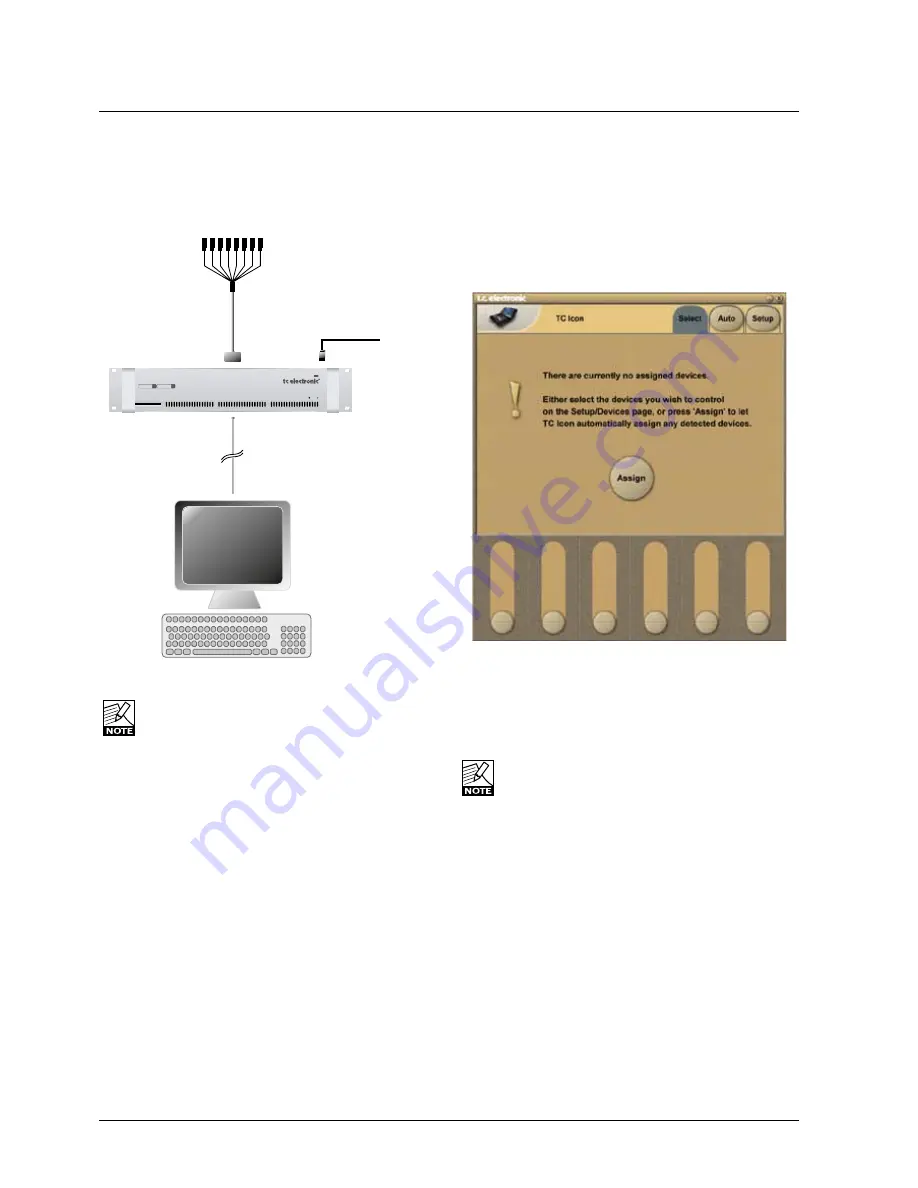
This is an illustration of how to connect a standard DB8/DB4 as it comes with one Mainframe and one TC Icon software
Editor. We recommend reading through the entire Hardware & Installation section before operating.
Please note that a crossed ethernet cable (supplied)
must be used in this type of setup. When the
system is connected to a HUB as a part of a major
network non-crossed ethernet cables must be used
(not supplied).
Connections
Install the TC Icon Software Editor
Follow the intallation instructions.
• Open the TC Icon Software Editor and the following
screen will appear.
• Press
Assign
.
The System is scanned and all connected
mainframes will appear on the next screen.
• Press the mainframe you wish to access.
• That’s it - you are now up and running.
Latest version of Mainframe software and latest
version of the TC Icon Software Editor is supplied
on the CD delivered with the Mainframe and
Software Editor package. However, from time to
time, software updates are available. To achieve the latest
software you should visit our site at www.tcelectronic.com
and go to “Downloads - Software Updates - TC Icon
Software Editor” and follow the instructions. You may also
contact your local dealer to get the latest software.
Quick setup guide
This quick setup guide applies for a simple setup as
illustrated. The setup procedure requires that your PC
or Mac has a network adapter installed as well as a
TCP/IP protocol.
• Unpack the Mainframe and mount in a well ventilated
space.
• Connect mains power and audio-connections via the
supplied 25 pin to XLR cable and use the supplied
X-coupled ethernet cable to connect the Mainframe to
your network adapter as illustrated.
• Boot computer and Mainframe.


