


Sevcon Troubleshooting
Page 10
Electrical Troubleshooting
Test 4. KEY FAULT
TEST 4.3:
Test the voltage at the cold side (violet/black wire)
of the key switch.
If the voltage equals battery volts, then skip
ahead to test #4.4.
If the voltage does not equal battery volts,
then replace the key switch.
Stop trouble shooting here and repair the
problem. When the repair is completed,
completely retest the vehicle before lowering
the drive wheels to the ground.
TEST 4.4:
Check the wire from the cold side of the key switch
to pin #1 on the 12 pin logic card connector for
open circuits.
NOTE: Your vehicle may be equipped with a charger
interlock relay. The charger interlock relay
disables the control system when the
charger is connected to its power source.
The interlock relay contacts are in series with
the wire from the cold side of the key switch
to pin #1 on the 12 pin logic card connector.
The relay is located in the charger cabinet.
Stop trouble shooting here and repair the
problem. When the repair is completed,
completely retest the vehicle before lowering
the drive wheels to the ground.
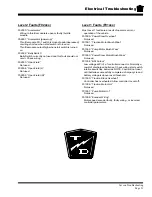
Typical Circuit Breaker
After any repairs are made, completely retest
the vehicle before lowering the drive wheels to
the ground. Failure to retest the vehicle could
result in unexpected movement of the vehicle
resulting in injury or property damage.
Stop, do not continue. Reaching this point
indicates a failure in the Sevcon power unit
or an error was made during testing. Confirm
all previous tests were performed correctly
before replacing the Sevcon power unit.
STOP
TEST 4.1:
Turn the key switch ON and place the forward and
reverse switch in the center OFF position
Perform the following tests:
Test the voltage at pin #1 on the 12 pin logic card
connector.
If the voltage equals battery volts, then skip
ahead to Test #5.
Test the voltage on both terminals of the battery
voltage positive circuit breaker (see below).
If the voltage on both terminals equals
battery volts, then skip ahead to test #4.2.
If the voltage on both terminals does not
equal battery volts, then check the circuit
breaker and wiring to the main circuit breaker
and to the batteries for open circuits.
Stop trouble shooting here and repair the
problem. When the repair is completed,
completely retest the vehicle before lowering
the drive wheels to the ground.
TEST 4.2:
Test the voltage at the hot terminal (red wire) on
the key switch.
If the voltage equals battery volts, then skip
ahead to test #4.3.
If the voltage does not equal battery volts,
then check the wiring from the key switch to
the battery voltage positive circuit breaker.
Stop trouble shooting here and repair the
problem. When the repair is completed,
completely retest the vehicle before lowering
the drive wheels to the ground.
Summary of Contents for R 380-36
Page 12: ...TAYLOR DUNN...
Page 30: ...TAYLOR DUNN...
Page 50: ...TAYLOR DUNN...
Page 64: ...Maintenance Service and Repair Steering Page 14 Exploded View of Steering Gear...
Page 90: ...TAYLOR DUNN...
Page 128: ...TAYLOR DUNN...
Page 143: ...Sevcon Troubleshooting Page 3 Electrical Troubleshooting Identifying Your Controller...
Page 162: ...TAYLOR DUNN...
Page 185: ...Wire Diagrams...
Page 190: ...Illustrated Parts Parts Page 4 Steering Linkage...
Page 192: ...Illustrated Parts Parts Page 6 Steering Gear 4 1 6 8 7 5 9 10 2 3 14 17 12 11 13 15 16...
Page 194: ...Illustrated Parts Parts Page 8 Front Suspension...
Page 196: ...Illustrated Parts Parts Page 10 Transmission primary reduction...
Page 198: ...Illustrated Parts Parts Page 12 Transmission secondary reduction Rear Axle...
Page 200: ...Illustrated Parts Parts Page 14 Rear Brakes Front Brakes optional Brake Body...
Page 202: ...Illustrated Parts Parts Page 16 Rear Suspension...
Page 204: ...Illustrated Parts Parts Page 18 Motor...
Page 206: ...Illustrated Parts Parts Page 20 Deadman Seat Brake...
Page 214: ...Illustrated Parts Parts Page 28 Wheels and Tires Ref wheel hub 1 2 5 assembly 4 3 6 7 8 9 10...
Page 218: ...Illustrated Parts Parts Page 32 Speed Control Panel R 3 80 36 1 2 4 5 6 6 7 8 3 9 10 11 12 13...
Page 220: ...Illustrated Parts Parts Page 34 Miscellaneous Electrical Miscellaneous Frame...
Page 222: ...Illustrated Parts Parts Page 36 Seat Cushions and Lights 1 2 3 4 5 6 7 8 9...
Page 230: ...Illustrated Parts Parts Page 44 Batteries 36 Volt 48 Volt...
Page 232: ...Illustrated Parts Parts Page 46 Decals Front Cowl Tray Battery Compartment...
Page 234: ...Illustrated Parts Parts Page 48 Trailer Hitch...
Page 236: ...Illustrated Parts Parts Page 50 Strobe Light Other Front End Options...
Page 238: ...Illustrated Parts Parts Page 52 Cab Cowl With Windshield Options...
Page 240: ...Illustrated Parts Parts Page 54 Optional Cab Accessories...
Page 242: ...Illustrated Parts Parts Page 56 Cab Door Options...
Page 244: ...Illustrated Parts Parts Page 58 Optional Top Cover...
Page 246: ...Illustrated Parts Parts Page 60 Rear Seat Rear Gate and Rear Deck...
Page 248: ...Illustrated Parts Parts Page 62 9 Side Panels...
Page 250: ...Illustrated Parts Parts Page 64 Front Bumper and Splash Pan...
Page 252: ...TAYLOR DUNN...


