3. Instructions for use
3.1. Before use:
3.1.1. Remove the appliance’s protective film(if
applicable).
3.1.2. Before using the product for the first time,
clean in the manner described in the cleaning sec-
tion.
3.2. Assembly
:
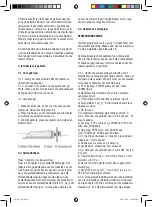
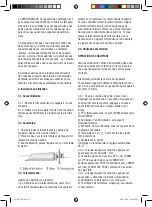
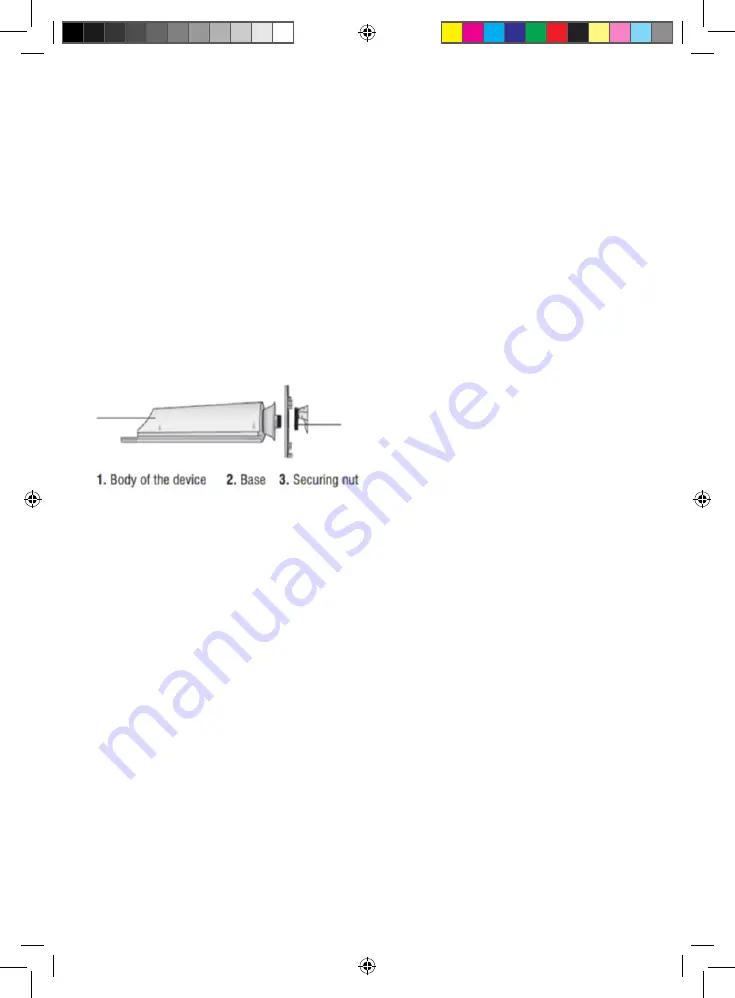
1. Open the box and take out all parts of the device.
Unscrew the securing nut.
2. Place the base on the bottom side of the device
and using the securing nut screw back in.
3. Before use place the device on an even and stable
floor.
3.3. Remote control:
1. Insert a battery (not included).
2. There are 6 buttons on the remote control. Their func-
tions iare equivalent to the functions of the touch sen-
sors on the control panel of the appliance. If you wish to
use the remote control, point the remote control at ap-
proximately the level of the control panel with the display.
The maximum signal range of the remote control is 6 m.
If you place the remote in such a way that the transmis-
sion of the signal is blocked by barrier, the signal may
not be transmitted at all.
3.4. Use and care
:
HEATER OPERATION
First connect the power cord into a power outlet with the
correct voltage. Ensure that the device is located on an even
and stable surface.
Main switch (on the back side of the device)
To turn on the device move the main switch. A sound will
be produced, which means that the device is ready for use.
3.4.1. Under the condition of Standby, it is in vain to press
any button except . Press to turn to machine, press it again
to turn off the machine. When the unit is on:
a) PTC: low power, 1200W indicator light on but 2000W light
off.
b) Oscillation: Not oscillation, and the oscillation indicator
light off.
c) Timer: No timer, all timer indicator lights off
d) Temperature: Led_H_˚C display the real room tem- pera
-
ture.
e) DC fan: on
f) Temperature setting: auto set 25˚C
3.4.2. When the unit is on, press to switch Low/Hi power.
a) Low power: PTC1 working, Led_1200W on (PTC2 not
heat, Led_2000W off )
b) High power: PCB1 working, Led_2000W on (Led_1200W
off). PCB2 begins to work 20s later
3.4.3. When the unit is on, press to switch on/off the oscil-
lation function.
a) Oscillation on: swing, Led_swing on.
b) Oscillation off: stopswing, Led-swing off.
3.4.4. When the unit is on, press SET to set time.
a) Timer function: Press n/off per 0.5s.Press and to set time
from 1h to 12h.
b) If set the time to 0h, then no time setting.
c) Press SET once, Led_H_˚C and Led_H are on, and o SET
to finish time setting.
3.4.5. Temperature setting: when the setting of the auto-
matic shutoff is completed, press the button SET again. The
display will show the standard value. Se the temperature us-
ing the touch sensors "+" and "-" in the range 15–35 °C.
Each time 25°C and now you can set the temperature you
press the buttons "+" or "-" the temperature will increase or
decrease by 1°C. At the same time, the set temperature will
be displayed on the display. By pressing the touch sensor
SET you will confirm your selection. The device will switch
to the mode displaying.
3.4.6. The temperature in the room and will automatically
maintain the set temperature by turning the heating elements
on and off.
3.4.7.
Note
: If you touch the sensor SET, the control light will
flash for a time of 5 seconds. If you do not press any button
within 5 seconds or you press a button other than SET, "+"
or "-", then the LED display will display the temperature in
the room. When the temperature in the room is lower than
-9°C, the display will show "LO" (low temperature). When the
temperature in the room is higher than +39 °C, the display
will show "HI" (high temperature). When the temperature is
in the range -9–39°C, then the display will show the actual
temperature in the room.
3.5. Safety features:
3.5.1. Overheat protection
The overheat function will automatically switch the appli-
ance off when it overheats.
947871_IM.indd 4
2017/12/05 1:40:56 PM


