1.
2.
3.
4.
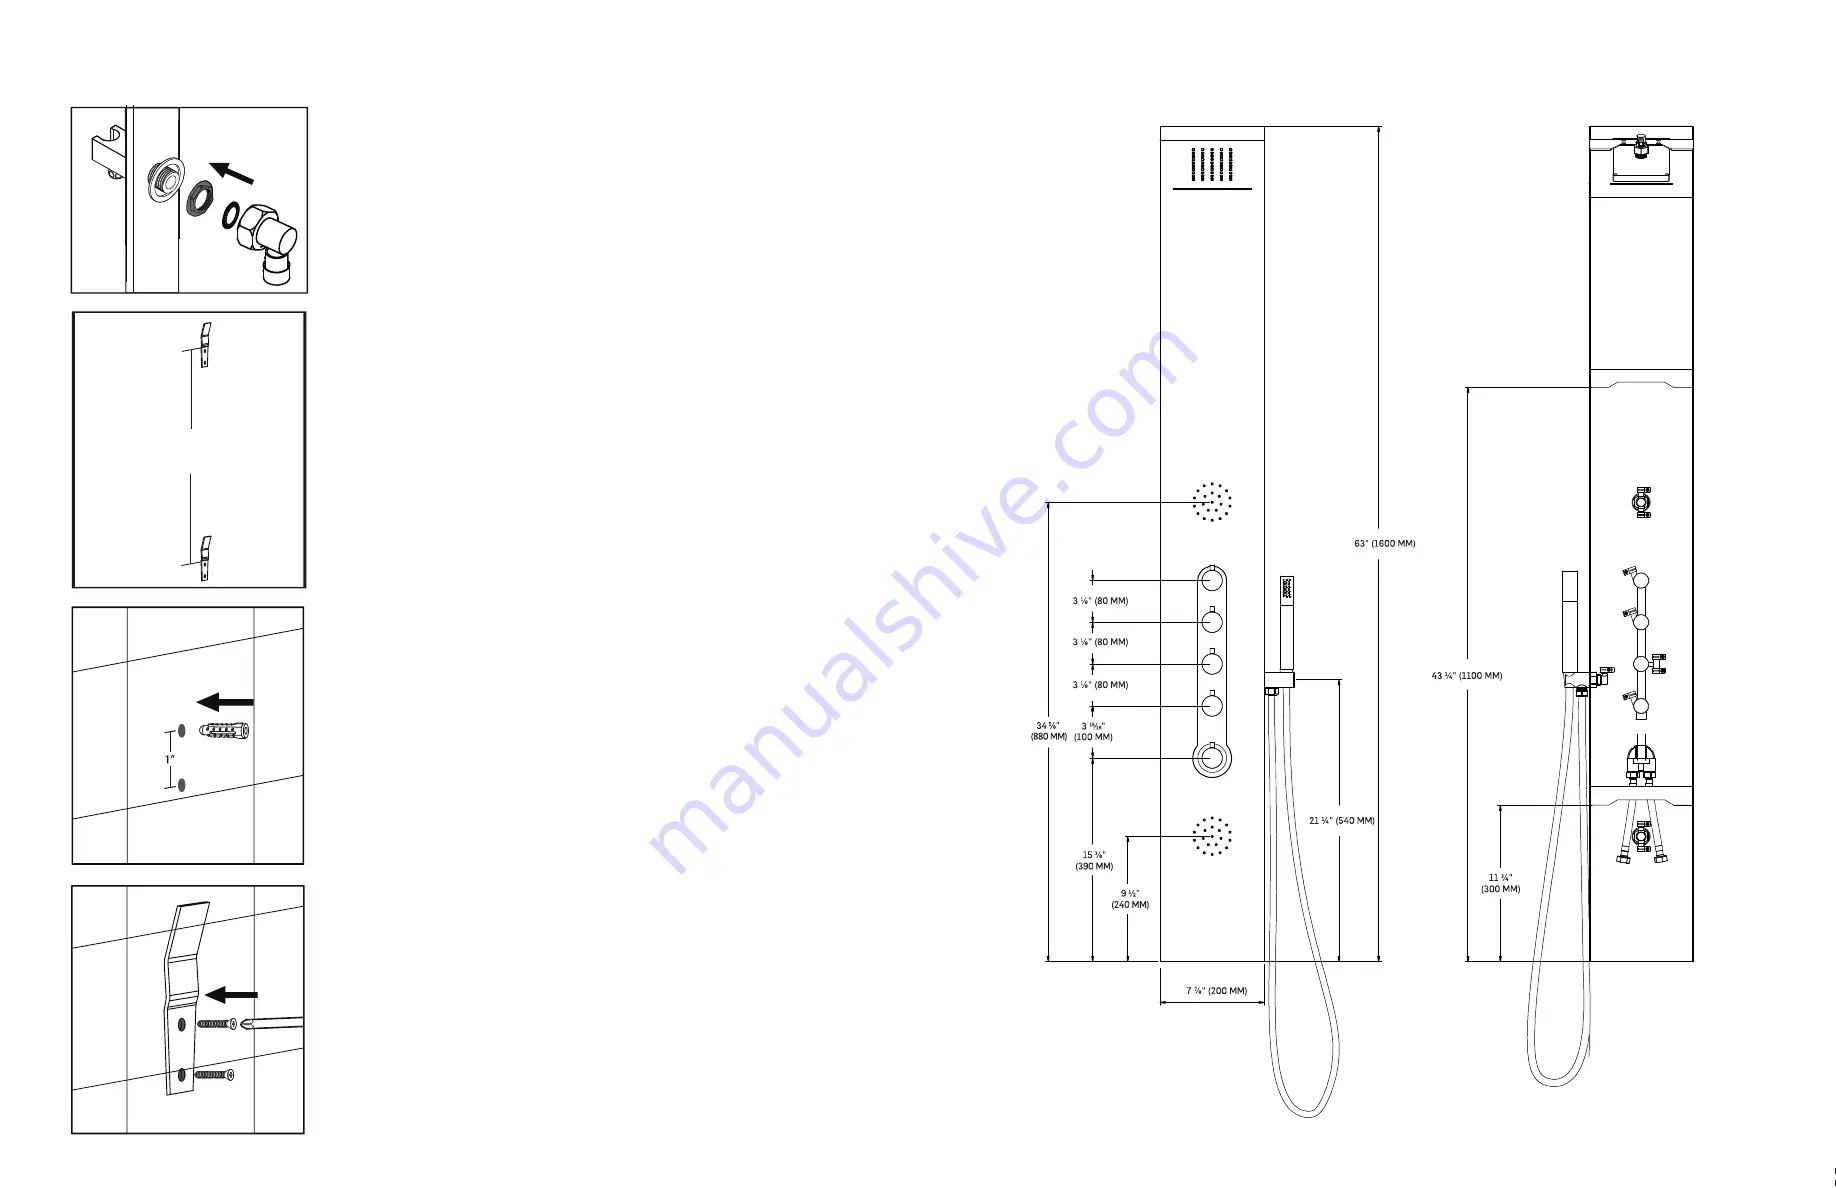
Install hand shower connector and attach PVC tubing to complete the connection.
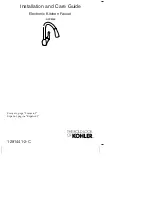
Lift the panel to determine the proper height and placement.
(NOTE: It is recommended to aim the top horizontal body jet to the chest area for optimal
showering experience.)
Mark the position of the 2 brackets on the wall and set the panel aside.
(NOTE: The distance between the two brackets should be 31 ½
"
or 800 mm.)
Using a drill with a tile bit, drill the hole slowly into the tile. Do not drill into any piping
or wiring in the wall. Insert the anchors into the wall.
(NOTE: Before installing the brackets, use a small piece of painters tape or masking tape over
the drill area to prevent damages to the tile.)
Secure the mounting brackets to the wall with the screws.
INSTALLATION
Posez le raccord pour la douchette à main et y joignez-y le tube en PVC pour achever
la procédure de raccordement.
Soulevez la colonne pour déterminer la hauteur et le positionnement voulus.
(REMARQUE : On recommande de positionner le jet de corps horizontal du haut vers
le torse pour une expérience de douche optimale.)
Marquez l’emplacement des deux supports sur le mur et laissez la colonne de côté.
(REMARQUE : La distance entre les deux supports devrait être de 31 ½ po ou 800 mm.)
Percez doucement un trou dans la céramique à l’aide d’une perceuse munie d’une mèche
à céramique. Ne percez pas dans un tuyau ou un câble dans le mur. Insérez les ancrages
dans le mur.
(REMARQUE : Avant de poser les supports, collez un bout de ruban de peintre ou de ruban
masque à l’endroit où les trous sont percés pour éviter d’endommager la céramique.)
Fixez les supports de fixation au mur à l’aide des vis.
6
3
31 ½"
800 mm


