


– 11 –
ENGLISH
The deck starts recording when the input
audio exceeds a certain level and pauses
when the input audio has dropped below a
certain level continuously for 4 seconds or
more.
1. Perform steps 1-6 of "Recording an MD"
on page 8.
2. Press the [SYNC RECORD] button on the
remote control unit. The deck enters the
Sync Record-Ready mode.
("
" and "
" light up.)
…
The remaining recording time appears
after "S_SYNC ON" is displayed.
3. Start playing the source component.
…
The deck starts sync recording upon
detection of the input audio signal.
It pauses when the input audio level
drops below a certain level.
…
You cannot start recording manually
by pressing the [
¥
PLAY] button or
[
π
READY] button in the Sync Record-
Ready mode.
…
Press the [SYNC RECORD] button again
to cancel sync recording. After "S_SYNC
OFF" is displayed, the remaining
recording time appears.
Notes:
…
Pressing the [
π
READY] button during
sync recording aborts the Sync Record
operation.
…
Changing the input or mode with the
[INPUT SELECTOR] or [REC MODE]
switch during sync recording aborts the
Sync Record operation.
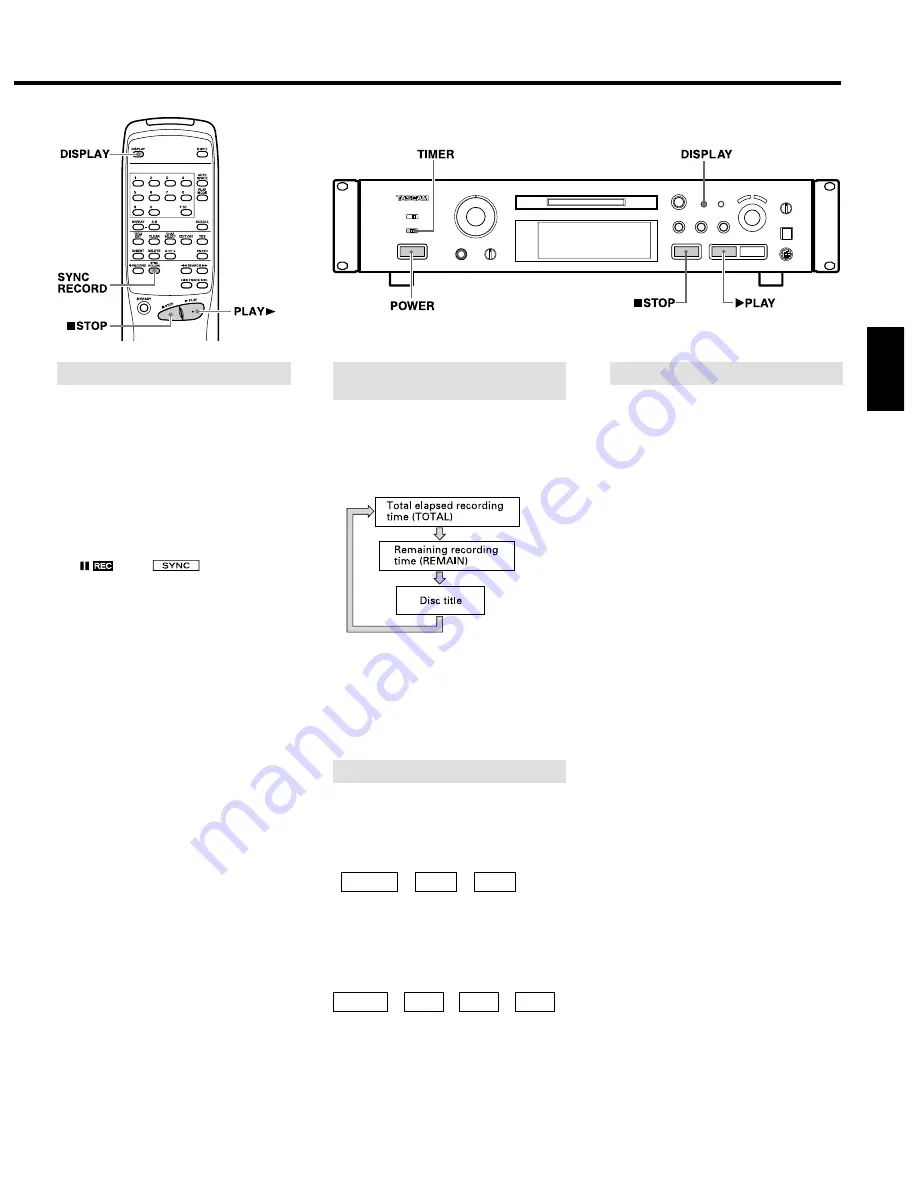
Sync Recording
With each press of the [DISPLAY] button,
the display changes as follows:
In the Stop /Record mode:
…
The remaining recording time (REMAIN)
is only displayed in the Record-Ready
mode.
…
The disc title can be displayed only when
it has been recorded onto the MD.
ª
Press the [
¥
PLAY] button immediately
after stopping recording.
The track which has just been recorded will
be played from the beginning.
∑
∑
ª
To play from the first track of the MD
after recording:
Press the [
ª
STOP] button again
immediately after stopping recording then
press the [
¥
PLAY] button.
∑
∑
∑
¥
PLAY
ª
STOP
ª
STOP
Recording
¥
PLAY
ª
STOP
Recording
Checking the Recorded Tracks
Checking the Remaining MD
Recording Time
By connecting this deck with a timer
(commercially available), you can start and
stop recording operations at a preset time.
1. Perform steps 1 to 6 of "Recording an
MD" on page 8.
2. Set the [TIMER] switch to [REC].
3. Set the [TIMER] so that it starts and stops
power supply at the desired start time
and end time.
…
As the actual recording starts after the
"TOC Reading" operation, set the timer
recording start time to slightly before the
time when you want to start recording.
…
Each component power is turned off.
…
When the start time comes, power is
supplied to the components and
recording starts.
[CAUTION]
…
When timer recording is performed in
the "SHUFFLE" mode or "PROGRAM"
mode, the deck automatically enters the
"CONTINUE" mode.
…
Be sure to turn the deck on again and
eject the MD within 3 or 4 days of timer
recording. When the MD is ejected, the
recorded contents will be written on the
MD. If the deck is left off for a long time
after the timer recording has finished,
the contents may disappear.
…
During timer recording, recording starts
from the end of the previously-recorded
portion on the MD.
…
Set the [TIMER] switch to [OFF] after
timer recording. If the timer is left in
[REC], the deck will automatically start
recording the next time the power is
turned on.
Timer Recording
Buttons used on this page