


TASCAM CD-500/500B
19
Use the unit’s menu system to make various settings.
Among the menu setting items are some that can also be
set using dedicated buttons on the remote control.
Menu structure
The menu structure of the unit includes the following
items.
Menu
number
Item
Function set
Reference
01
Origin
Original key
Page 27
02
EJECT
Eject block
Page 21
03
A-CUE
Auto-cue level
Page 24
04
Prog
Program
Page 27
05
FADE
Fade in/out playback
Page 29
06
RELAY
Relay playback
Page 30
07
P onPL
Power on play
Page 26
08
Mono
Mono output
Page 32
09
RESUM
Resume
Page 24
10
EOM
EOM (TRACK EOM) time
display
Page 31
11
Inc-P
Incremental play
Page 25
12
P-STEP
Pitch control steps
Page 27
13
232C
Baud rate
Page 33
14
S-BAC
Skip back
Page 29
15
IR
Remote control reception
Page 17
16
INTVAL
Silent interval between
tracks
Page 31
17
FRAM
Frame time display
Page 31
18
REMOT
Foot switch mode
Page 32
19
FLASH
Flash start
Page 29
20
RESET
Restore unit to factory
defaults
Page 33
21
INFO
View the firmware version
Page 33
22
U-DATA
User data settings (AES/
EBU, CD-500B only)
Page 34
23
PARALL
Set the parallel function
(CD-500B only)
Page 34
Menu operation basics
The basic procedures for making settings using the menu
system are as follows.
1 When the display shows the usual playback
information, activate the menu mode in which you
can select menu items by using the unit’s front
panel buttons or the included TASCAM RC-500
remote control.
When using the front panel buttons:
•
In shift mode
(when the
SHIFT
indicator is lit), press the
PITCH
[MENU]
knob.
When using the remote control:
•
Press the
MENU
button.
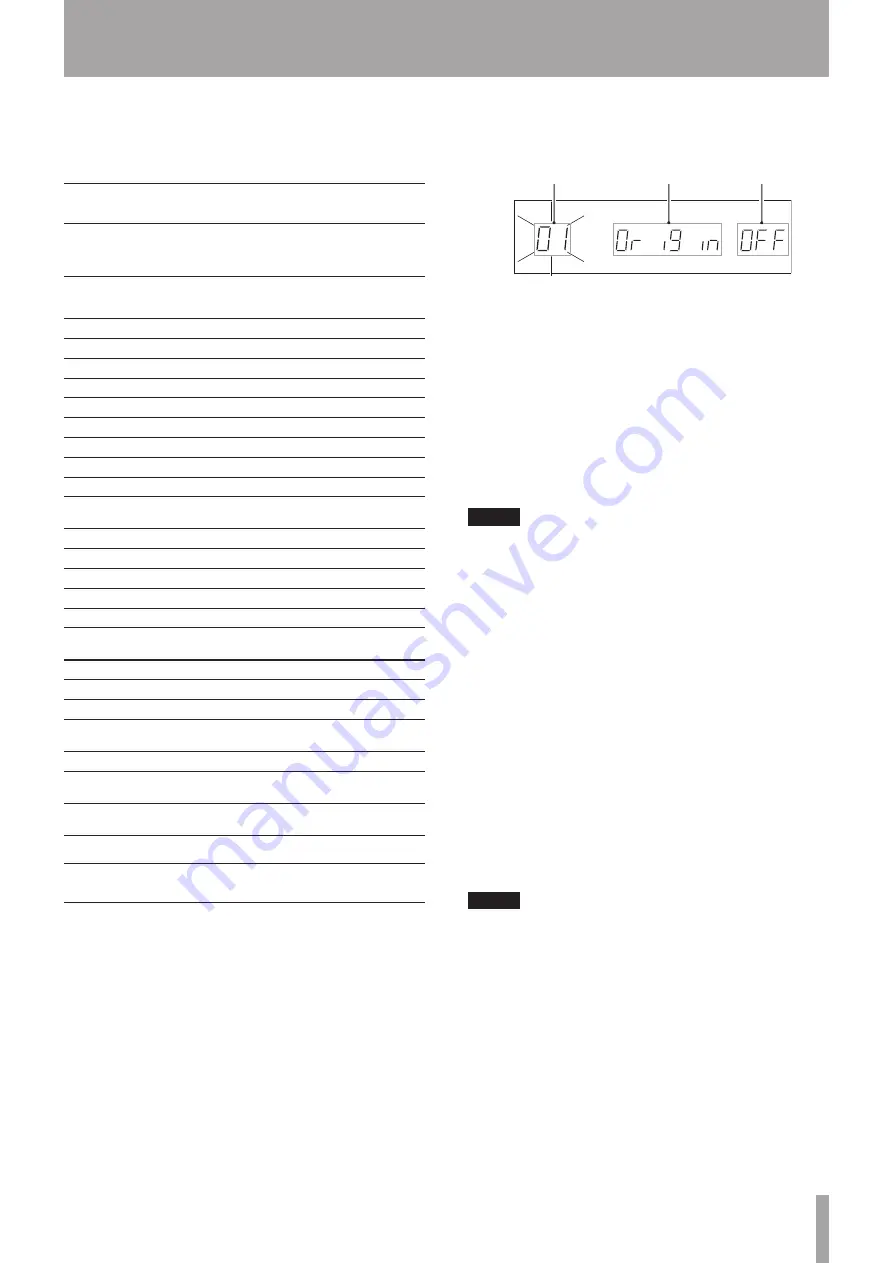
The center area of the display shows the menu item
selected. The menu item that was selected the last
time that the unit was in menu mode appears.
Menu item number Menu item name
Setting
2 Use the unit’s front panel buttons or the remote
control to conduct the following operation to select
the desired menu item.
When using the front panel buttons:
•
Turn the
PITCH [MENU]
knob or use the number buttons to
select the menu item, and press the
PITCH [MENU]
knob to confirm.
When using the remote control:
•
Use the
PREV
and
NEXT
buttons, as well as the number buttons to
select the menu item, and press the
ENTER
button
to confirm.
NOTE
The menu item number blinks before it has been
•
confirmed.
When using the number buttons input two digits
•
to select menu items. For example, to select menu
number
06
, press the
0
button followed by the
6
button.
The following step (3) applies to all items except
04
PROG
,
19 FLASH
,
20 RESET
and
21 INFO
. See
their explanations for instructions about how to use
these items.
3 Select the desired value.
When using the front panel buttons:
•
Turn the
PITCH [MENU]
knob to select the value and press
the
PITCH [MENU]
knob to confirm the setting.
When using the remote control:
•
Use the
PREV
and
NEXT
buttons to select the value and press the
ENTER
button to confirm the setting.
NOTE
When a value different from the active setting is
•
selected, the value blinks. After the new setting is
confirmed, menu mode ends and the display shows
the usual playback information again.
To quit menu mode without changing a setting, press
•
the
SHIFT
button or
DISPLAY [LOCK]
button on the
front panel of the unit, or press the
MENU
button on
the remote control.
4 – Menu


