59
6
-
6
-
1
Ethernet
(1) TCP/IP
This is to use a fixed IP in the Local Area Network environment.
①
Select
{Ethernet}
in
{Menu}
{Setup}
{Network}
.
②
Select {TCP/IP}.
③
Save after filling in IP Address, Subnet Mask, Default Gateway, Primary DNS, and Secondary DNS.
6
-
6
-
2
DDNS
As part of the DNS system, the Dynamic Domain Name System
(DDNS)
service updates IP addresses of the
host name in the real time and allocates fixed domain names to systems linked to dynamic IP addresses to allow
users to use the same DNS name regardless of the change of in the IP address.
It provides dynamic DNS to ensure URL access in the dynamic IP environment.
User can monitor the remote place thru internet with web server functions which is equipped in DVR.
①
Select On/Off of DDNS or a domain name to use by using arrow keys and the selection button.
②
In case of DDNS On, enter the host name and save it then, the registration procedure of the host
name proceeds automatically. You can enter the host name with 4-20 letters.
③
The host name to enter must not be pre-
registered in DDNS sever. Otherwise it won’t work.
④
The basic host name is the MAC address of appertaining DVR.
⑤
In case the host name have entered starts with “000c28”, none of MAC address will work exceptin
g for appertaining DVR’s.
⑥
In case of DynDNS On, enter the host name, user name registered in DynDNS and password then,
save them.
※
Access to DynDDNS sever(http://www.dyndns.org) and apply for the user account then,
register the domain name to use and enter URL.
※
For more information, please access to the site.
6
-
6
-
3
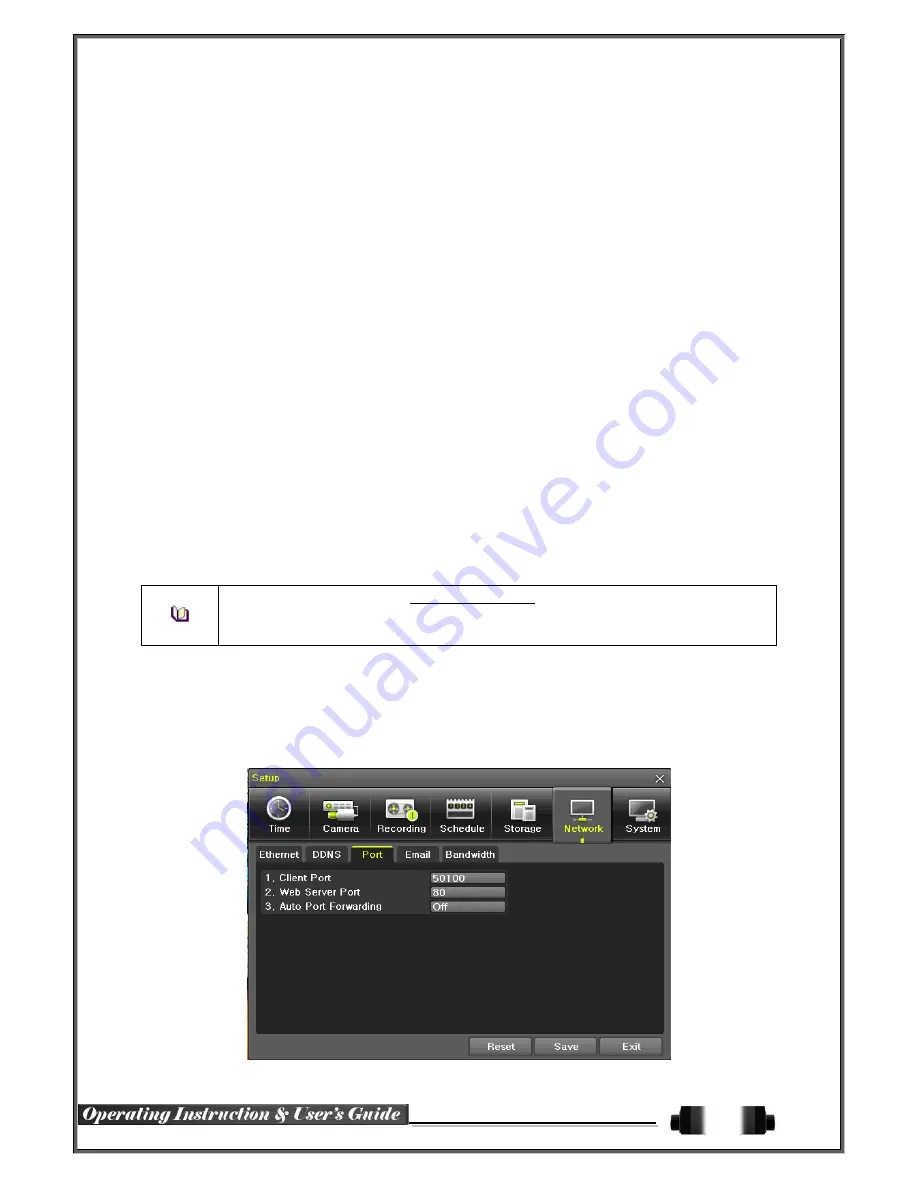
Port
Move to
{Menu}
{Setup}
{Network}
{Port}
.
This feature is used to set the network port.
The default value is 50100; a randomly chosen value can be used depending on the network environment. The
Web Server Port is used to connect the DVR remote monitoring. The Web Port Default is 80, but can be set
between 2000 ~ 65527.
[Figure 6-50. Network Port Window]


