HTTP://GLOBAL.TALKSWITCH.COM
7
CONFIGURE TALKSWITCH TO MAKE AND MANAGE VoIP CALLS
STEP 1 — CONFIGURE TALKSWITCH IP ADDRESSES
Each TalkSwitch system in a multi-location network must be configured with both
local IP and public IP address information. These addresses are used to direct VoIP
calls to the appropriate location. Each TalkSwitch unit in a system will have a
different local IP address, and share a common public IP address.
Set the TalkSwitch local IP address
The following steps describe how to set the local IP address(es) of a TalkSwitch
system:
1.
Open the TalkSwitch configuration software by double-clicking the
TalkSwitch
icon on your Desktop or, from the Windows
Start
menu, select
Programs
, the
TalkSwitch
folder, and click
TalkSwitch
.
2.
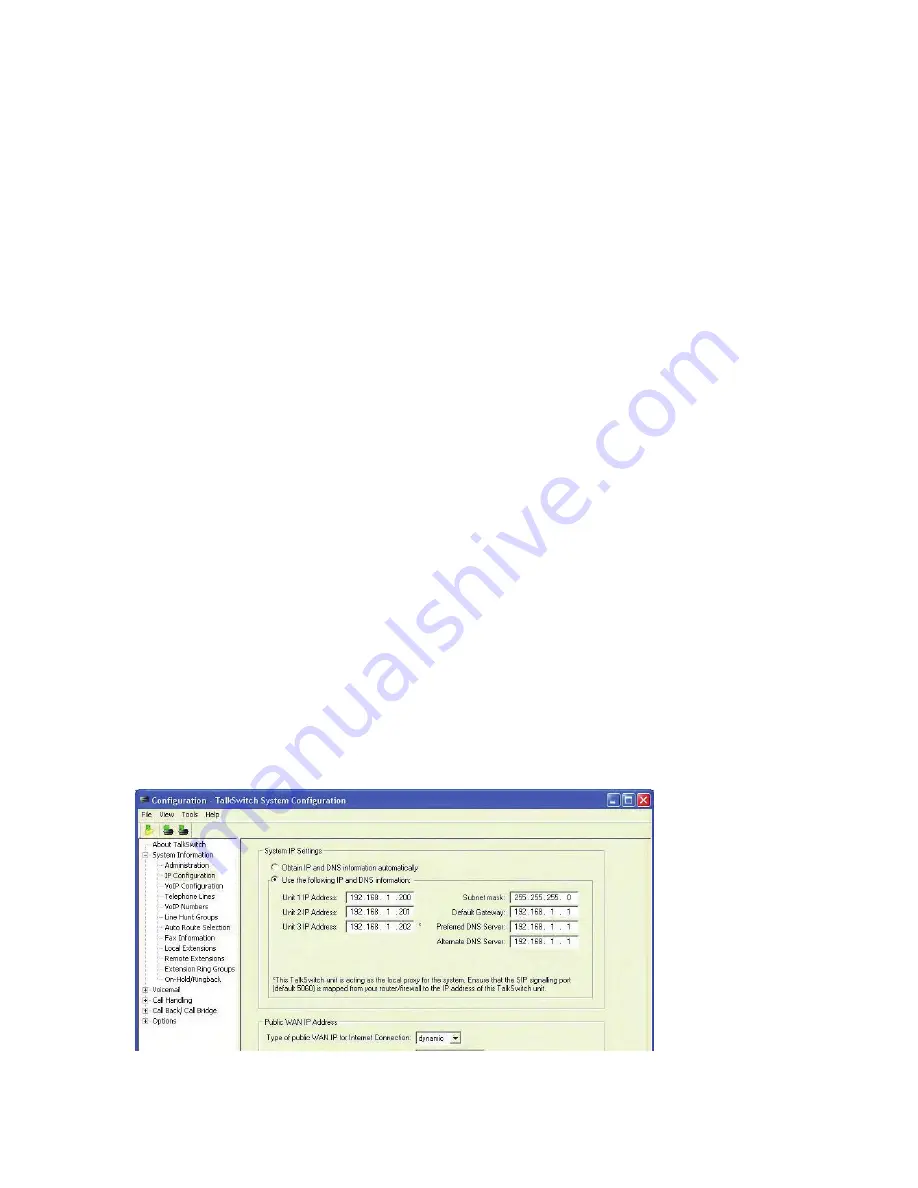
In the
TalkSwitch System Configuration
window, select
System Information
->
IP Configuration
from the menu at the left.
3.
TalkSwitch is factory configured to use DHCP (Dynamic Host Configuration
Protocol) to automatically obtain its System IP Settings. If the location has a
DHCP server, which is typically a function of the router, the fields on the
screen will automatically be filled in with the correct IP information. Click
Use the following IP and DNS information
to
‘lock in’ these settings and ensure
they are saved as the system IP settings.
4.
If the location does not have a DHCP server, the
System IP Settings
fields will
not be filled in. Click
Use the following IP and DNS information
and enter the
IP address(es)
,
Subnet mask
,
Default Gateway
,
Preferred DNS Server
, and
Alternate DNS Server
information in the appropriate fields. For details on
these settings, refer to the
TalkSwitch User Guide
.
5.
If there are multiple units in a system, enter the IP addresses of all units in
the system (Unit 2 IP Address, Unit 3 IP Address, Unit 4 IP Address).


