Page 13 of 15
Tapered Product Carriage:
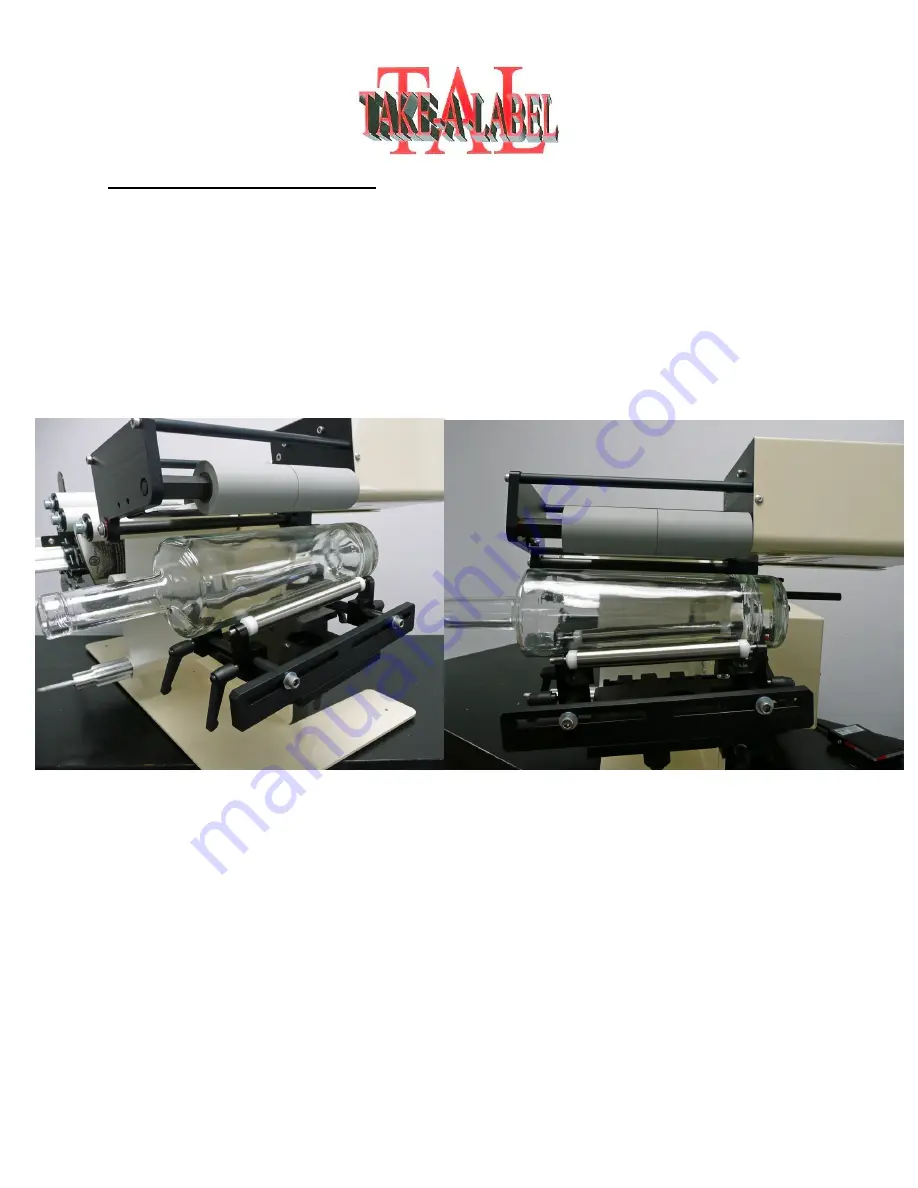
The Tapered Product Carriage is designed to assist in the application of labels to tapered bottles.
For the tapered carriage to work properly the label must be crescent or arched in shape and match the
taper/angle of the bottle.
1.
Teach photo eye and set Label Advance per instructions on page 3 and 4.
2.
First space two bottle support rollers to support tapered bottle
3.
Tilt the carriage so when the drive head is lowered it hits the top of the bottle flush. The full
length of the rubber product drive roller should hit even and flat across the top of the bottle.
4.
Using the adjustment screws (A) in the back of the carriage set the stops for the rotation of the
carriage. With the carriage fully rotated and bottomed out against the stop the bottle should
match the taper on the edge of the bottle. Once the desired locations are found, use the set screws
(B) in the rear of the adjustment blocks to snug onto the threads of the bolt. DO NOT overtighten
the set screw as damage can be done to the threads on the bolt.


