Taiden HCS-8600 Series Manual Download Page 14

4.4.2 Operation of speaking area 

The speaking area, on the right side of the unit, is the 

area which is used to distribute the interpretation 

languages to the corresponding channels. It includes 

functional buttons and channel selectors, etc. 

1. Press the microphone ON/OFF button, and distribute

the interpretation language to the output channel.

At most 6 interpreter units can be set in one booth for

6 interpreters. Only one microphone can be activated

in one booth. When one microphone in the booth is

activated, the loudspeaker of every interpreter unit in

the booth will mute.

2. Output channel select:

Use the “A”, “B” or “C” button to switch the output

channel quickly. If the auto relay interpretation is

activated and the output channel B/C  activated,

the output will be automatically distributed to all

booths which set this booth as their auto relay

booth  and other interpreters can now do relay

interpretation.

If selected “Allow switching output channel when

microphone is active”  by application software

(Control  –  Booth Manage. –  Param. Setup),

interpreter can switch output channel freely, or else,

he/she can only switch output channel when

microphone is turn off;

Both  the  “A”,  “B”  and “C” buttons have an

ENGAGED indicating light  each. If the selected

output channel is already engaged by another

interpreter unit, this indicating light will be

activated

ENGAGE indicating light of its own will be on when

the microphone is active.

3. Press and hold the “MUTE” button to close the

microphone temporarily and the Mute indicating light

will be turned on.  Releasing the button will activate

the microphone automatically.

4. The “MESSAGE”

) button is used to check short

message.

5. Intercom button: if output channel C is “No Output”,

and  If  selected  “Allow Call”  by application software

(Control  –  Booth Manage. –  Param. Setup),  press

and hold C button to call the operator (PTT mode).

6.

“HELP”  button:  If  selected  “Allow Help”  by

application software  (Control  –  Booth Manage. –

Param. Setup), used by the interpreter requesting


for

help. Help information will be displayed on the status

bar of the application software; at the same time,

“Booth:  xx  asks for help”  will be displayed on the

LCD of operator unit.
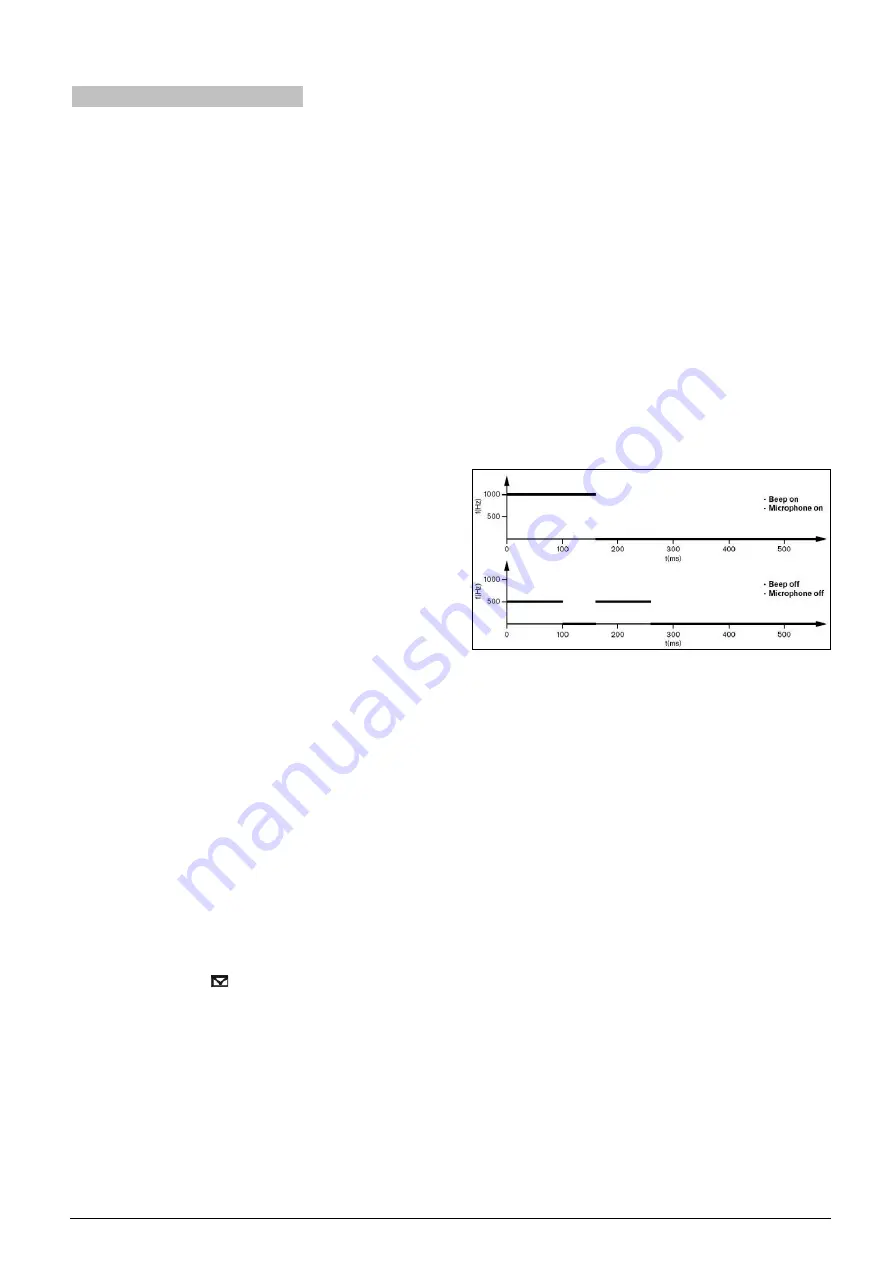
7. Beeps

The audio beeps can be toggled on and off with the

Beep  button.  If  this function  is enabled,  the display

shows a musical note, the audio beeps can also be

toggled on and off with the Mic. ON/OFF button. When

beeps are enabled, the interpreter unit plays  a beep

when the channel that you selected contains  an

indirect interpretation of the floor language.

14


Summary of Contents for HCS-8600 Series

Page 1: ...100 system and c if the output channel is recording In addition the signal level of the input channel can be displayed in real time Multi input output language channels which can be preset with corres...

Page 2: ...4 1 Functions and indications Front Side Bottom Figure 4 1 HCS 8685 Interpreter unit 2...

Page 3: ...annel 1 turn the function knob to select the interpretation channel When the Output channel B C switch button B C was pressed push the function knob to go to channel 1 turn the function knob to select...

Page 4: ...repeat time by application software Control Booth Manage Param Setup push the REP button to playback input channel audio Push the REP button again to cancel playback 16 Video button Reserved 20 Beep...

Page 5: ...45S converter cable the other end of the Cat5e cable is connected to the 8P DIN male connector of the interpreter unit via the CBL8S2RJ45S converter cable Figure 4 4 HCS 8685 Interpreter unit connecte...

Page 6: ...lowing figure Functions and indications 1 Left stereo channel signal 2 Right stereo channel signal 3 Power ground Shield 4 2 4 External microphone An external headset can be connected to the TRRS jack...

Page 7: ...pretation is needed the interpreter can select a language by the monitor channel shortcut switch button 1 2 3 4 5 6 7 and the Primary knob Due to the fact that the output language of each booth is arr...

Page 8: ...Figure 4 7 Direct interpretation Figure 4 8 Relay interpretation Figure 4 9 Schematic diagram of the connection of interpreter units 8...

Page 9: ...tion of the interpreter unit If unit not installed press the function knob to enter the setting menu Press the return button to activate the LCD menu if no operation in 5 s menu exits and if press any...

Page 10: ...button to return Select booth number Setup the interpreter unit with the number of the booth within which the interpreter unit is located according to the configuration in the CMU 1 Select the booth n...

Page 11: ...Blue 11...

Page 12: ...C is set as None the output channel B is used to output a non conventional language Output channel B can be setup as None or All from the CMU menu configuration If the output channel B is set as All t...

Page 13: ...language with the Monitor channel switch button 1 2 3 4 5 6 7 If the channel language is not preset he she can select the channel language by pressing the button 1 2 3 4 5 6 7 and turning the Functio...

Page 14: ...Both the A B and C buttons have an ENGAGED indicating light each If the selected output channel is already engaged by another interpreter unit this indicating light will be activated ENGAGE indicating...

Reviews: