MICO-PS-3P
64
In addition, check the cable connection. If the pins are damaged, contact your dealer for a
replacement connector.
Windows 95/98/Me/NT/2000/XP/2003 Troubleshooting
Multi-Segment LAN Environment Installation (through the Network Print Port)
If your print server and Windows 95/98/Me/NT/2000/XP/2003 are located on two different
segments, and your Windows NT server is used as the router/gateway you will need to
implement the following procedures in order for your print server to function properly:
Add the RIP for NWLink IPX/SPX compatible transport. See
RIP for NWLink IPX/SPX
compatible transport Installation Procedure
later in this section.
Add the frame type 802.2 for both Ethernet adapters. See
Multi-Segment Frame Type
802.2 Installation
later in this section.
RIP for NWLink IPX/SPX compatible transport Installation Procedure
1. From your Windows NT server that is used as a router, select
Start
from the bottom left
hand corner of the screen.
2. Select
Settings
.
3. Select
Control Panel
.
4. Double-click
the
Network
icon.
5. Select
Services
.
6. Select
Add
.
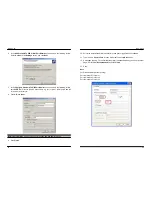
7. In the Select Network Service box, select the
RIP for NWLink IPX/SPX compatible
transport
. Click
OK
.
8. Follows the directions on the screen.
9. Done.
Multi-Segment Frame Type 802.2 Installation
1. From your Windows NT server that is used as a router, select
Start
from the bottom left
hand corner of the screen.
2. Point
to
Settings
, and select
Control Panel
.
3. Double-click
the
Network
icon.
4. Select
Protocols
.Select the
NWLink IPX/SPX Compatible Transport
.
5. Select
Properties
.
6. Select your (first) network interface card and select
Manual Frame Type Detection
.
7. Click
Add
.
8. In
the
Frame Type
field, select
Ethernet 802.2
.
9. In
the
Network Number
field, type in an unique 8-digit hexadecimal network number.
For example: 12345ABC.
10. Select
Add
.
11. Repeat the Steps 8-12 for the other Ethernet adapter.
12.
Restart the computer
.
13. Done.
MICO-PS-3P
65
Moving the MICO-PS-3P to A New Segment
If the print server is moved from one network segment to another after the initial installation,
through the Network Print Port, the print server must be reconfigured on the original Windows
NT server or on each Windows 95/98 computer using this print server in order for the print
server’s driver on each computer to re-establish a new connection.
MICO-PS-3P Reconfiguration Procedure on Windows 95/98/Me
1. Click
Start
on the bottom left hand corner of the screen.
2. Select
Settings
and select
Printers
.
3. Select your printer connected to the print server and right-click the printer icon. Select
Properties
.
4. Click
Details
tab.
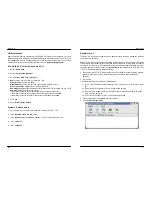
5. Click
Port Settings
as shown in the picture below. The print server will be displayed on
the next print server’s configuration screen.
Find your original print server according to its Port Name or other distinguished name and
click this print server.
6. Click
OK
and it returns to the printer’s Properties page.
7. Click
OK
.
8. Done.
Print server Reconfiguration Procedure on Windows NT
1. Click
Start
on the bottom left hand corner of the screen.
2. Select
Settings
and select
Printers
.
3. Select your printer connected to the print server, and right-click the printer icon. Select
Properties
.
4. Click
Ports
tab.
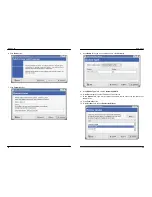
5. Click
Configure Port
. The print server will be shown on the next screen.
6. Find your original print server according to its Port Name or other distinguished name
and click this print server.
7. Click
OK
and it returns to the printer’s Properties page.
8. Click
OK
.
9. Done.

