


TAC Xenta® 511 and 911 Handbook
2 TAC Xenta 511
TAC AB, Feb 2005
15 (42)
0-004-7870-2 (EN)
2
C1
and
C2
(LonWorks connection, not used by Web Browser):
standard unshielded (UTP) or shielded (STP) twisted pair cable.
3
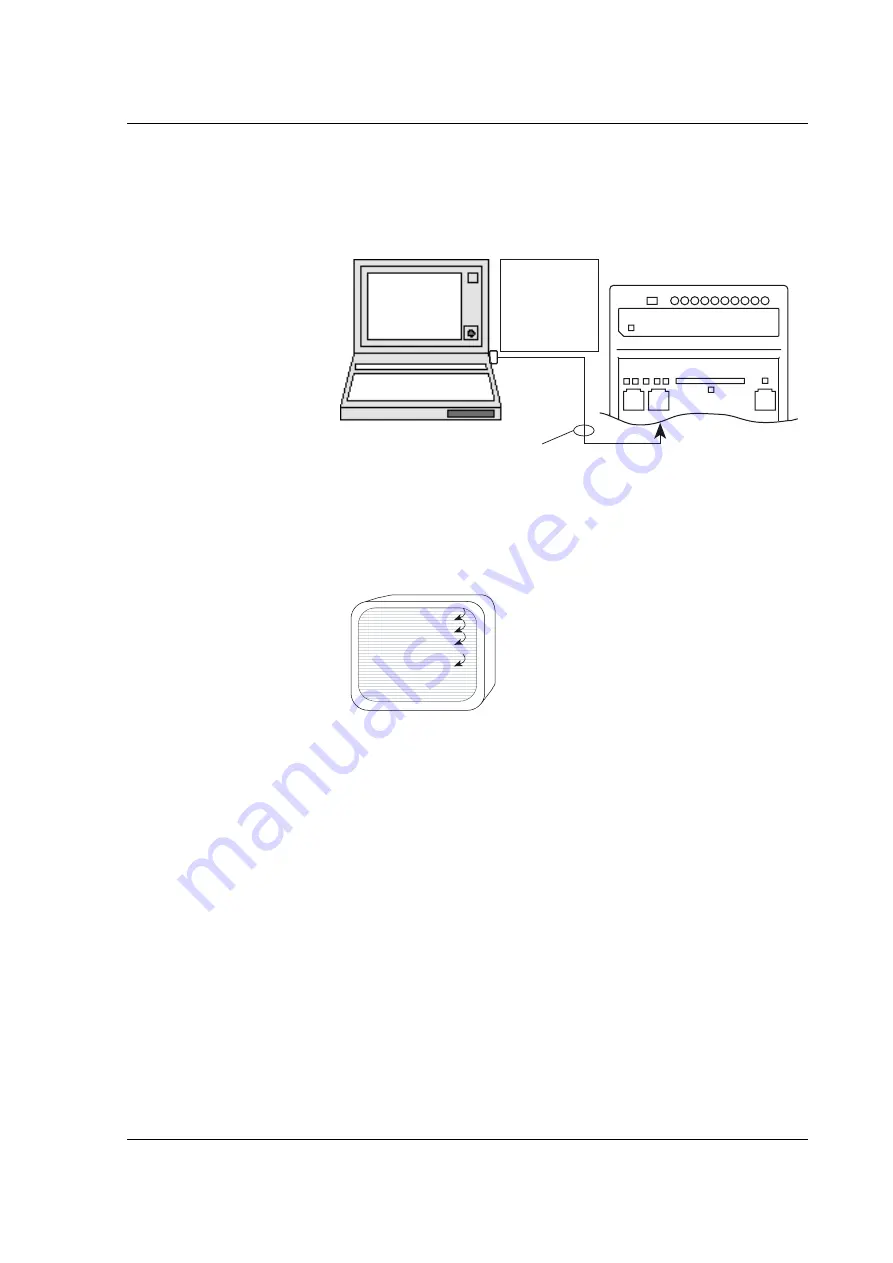
Connect a serial cable between the PC and the Xenta 511
RS232B
.
4
Start a terminal emulator such as the Windows Hyperterminal.
2.3.3
Assigning an IP Address to the Xenta 511
1
Enter
user name
and
password
.
2
Type
setip
(see “Setting List for Configuration” on previous page)
and then answer the DHCP enable question:
-
no
if you are using a fixed IP address. Continue with step 3a).
-
yes
if you are using dynamic IP addressing. Continue with step
3b).
3
a) Enter the IP items from the Setting List:
•
IP address
•
Subnet mask
b) Enter the remaining items from the Setting List:
•
Default Gateway
•
DNS
•
Web site name
Fig. 2.3: Connecting a Hyperterminal to TAC Xenta 511
A RS232 B
10Base-T
9600 bps
8 data bits
no parity
1 stop bit
no flow control
TAC Xenta Programming Serial Kit, part no. 0-073-0920
Fig. 2.4: Assigning the IP address using the Hyperterminal
username:root
password:root
dsh/>setip
DHCP enable
(yes/no) no
.
.
dsh/>restart
Summary of Contents for Xenta 511
Page 1: ...TAC Xenta TAC Xenta 511 and 911 Handbook...
Page 2: ......
Page 3: ...TAC Xenta TAC Xenta 511 and 911 Handbook...
Page 7: ...INTRODUCTION 1 Introduction...
Page 8: ......
Page 11: ...REFERENCE 2 TAC Xenta 511 3 TAC Xenta 911...
Page 12: ......