


33
Safety notes
All components used in this device satisfy the current German and European
safety norms and standards.
Careful quality testing of all materials, painstaking assembly by highly qualified
staff and a fully automatic computer-controlled final quality control proced.
For your own safety please be sure to read right through these operating
instructions. It is especially important to observe the information regarding
setting up and operating the equipment, and the safety notes.
Installation
The turntable should be set up in such a way that none of the electrical
connections can be touched, especially by children. Be sure to heed the
information included in the section
'
Setting up and wiring
'
.
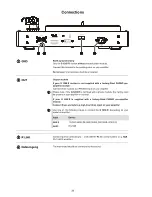
Power supply
The power supply required for this machine is printed on the mains supply
socket. The unit must never be connected to a power supply which does not
meet this specification. If the turntable is not to be used for a long period,
disconnect it from the mains supply at the wall socket.
Mains leads / Mains plug
Mains cables must be deployed in such a way that there is no risk of people
tripping over them, or of damage caused by furniture. Particular care is required
with connectors, distribution panels and the turntable’s sockets and other
connections.
Unplugging the mains plug will disconnect the device from the mains for service
and repair. Please make sure that the mains plug is easily accessible.
Enclosure openings
Liquid or foreign bodies must never be allowed to get inside the case through
the vent slots. Mains voltage is present inside the unit, and there is a risk of
lethal electric shock. Do not exert undue force on the mains connectors.
Protect the turntable from drips and splashes of water. Never place flower
vases or other liquid-filled containers on the unit.
Supervision of device
operation
As with all electrical equipment, this device should never be used without
proper supervision. Ensure that it is out of the reach of small children.
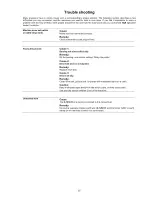
Service, Damage
The unit should only ever be opened by a qualified specialist technician.
Repairs and fuse replacements should be entrusted to an authorised
specialist workshop. With the exception of the connections and procedures
described in these instructions, no work of any kind may be carried out on the
turntable by unqualified persons.
If the unit is damaged, or if you suspect that it is not functioning correctly,
immediately disconnect the mains plug at the wall socket, and ask an
authorised
specialist workshop to check it.
Over voltage
The unit may be damaged by excess voltage in the power supply, the cable
network or in aerial systems, as may occur during thunderstorms (lightning
strikes) or due to static discharges.
Special power supply units and excess voltage protectors such as the
'Power Bar'
mains distribution panel offer some degree of protection from
damage to equipment due to the hazards described above.
However, if you require absolute security from damage due to excess voltage,
the only solution is to disconnect the unit from the mains power supply and any
aerial systems.
If you believe there is a danger of voltage spikes (e. g. when an electrical storm
is building up) disconnect all your Hi-Fi system components from the mains and
the aerial sockets.
All mains power supply and aerial systems to which the unit is connected must
satisfy the currently valid regulations, and must be installed by an approved
electrical installer.
Many insurance companies offer lightning damage insurance for electrical
equipment as part of their household insurance service.
Summary of Contents for G 1260 R
Page 1: ...V 1 0 Bestellnr Order No 9103 0425 DE UK BETRIEBSANLEITUNG USER MANUAL G 1260 R...
Page 2: ...2...
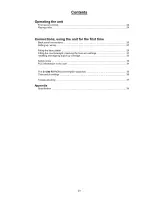
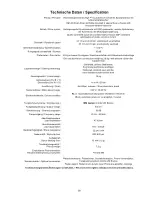
Page 3: ...3 Seite Page Deutsch 4 English 22 Anhang Appendix Technische Daten Technical specifications 39...
Page 20: ...20...
Page 21: ...21 English...
Page 38: ...38...
Page 40: ...elektroakustik GmbH Co KG Herford Deutschland Germany...


