background image

3.4

Storage

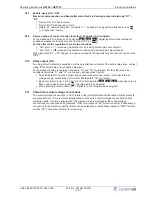
The device must be stored in its original packaging in a dry and weather-proof room.

Avoid exposure to extreme heat and cold.

Avoid over-long storage periods (we recommend a maximum of one year).

3.5

Disposal / recycling

Disposal must be carried out professionally and environmentally friendly in accordance with the legal 
stipulations.

4

Mounting

4.1

General notes

Attention!

The following points must be complied with during the mechanical installation to avoid causing a defect 
in the device due to assembly errors or environmental in

uences:

Before installation remove the device from the packing and check for any possible shipping 
damage!

Assemble the device on a clean and stable base. Do not distort during assembly! Use the 
appropriate mounting devices for proper installation of the unit!

Do not mount equipment on vibrating base!

When mounted onto lightweight walls, there must be no impermissibly high vibrations or shock 
loads. Any banging shut of doors that are integrated into these lightweight walls, can result in 
extremely high shock loads. Therefore, we advise you to decouple the devices from the wall.

Do not allow drilling chips, screws and other foreign bodies to reach the device interior!

The device should be installed in a location where it will not be disturbed, but at the same time 
can be easily accessed!

Depending on the housing model use supplied stoppers for cable inlets, cut off necessary cable 
inlets respectively to the cable diameter. Or alternative use cable inlet for cable glands. Any 
cable ducts openings not used must be sealed!

Care must be taken to avoid direct radiation from the sun!

The device is designed for vertical installation (cable inlet down). A horizontal or reclined 
installation is only permissible after technical release of the manufacturer!

Be sure to observe proper heat dissipation (

  Technical data, heat dissipation). 

4.2

Minimum space requirement

In order to ensure suf

cient ventilation of the device, clearance on all sides of at least 50 mm has to 

be maintained to the housing walls, switch cabinet doors, wiring ducts, etc. The same clearance 
applies to the installation of several devices next to each other.
When installing several devices on top of each other, the danger of reciprocal heating exists. This 
layout is only then permissible when the air suctioned from the upper unit does not become warmer 
than the permissible ambient temperature (

  Technical data). I.e., a correspondingly larger clearance 

or thermal shielding is required.

4.3

Outdoor installation

Outdoor installation is possible up to -20 

°

C when the controller supply is not switched off. Installation 

must be protected from the effects of weather as much as possible, including protection from direct 
sunlight! 

Operating Instructions 

RETP6 / RETP10

Mounting

L-BAL-E082-GB 1237 Index 002

Part.-No. 00163339-GB

7/31

Summary of Contents for 303612-42

Page 1: ...RETP6 RETP10 Multipurpose controller for variable voltage 1 fans Operating Instructions Software version B1061AA from version 1 01 L BAL E082 GB 1237 Index 002 Part No 00163339 GB english...

Page 2: ...for agriculture 8 4 5 Temperature in uences during commissioning 8 5 Electrical installation 8 5 1 Safety precautions 8 5 2 EMC compatible installation 8 5 2 1 Motor cable 8 5 2 2 Signal cable 8 5 2 3...

Page 3: ...19 9 2 1 Setting for operation as Temperature controller 19 9 2 2 Example Temperature control Cooling function factory setting 20 9 2 3 Example Temperature control Heating function 20 9 3 Pressure co...

Page 4: ...consequence of unauthorized repairs or modi cations 1 4 Copyright These operating instructions contain copyright protected information The operating instructions may be neither completely nor partiall...

Page 5: ...s for the prevention of accidents and the corresponding national as well as regional and in house regulations Personnel to be trained or instructed and apprentices are only permitted to work on the de...

Page 6: ...ns and or operating instructions are always readily available at the location where the device is being used are complete and are in legible condition These persons are regularly instructed in all app...

Page 7: ...be easily accessed Depending on the housing model use supplied stoppers for cable inlets cut off necessary cable inlets respectively to the cable diameter Or alternative use cable inlet for cable glan...

Page 8: ...been properly attached Metal screwed connections are not permitted in plastic housing parts because there is no potential equalization Never clean electrical equipment with water or similar liquids I...

Page 9: ...in the lower speed range due to the occurrence of resonance 5 5 Motor protection The motor can be protected by connecting thermostats TB When multiple motors are connected it is essential to ensure t...

Page 10: ...ulation 0 100 Proportional the internal control of modulation with consideration n min and n max setting For enable OFF it goes back to 0 V For motor fault the output signal remains for a slave contro...

Page 11: ...the relay is energized terminals 12 and 14 are bridged For fault the relay is de energized terminals 11 and 12 are bridged Diagnostics faults Fault indicated for line fault blown internal semiconduct...

Page 12: ...ng on internal switch DIP 2 and selected mode For Speed controller 1 01 always without function For the P controller 2 01 3 01 and PI controller 4 01 the DIP 2 switch can be used to select whether the...

Page 13: ...ternal potentiometer active DIP 2 OFF For temperature control 2 01 with passive sensors TF KTY setting range 0 100 26 76 C measuring range of controller For control with active sensors 3 01 4 01 0 10...

Page 14: ...hanged functions become active partly only after renewed switching on the mains voltage E1 Analog In factory setting 0 10 V 13 03 2012 v_jumper_e1_dip_s1_mode vsd 1 GND 0 10 V 10 k 1 GND TF TF KTY 3 1...

Page 15: ...red by the sensor is compared with the nominal value that has been set The output voltage and hence the rotational speed of the connected motor automatically change as a function of the parameter sett...

Page 16: ...in With minimum speed cut off DIP 5 ON When the setpoint is reached the modulation is reduced to 0 or to the set value if n min is speci ed For actual value setpoint disconnection takes place from n m...

Page 17: ...al signal or external potentiometer DIP 2 OFF factory setting Setting range Output voltage from approx 0 100 of connected line voltage or in range of settings n min up to n max Potentiometer set witho...

Page 18: ...tages two steps DIP2 OFF for setting via external signall Switchover between two steps via external potential free contact possible Step 1 low speed When there is no input signal connected to the inpu...

Page 19: ...6 65 8 76 0 Scale 0 100 26 76 C for Temperature control with passive sensors TF KTY set 0 5 10 15 20 25 30 35 40 45 50 55 60 65 70 75 80 85 90 95 100 C 26 0 20 9 15 8 10 7 5 6 0 5 4 6 9 7 14 8 19 9 25...

Page 20: ...5 2 C n min 35 n max 85 Idealized principle diagram 9 2 3 Example Temperature control Heating function Val Set n DIP4 ON Temperature sensor type TF Measuring range controller 26 76 C Settings set 50 2...

Page 21: ...5 2008 v_pxet_q_skala_mbg30 VSD set 0 10 20 30 40 50 60 70 80 90 100 bar 0 0 3 0 6 0 9 0 12 0 15 0 18 0 21 0 24 0 27 0 30 0 20 03 2008 v_pand_pxet VSD R5 Pband 5 30 Pband Pband Narrow control range Sh...

Page 22: ...n use of refrigerant medium table for R507 Pband 10 3 0 bar U Motor 50 100 bar C 50 15 bar 34 28 C 507 Set Pband 10 12 03 2008 v_diagramm_bar_c vsd 18 bar 41 53 C 507 n min 0 n max 100 n min 35 n max...

Page 23: ...9 49 77 54 25 58 41 62 30 65 96 69 41 72 70 75 82 78 81 81 68 84 44 87 09 89 66 R401A C 29 21 6 93 6 40 16 33 24 39 31 26 37 28 42 68 47 59 52 10 56 29 60 22 63 91 67 40 70 72 73 88 76 91 79 81 82 60...

Page 24: ..._skala_mal1 VSD set 0 10 20 30 40 50 60 70 80 90 100 m s 0 0 0 1 0 2 0 3 0 4 0 5 0 6 0 7 0 8 0 9 1 0 20 03 2008 v_pand_pxet VSD R5 Pband 5 30 Pband Pband Narrow control range Short control times Wide...

Page 25: ...idged Motor fault Tripping of connected thermostat or break between terminals TB The unit cuts out and does not switch on again Check motor and connection then reset Motor protection 3 energized Termi...

Page 26: ...ch Line voltage 1 230 V 15 10 50 60 Hz Input resistance for sensor or signal set for the rotational speed for 0 10 V input Ri 100 k for 4 20 mA input Ri 100 Output voltage approx 0 100 of applied main...

Page 27: ...r each degree higher the load has to be reduced approx 2 2 The average value measured during a 24 h period must be 5 K under the max ambient temperature For installation in a switch cabinet the device...

Page 28: ...C PEUN17K2 15 07 2009 TB TB D1 D1 24V Hand Auto 0 100 Kontaktbelastung Contact rating max AC 250 V 5 A 5 1 Line 1 230 V 50 60 Hz 2 1 Motor with internal thermostats 3 Output 0 10 V Imax 10 mA 4 Input...

Page 29: ...11 3 Dimensions mm RETP6 RETP10 Operating Instructions RETP6 RETP10 Enclosure L BAL E082 GB 1237 Index 002 Part No 00163339 GB 29 31...

Page 30: ...connected 9 mains voltage 9 maximum control current 9 MBG 30I 22 Minimum space requirement 7 Minimum speed cut off 16 Mode 14 motor feed cable 8 motor protection unit 9 O Outdoor installation 7 P P C...

Page 31: ...have any questions concerning the use of our products or plan special uses please contact Systemair Industriev gen 3 73930 Skinnskatteberg Telefon 46 0 222 440 00 Telefax 46 0 222 440 99 mailbox syst...

Reviews: