8 Complete medullary reaming
Repeat steps 5 to 7 for each additional reamer head
(352.090 –190) until the medullary canal is reamed to the de-
sired diameter. Reaming is usually performed with increments
of 0.5 mm.
Note:
Only ream over the SynReam Reaming Rod
2.5 mm
(352.032 or 352.033), since the rod ensures that a secure con-
nection is maintained between the reamer head and the flexi-
ble shaft.
Loosen blocked medullary reamer heads with left-right turns or
with gentle hammer taps to the Holding Forceps for SynReam
Reaming Rod (351.782) fastened to the SynReam Reaming
Rod Ø 2.5 mm (352.032 or 352.033).
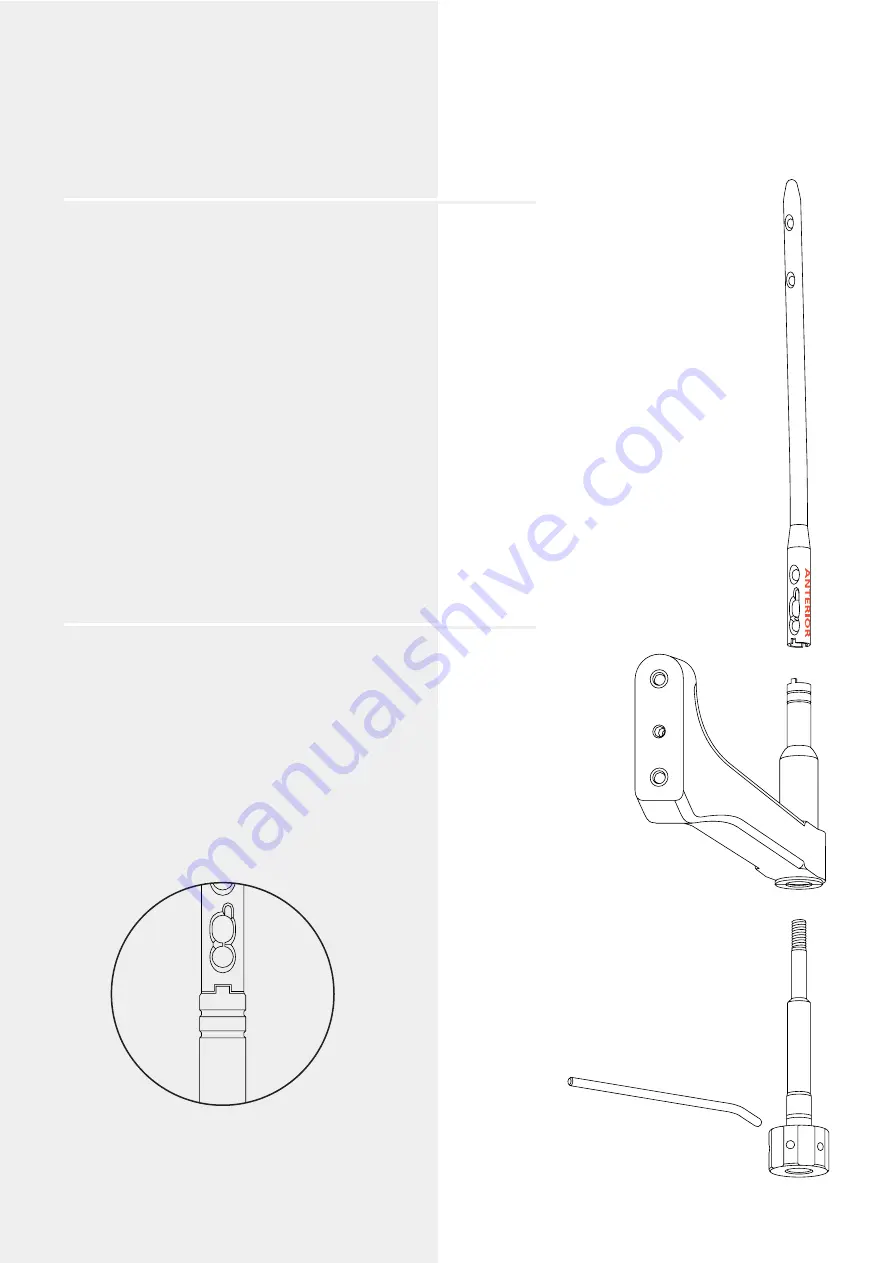
9
Attach nail to insertion handle
With the Insertion Handle (357.112) facing laterally, match
the teeth on the handle with the notches in the nail. The
anterior curvature of the implant must be aligned with that
of the femur. Note the inscription ANTERIOR on the nail.
Slide the Connecting Screw (357.135) through the insertion
handle and screw it into the nail. Tighten the connecting
screw with the Pin Wrench (321.170) without stripping it.
Synthes
11
Distal Femoral Nail
Standard locking


