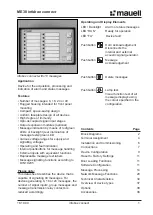
background image

24/26

User’s Guide

6200 Digital 

Voice Processor

To download the latest version of 6200 Designer, a Windows GUI 

application interface for the 6200, go to: www.airtoolsaudio.com

TM

Symetrix

Engineered by

Setting the 6200’s IP Address:

1. Press the HOME button to ensure that we are starting from the top.
2. Press the NEXT button once.
3. Turn the ADJUST knob clockwise until the display reads “Section to Edit, - Setup Menu -”.
4. Press the NEXT button once.
5. Turn the ADJUST knob clockwise until the display reads “- Setup Menu -, -- Communication --”.
6. Press the NEXT button four times and the display should read “IP Address, 192.168.000.002”.
7. Turn the ADJUST knob clockwise to increment or counter-clockwise to decrement the first three digits of the IP Address.
8. When you have the first three digits of the address correctly selected, press the NEXT button once and then repeat step 7 

to select the next three digits of the IP Address. Repeat two more times in order to enter the full address.

7. Press the HOME button when finished.

Setting the 6200’s Subnet Mask:

1. Press the HOME button to ensure that we are starting from the top.
2. Press the NEXT button once.
3. Turn the ADJUST knob clockwise until the display reads “Section to Edit, - Setup Menu -”.
4. Press the NEXT button once.
5. Turn the ADJUST knob clockwise until the display reads “- Setup Menu -, -- Communication --”.
6. Press the NEXT button eight times and the display should read “Subnet Mask, 255.255.255.000”.
7. Turn the ADJUST knob clockwise to increment or counter-clockwise to decrement the first three digits of the Subnet Mask.
8. When you have the first three digits of the address correctly selected, press the NEXT button once and then repeat step 7 

to select the next three digits of the Subnet Mask. Repeat two more times in order to enter the full address.

7. Press the HOME button when finished.

Setting the 6200’s Gateway IP Address:

1. Press the HOME button to ensure that we are starting from the top.
2. Press the NEXT button once.
3. Turn the ADJUST knob clockwise until the display reads “Section to Edit, - Setup Menu -”.
4. Press the NEXT button once.
5. Turn the ADJUST knob clockwise until the display reads “- Setup Menu -, -- Communication --”.
6. Press the NEXT button sixteen times and the display should read “Gateway Disabled, 000.000.000.000”.
7. Turn the ADJUST knob clockwise to increment or counter-clockwise to decrement the first three digits of the Gateway IP 

Address.

8. When you have the first three digits of the address correctly selected, press the NEXT button once and then repeat step 7 

to select the next three digits of the Gateway IP Address. Repeat two more times in order to enter the full address.

7. Press the HOME button when finished.

Alternate Communications Connections...

 continued

Summary of Contents for airTools 6200

Page 1: ...afety If the provided plug does not fit into your outlet consult an electri cian for replacement of the obsolete outlet 10 Protect the power cord from being walked on or pinched particularly at plugs convenience receptacles and the point where they exit from the apparatus 11 Only use attachments accessories specified by the manufacturer 12 Use only with the cart stand tripod bracket or table speci...

Page 2: ...lude connector allowance Allow at least 1 inch additional clearance for rear panel con nections Additional depth may be required depending upon your specific wiring and connections Electrical 100 240 VAC 50 60 Hz 25 Watts maximum No line voltage switching required Ventilation Maximum recommended ambient operating temperature is 30 C 86 F Ventilation should not be impeded by covering the unit with ...

Page 3: ... presence is automatically detected PROGRAM CONTROL Male DB9 Simple program recall interface RS 232 Female DB9 Optional serial communications interface for 6200 Designer on the host PC ETHERNET 10 Base T RJ 45 Optional Ethernet communications interface for 6200 Designer on the host PC RS 485 Euroblock Optional long distance serial communications interface for 6200 Designer on the host PC Third par...

Page 4: ...o audio signals even though the microphone cable carries both phantom power as direct current and audio signals as alternating current Specifically the term phantom power means a positive DC voltage sent to the microphone on both audio leads through current limiting resistors which also serve to isolate the audio leads from one another Enabling phantom power applies phantom power via pins 2 and 3 ...

Page 5: ...LOG IN CHAN 1 requires phantom power you now need to enable it for that input 1 Press the HOME button to ensure that we are starting from the top 2 Press the NEXT button once 3 Turn the ADJUST knob clockwise until the display reads Section to Edit Setup Menu 4 Press the NEXT button once 5 Turn the ADJUST knob clockwise until the display reads Setup Menu Channel 1 Input 6 Press the NEXT button thre...

Page 6: ...annel 1 Menu Input 4 Press the NEXT button once the display should read Input Gain Trim 0 0 dB You can now use the ADJUST knob to dial in your fine gain setting Talk into the microphone as loudly as you think you will ever talk into it while turning the ADJUST knob clockwise increasing gain Note when the audio distorts and then turn the gain back down somewhat maybe 6 dB or so You should now be ab...

Page 7: ...reduction meter is provided so that the effect of the de esser can be observed PARAMETRIC 1 through 4 EQ With parametric equalizers you can adjust center frequency gain and bandwidth of a filter band Parametric EQ can be used to tailor an overall sound quality or to more accurately boost cut specific frequency ranges The 6200 provides a four band parametric EQ Each of the four bands can be individ...

Page 8: ...with the signal levels that you are interested in Compressor Ratio The ratio determines the degree of output change for an above threshold change in the input Generally ratios under 10 1 are considered compression while those above 10 1 are considered limiting Gain Reduction Meter A gain reduction meter is provided so that the effect of the compressor can be observed present on Threshold and Ratio...

Page 9: ...requencies A low pass filter in a voice processor is typically used to limit the high frequency content sent to downstream processing or the transmitter The 6200 offers 6 dB octave 12 dB octave 18 dB octave and 24 dB octave filters Additionally peak versions of each filter are provided for further flexibility and tuning The filters with the steeper response filter more sharply Controls Bypass Enab...

Page 10: ...Turn the ADJUST knob to locate the program location 1 256 you wish to save to 3 Now press and hold the LOAD 1 SAVE 1 button again for approximately one second and the screen should read Save Mono or Stereo 4 Turn the ADJUST knob to toggle between Mono and Stereo formats 5 Once you have chosen your format for the program press and hold the LOAD 1 SAVE 1 button again for approximately one second 6 T...

Page 11: ...programs plus DSP Bypass Changes to the 6200 s processing parameters must be made at the unit s front panel or by using the optional 6200 Designer software There is no button lockout or other security feature provided on the RC 1 If you accidentally hit one of the buttons you will accidentally change the processing program on the 6200 The RC 1 connects to the 6200 with the included 25 foot 7 pin D...

Page 12: ...in pencil please your own identification for programs 1 through 11 on the spaces provided on the RC 1 Remote Control If you will faithfully use pencil the names are easily erased when changes become necessary Ball point pen markings can usually be removed with denatured alcohol Beware unlike radio station staff names entered with permanent markers usually remain forever A wise alternate label migh...

Page 13: ...ally a relay activated output disconnect It is only accessible by activating a contact closure attached to the HM and Ground terminals of the rear panel REMOTE BYPASS connector Hardware Mute HM switch wiring The figure right shows the connection of a contact closure to the Hardware Mute function of the REMOTE BYPASS connector NOTE A latching switch should be used in order to hold the bypass state ...

Page 14: ...nels of AES EBU bidirectionally over a single CAT 5 cable HomerLink allows the 6200 to integrate with the AirTools Studio Matrix system AES OUT CONNECTION Connect the AES OUT jack of your choice to your downstream equipment s AES IN jack using a standard 110 Ohm AES cable terminated with the appropriate XLR jacks AES OUT MODE Typically an AES jack will carry two audio signals most often a stereo L...

Page 15: ... box with standard XLR connectors Enabling AES Input These steps walk you through setting channel 1 s input source to AES 1 Press the HOME button to ensure that we are starting from the top 2 Press the NEXT button once 3 The display should read Section to Edit Channel 1 Menu 4 Press the NEXT button three times and the display should read Input Signal Source ANALOG 6 Turn the ADJUST knob clockwise ...

Page 16: ...n using an external server If you have any questions regarding the integration of the 6200 into your network consult your friendly IT IS personnel or your network hardware s documentation More information and a list of public servers in the US can be found at http www boulder nist gov timefreq service time servers html or by searching for the NIST Internet Time Service Entering the Time Server IP ...

Page 17: ...haps even get useful work done You can save any Sites complete with up to 256 programs that you create to a file that can be downloaded later into an operating 6200 If there is a 6200 hardware unit connected you can go download to and upload from the 6200 Once you have a unit connected you can also work online in real time which allows you to hear adjustments and settings as you make them Follow t...

Page 18: ... the option Install from a list or specific location Advanced and click the Next button 7 In the next dialog choose the option Search for the best driver in these locations and check the sub option Include this location in the search Then click the Browse button and navigate to the 6200 Designer USB Driver directory typically C Program Files Symetrix 6200 Designer USB Driver Select that directory ...

Page 19: ...as a standard straight through with only pins 2 3 and 5 absolutely necessary Connect a standard RS 232 cable terminated with the proper DB 9 connectors between your PC s COMM port and the rear RS 232 port of the 6200 The 6200 s RS 232 port is a female DB 9 connector Refer to the help content within the 6200 Designer application for more information Setting the RS 232 baud rate 1 Press the HOME but...

Page 20: ... Turn the ADJUST knob clockwise until the display reads Setup Menu Communication 6 Press the NEXT button once and the display should read RS485 Baud Rate 38 4K This is the default baud rate and is recommended unless your RS 485 interface does not support this rate If another baud rate is required turn the ADJUST knob to select a another rate 7 Press the HOME button when finished Setting the Unit N...

Page 21: ...twork a network administrator should be able to provide the above information For security reasons it is not recommended to put the 6200 directly on the internet If you do a network administrator or your Internet Service Provider can provide the above information If you are building your own separate network you may consider using an IP Address from one of the Private Use networks noted in RFC 191...

Page 22: ...nter in the appropriate information DNS server is not required for connection to a 6200 6 Press OK to save and Close to exit out of the Local Area Connection Properties B Windows XP 1 Select Start Control Panel 2 Open the Network Connections Control Panel 3 Right click on your Local Area Connection and select Properties 4 Under This connection uses the following items select Internet Protocol TCP ...

Page 23: ... Engineered by 5 On the General tab you may select Use the following IP address to enter in the appropriate information DNS server is not required for connection to a 6200 6 Press OK to save and Close to exit out of the Local Area Connection Properties For more information about configuring the host computer visit http www microsoft com Alternate Communications Connections continued ...

Page 24: ... Turn the ADJUST knob clockwise until the display reads Setup Menu Communication 6 Press the NEXT button eight times and the display should read Subnet Mask 255 255 255 000 7 Turn the ADJUST knob clockwise to increment or counter clockwise to decrement the first three digits of the Subnet Mask 8 When you have the first three digits of the address correctly selected press the NEXT button once and t...

Page 25: ... and settings match between the PC and 6200 hardware NOTE There are a lot of useful functions available in the mouse right click Explore That s the ultra condensed version You ll find more complete information in 6200 Designer s online help Just choose Help Contents F1 from the Help menu When all else fails When you re miserably lost settings are completely out of whack or when you just want to ma...

Page 26: ...ccompanied by control software intended to be run on a personal computer Said software is specifically excluded from this warranty Limitation of Liability The total liability of Symetrix on any claim whether in contract tort including negligence or otherwise arising out of con nected with or resulting from the manufacture sale delivery resale repair replacement or use of any product will not excee...

Page 27: ... 1 2 Phillips head screwdriver Top Cover Removal 1 Ensure that the 6200 is disconnected from the AC power source 2 Remove seven 6 32 x 1 2 inch screws from the top panel and two 6 32 x 1 2 inch screws from each side of the chassis 3 Lift the top cover free of the chassis Changing the Output Level Jumpers The 6200 ships with the outputs configured for a line level output If you must have a micropho...

Page 28: ...E S S A P Y B A l a m r o N e l t n e G g g e v i s s e r m i r T n i a G t u p n I y c n e u q e r F s s a P h g i H e c r u o S l a n g i S t u p n I e p o l S r e t l i F P H z H k 7 9 1 o t z H 6 1 L A T I G I D G O L A N A B d 5 1 3 o t B d 0 6 9 y c n e u q e r F s s a P w o L z H k 7 9 1 o t z H 6 1 n i a h c e d i S r o s s e r p m o C d l o h s e r h T r o s s e r p m o C r o s s e r p m ...

Page 29: ...v S t i L y a D y a D t r t S g v S t i L y a D r u o H t r t S g v S t i L y a D h t n o M d n E g v S t i L y a D k e e W d n E g v S t i L y a D y a D d n E g v S t i L y a D t n u o m A g v S t i L y a D t u p t u O e m a N m a r g o r P r e d r O e l u d o M i a G t u p t u O n e p o l S r e t l i F P L o i t a R r o s s e r p m o C k c a t t A r o s s e r p m o C e s a e l e R r o s s e r p ...

Page 30: ...e 6200 Digital Voice Processor To download the latest version of 6200 Designer a Windows GUI application interface for the 6200 go to www airtoolsaudio com TM Symetrix Engineered by Appendix C Audio Wiring Reference ...

Page 31: ...0 Digital Voice Processor To download the latest version of 6200 Designer a Windows GUI application interface for the 6200 go to www airtoolsaudio com TM Symetrix Engineered by Appendix C Audio Wiring Reference continued ...

Page 32: ......

Page 33: ...onal purposes only and constitutes neither an endorsement nor a recommendation Symetrix assumes no responsibility with regard to the performance or use of these products Under copyright laws no part of this User s Guide may be reproduced or transmitted in any form or by any means electronic or mechanical without permission in writing from Symetrix Inc If however your only means of access is electr...

Reviews: