background image


16 

10. INSPECTION AND MAINTENANCE BEFORE RIDING   


§

DISK BRAKE INSPECTION

§

(

applicable for model equipped with disc brake.

y

 Visual check brake lines for leakage, or damage, check 

brake lines connections for looseness using a wrench or 
similar tool, and check whether steering handle vibration in 
driving, or any parts’ interference may have damage the brake 
lines. If so, bring your motorcycle to your SANYANG dealer for 
repairing or service.   


leak, damaged, looseness of brake line


Checking front brake lining


y

  check the brake from behind the brake caliper. 

The brake pad must be replaced with new 
lining when the brake pad wear limit reaches 
the brake disk.   

Checking oil quantity in brake oil reservoir


y

  Park the motorcycle on a lever ground, and 

check if fluid lever is under the “LOWER” 
mark. Recommended Brake Fluid: WELL 
RUN BRAKE OIL (DOT3 or DOT4 ).   


Replenishment of front wheel brake fluid


1.Loosen the screws and remove the master cylinder 

cover. 

2.Wipe clean foreign materials, dirt around the reservoir, 

being careful not to let foreign materials fall into the 
reservoir. 

3. Remove the diaphragm plate and the diaphragm.   
4. Add brake fluid to upper lever. 
5.Install the diaphragm plate and the diaphragm, and 

install the master cylinder cover.     

6.please note the diaphragm direction, and do not let 

foreign materials fall into the reservoir. And tighten the 
master cylinder cover securely. 

 CAUTION: 

y

  TO prevent chemical reaction, please do not use brake fluids other than those recommended.   

y

  Do not fill above the upper limit when adding brake fluid and avoid dropping on painting or plastic 

components to prevent damage. 


 CAUTION: 

y

  Please drive your motorcycle on a dry road surface 

slowly and operate front and rear brakes in order to 
find out if there is any malfunction so as to ensure 
the motorcycle is at optimum condition and safe 
ride.  . 


Brake


disk 

Brake


caliper 

Brake


pad wear 

limit grooves 

Screw 

Master 

cylinder cover

Diaphragm

Upper 

Brake fluid

Summary of Contents for Tonik 125

Page 1: ...drive off 12 The control of throttle valve handle 12 Parking method 12 10 Inspection and maintenance before riding 13 Routine inspection 13 Engine oil inspection and change 13 Fuel inspection 14 Tran...

Page 2: ...ark plug 20 Checking the air cleaner 20 11 When there is an abnormal condition or a trouble 21 Diagnosis when engine does not start 21 12 C D I electrical ignition system 21 13 Suggestions on engine f...

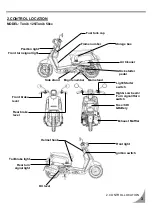
Page 3: ...ler High Low beam Turn signal Horn switch Tail brake light Fuse CDI Battery Air Cleaner Oil level Front turn signal light Helmet hook Storage box Kick starter pedal Main stand Ignition switch Rear bra...

Page 4: ...newly bought motorcycle very carefully but after they became familiar with their motorcycles they tended to become reckless which may result in an accident To remind you y Please wear a safety helmet...

Page 5: ...ffects the riding safety Therefore do not overload your motorcycle CAUTION y Do not place flammable materials such as rags between the body side cover and engine to avoid components damaging by fire y...

Page 6: ...tch when it is turned on y Fuel Meter The pointer in this meter shows how much fuel remains in the tank When the pointer stays position it means full of gasoline in the fuel tank The pointer stays pos...

Page 7: ...l gasoline position counter clockwise y Then the fuel tank cover can be open You can fill gasoline in the fuel tank CAUTION y Never operate the ignition switch key when the motorcycle is running To tu...

Page 8: ...With the main switch on press this button while holding the front or rear brake lever will start the engine CAUTION y Release this button immediately after engine has been starter and never press the...

Page 9: ...he turn signal light button to the original position Left side turn signal light flashing means you intend to make a right turn Right side turn signal light flashing means you intend to make a left tu...

Page 10: ...n down the motorcycle y Make sure the cap has been tighten properly BRAKE y Avoid unnecessary sudden braking y Use front and rear wheel brakes simultaneously when braking y Avoid brake continuously fo...

Page 11: ...top and wait for 10 seconds before start it again y It is harder to get the engine started after the motorcycle has been left idle for a long time or after refueling only after the fuel has been deple...

Page 12: ...drivers of vehicles behind y When stop completely 3 Press the turn signal switch back to its original position and turn the ignition switch key to the OFF position to shut off the engine 4 Get off the...

Page 13: ...mirror Is it operated properly Do lights come on Can it be seen clearly from behind Tightness of Main Components Are screws nuts loosen Abnormal Points Do the previous troubles still exist CAUTION y...

Page 14: ...efilled check the engine for leaks and refill it again y Keep away from spark and flames when refilling the oil FUEL INSPECTION y Turn main switch key to ON position and check fuel gauge s needle rang...

Page 15: ...el is spongy when press the foot braking pedal forcefully Adjustment Drum type y The indentation of brake adjustment nut must be aligned with the pin see below figure y Turn the adjustment nut on brak...

Page 16: ...brake fluid 1 Loosen the screws and remove the master cylinder cover 2 Wipe clean foreign materials dirt around the reservoir being careful not to let foreign materials fall into the reservoir 3 Remov...

Page 17: ...on off with a steel brush or a piece of sandpaper y Install battery cable after cleaning and apply a thin coat of grease on the terminals y Install battery in reverse order of removal y The motorcycle...

Page 18: ...nt cause that results in the loss control of the steering handle and a punctured tire s STEERING HANDLE FRONT SHOCK ABSORBERS INSPECTION y Perform this check with engine shut off and ignition switch k...

Page 19: ...ront rear and left right signal lights flashes and also check if the warning buzzer sounds y Check turn signal light covers if they are dirty crack or loosen y Press horn button to check if it works C...

Page 20: ...1 2 1 2kmf m WARNING The engine is very hot after running Pay attention not to get burned Use only spark plugs suitable for the engine specifications of this motorcycle recommended by the manufacturer...

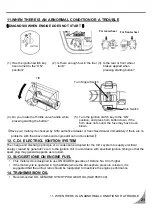
Page 21: ...f there are no problems with the above items and engine still can not be started 12 C D I ELECTRICL IGNITION SYSTEM The charge and discharge principle of a condenser is adopted for the C D I system to...

Page 22: ...Rapidly rotate the throttle valve handle or release the clutch lever may cause the motorcycle moving forward suddenly and it is very dangerous y Make sure the side parking stand is spring back complet...

Page 23: ...on I 19 Cam Chain ignition time I I 20 Valve clearance I I 21 Shock absorbers I I 22 Front rear suspension I I 23 Main side stands I I L 24 Crankcase Blow by system PCV I I 25 Clutch disk I 26 Brake m...

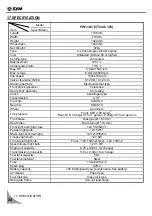
Page 24: ...type Transmission C V T Front tire 90 90 10 Rear tire 90 90 10 Wheel Aluminum Tire pressure Front STD 2 00 kg cm 2 Rear STD 2 00kg cm 2 for 1 person 2 25kg cm 2 for 2 persons Front brake Disk type 160...

Page 25: ...ansmission C V T Front tire 90 90 10 Rear tire 90 90 10 Wheel Aluminum Tire pressure Front STD 2 00 kg cm 2 Rear STD 2 00kg cm2 for 1 person 2 25kg cm2 for 2 persons Front brake Disk type 160 mm Rear...

Page 26: ...ission C V T Front tire 90 90 10 Rear tire 90 90 10 Wheel Aluminum Tire pressure Front STD 2 00 kg cm 2 Rear STD 2 00kg cm2 for 1 person 2 25kg cm2 for 2 persons Front brake Disk type 160 mm Rear brak...

Page 27: ...ont tire 90 90 10 Rear tire 90 90 10 Wheel Aluminum Tire pressure Front STD 2 00 kg cm 2 Rear STD 2 00kg cm 2 for 1 person 2 25kg cm 2 for 2 persons Front brake Disk type 160 mm Rear brake Drum type 1...

Reviews: