107
E
7
Calibration of the unit
The calibration of unit D200
the manufacturer. If a re-calibration is
oceed as follo
) Fix the probe P2, P5, P10, P25 or P50 on a
port.
.0
m or
01 in.
ly op
) Position the probe mech nically on the
at t
cluded:
For a
P2
between 0.2 and 0.3 mm
betwee
0 between 0.4 and 0.5 mm
e
0 betwee
5) Open "
Channel Setup
"
of the
master which will be used for the calibration.
the probe on its re
calibration.
7) Move the probe to the ca
repeat if necessary poin
ration into
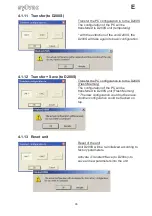
the menu "
Tr Save
"
(see. chapter 4.1.12).
S is made by
necessary, pr
ws:
1
vertical sup
2) Select a resolution of 0 001 m
0.000
3) The probe complete
en, perform a zero
setting
4
a
reference base so th
indicates a value in
he display
P5
P1
n 0.7 and 0.8 mm
P25 betwe n 0.8 and 0.9 mm
P5
n 1.0 and 1.2 mm
and introduce into the field "
Ref1
" the exact value
6) Move
ference base (value 0), then click
libration master then click again calibration.
ts 5), 6) and 7) for the other channels.
8) Save the calib
the unit by using


