


Step 9:
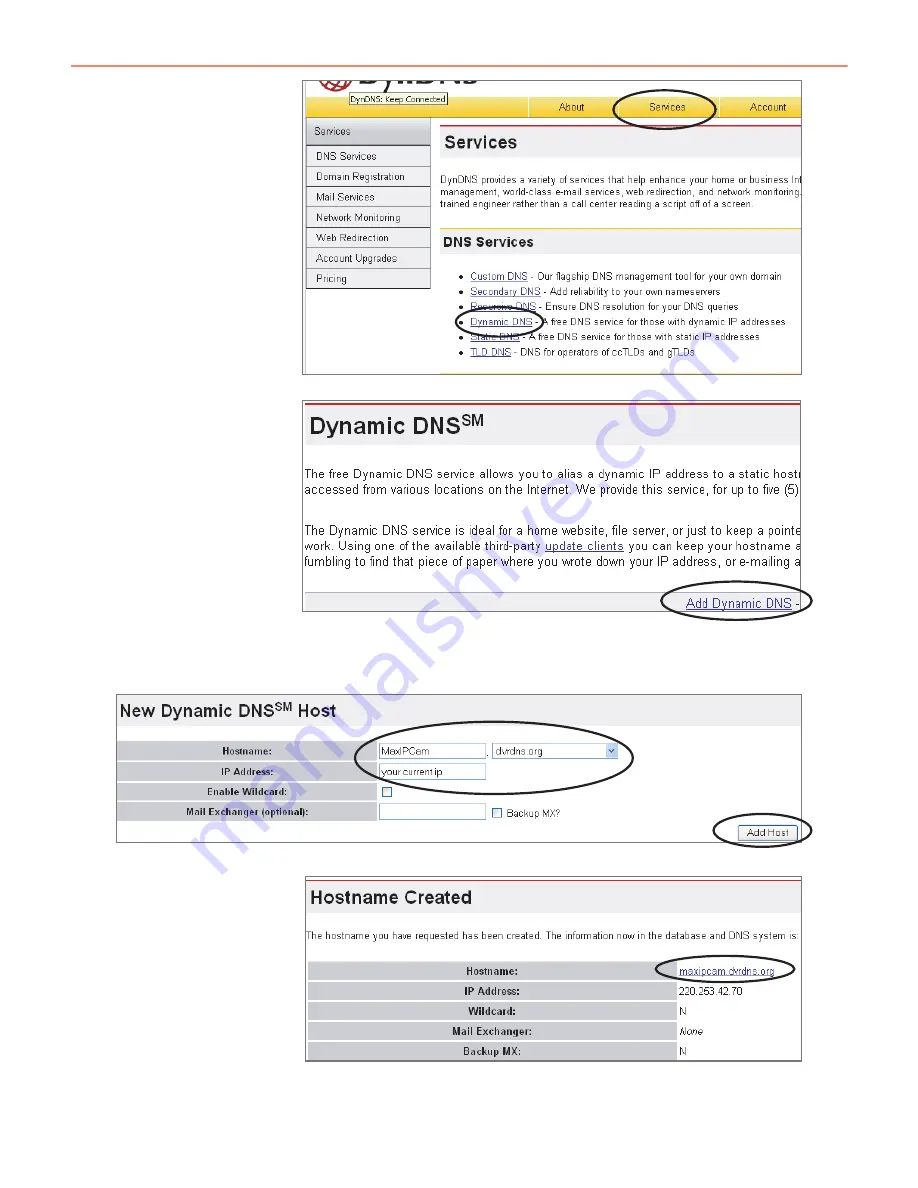
The "Dynamic DNS"
menu should
automatically appear.
Click on "Add Dynamic
DNS" as shown below;
Step 10:
Enter your Host Name (MaxIPCam has been used in this example for your reference) select the
domain you wish to use, enter your current Internet IP address and click on "Add Host" to finish;
The section marked above is what you will enter into your web browser to view your IP camera
from a remote location.
Step 11:
After the new hostname
has been successfully
created, the following
screen should appear:
Step 8:
Once you are logged
in, click on the
"Services" link then click
on "Dynamic DNS" as
shown below;
22


