English
English
24
25
Basic S
etup
Basic S
etup
Operating the DVR Locally
1) Menu:
Opens the main menu.
2) Single Camera View:
Shows images from one camera in
full-screen.
3) Quad-Camera (2 x 2) View:
Divides the screen into four
viewing windows, each showing images from one camera.
4) Next Camera(s):
Cycles the cameras displayed in viewing
mode.
5) Start/Stop Tour:
Starts or stops auto channel switching.
6) PTZ Control:
Opens the PTZ control window.
7) Digital Zoom:
Increases the size of things in view, at the
cost of visual quality.
8) PIP:
Picture-in-picture. Allows you to view two channels at
once, with one full screen and the other as a small overlay.
9) Manual Record:
Initiates manual recording.
10) Playback:
Opens the
Search: Playback
(page 33)
menu.
11) Audio On/Off:
Enables or disables the audio function of
the DVR.
12) Run Start-up Wizard:
Runs the initial start-up wizard.
To open the Menu Bar:
•
Right click with the mouse on the live viewing screen.
or
•
Press the MENU button on the DVR.
The camera icon indicates that this camera is currently recording. This icon will be the same
whether the recording was scheduled, initiated manually or triggered by motion (though the
motion icon will also be present if there’s motion detected).
The motion icon indicates that the DVR is detecting motion coming from this camera. It doesn’t
necessarily mean it’s recording (the camera icon will be there, too, if that’s the case!).
Video Loss indicates that the channel displaying this has lost the feed from its camera. This may
be caused by a disconnected/damaged cable, the camera may have lost power or the video
standard might be wrong (PAL/NTSC).
If you see this icon on-screen (it’ll be lurking in the lower right corner by default) it indicates
that something has gone wrong. Click the icon to access the
Event Log
where you’ll get more
information about exactly what has gone wrong.
Default Password Information
To ensure your privacy, this DVR supports password protection.
The default, all-access username is “admin”.
If the DVR asks you to log in before you’ve set a password, enter
admin
as your username and leave the password blank. This will give you access to all areas of the DVR.
The password function is disabled by default. However, if you’re asked for a password, the default is “12345”.
To ensure your ongoing privacy,
we strongly recommend setting a password as soon as possible
. Choose
something that you’ll remember, but that others would be unlikely to guess.
If you do manage to lock yourself out of the DVR, you’ll need to contact us at the
Swann
Technical Support
Telephone Helpdesk - the number is on the back cover.
Remote Access From a Mobile Device
Using the
SwannView
app for mobile devices, you’ll be able to log into your DVR from almost anywhere you can imagine (or,
at least, get a decent signal - like everyone, we’re at the mercy of your phone company!) and view images coming from your
cameras in real-time (or as close to as wireless networking will permit).
How cool is that? We’re pretty sure this was science-fiction just a few short years ago.
You’ll need a compatible mobile device. At the time of writing, there are apps for
iOS (iPhone / iPad)
and
Android-
based devices.
We’re working on apps for other mobile platforms.
The apps for both iOS and Android are
free
to download and use.
To download the latest mobile viewing apps, operating guides and to check the compatibility of your device, log onto:
www.swann.com/swannview
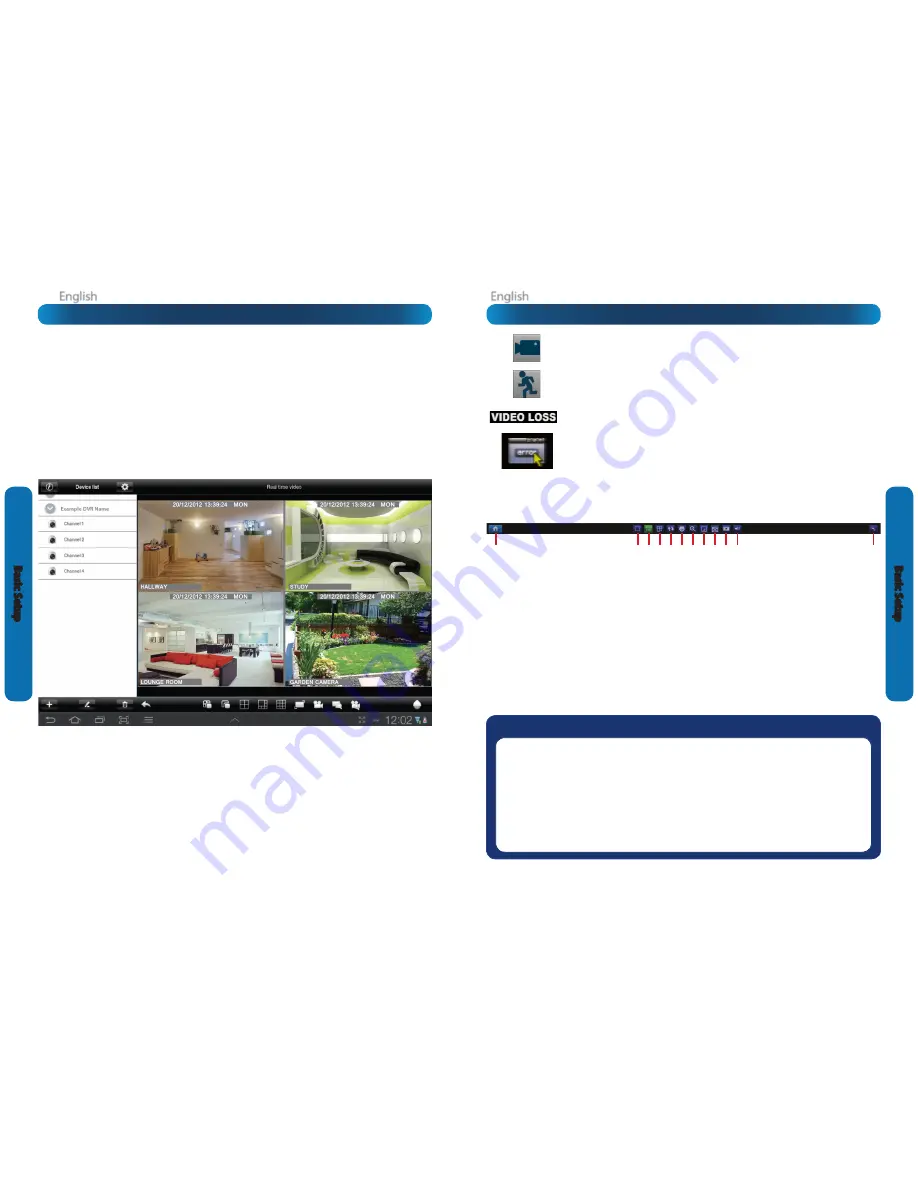
Above:
A screen-capture of
SwannView
running on an
Android
-based tablet
.
We’re constantly making improvements to our software, so the interface
may look slightly different to this, but the functionality will be much the same.
1
2
3
4
5
6
7
8
9
10
11
12


