


- 16 -
Copying from an External
Copying from an External
Copying from an External
Copying from an External
Copying from an External
Source
Source
Source
Source
Source
To access the SYNC RECORD modes, press the SYNC REC
button on the top panel of the PSD330. Use the SELECT
jog wheel to select either SYNC RECORD or SYNC
FINAL. Press ENTER to confirm selection.
SYNC RECORD
This REC mode is used to automatically start the
recording process from an outside digital or analog
source including DAT, minidisc, cassette tape or LP for
example. When this mode is selected, the PSD330 will
display “PUSH REC KEY” as normal. When the RECORD
button is pressed, the PSD330 will search for an input
signal, either analog or digital depending on how the
Input switch is set (see pg. 6, [8]). When an input is
detected, the recording will begin and the display
counter will start to increment.
SYNC FINAL
SYNC FINAL mode operates in the same
manner as SYNC RECORD mode except that the disc
will automatically be finalized at the end of the record-
ing session. The finalization takes approximately 2
minutes. Before using this mode, change the AUTO
STOP feature to ON (see Menus, pg. 20).
How to Finalize a Disc
The PSD330 will play finalized or unfinalized CD-R and
CD-RW discs.
However, for
recorded discs to
play on other CD
players, a disc must
first be finalized.
To finalize a disc
once you have
stopped recording
onto it, press the
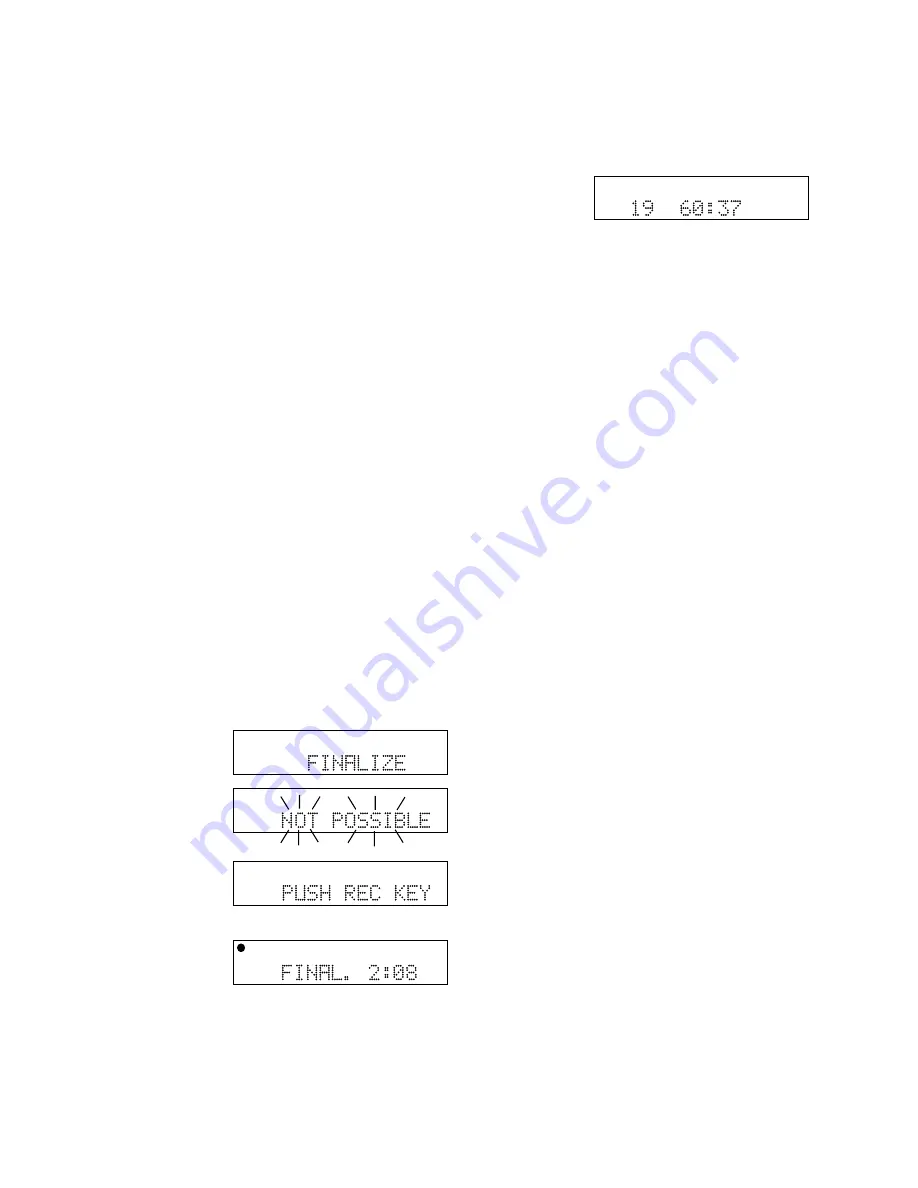
FINALIZE button.
“FINALIZE” is
displayed for a
couple of seconds.
Then “PUSH REC KEY” is displayed.
TOTAL TRACK
CD-R
R
L
dB-50 -30 -22 -16 -12 -8 -4 0
CD-RW
TOTAL TRACK
CD-R
R
L
dB-50 -30 -22 -16 -12 -8 -4 0
CD-RW
TOTAL TRACK
CD-R
R
L
dB-50 -30 -22 -16 -12 -8 -4 0
CD-RW
TOTAL TRACK
CD-R
R
L
dB-50 -30 -22 -16 -12 -8 -4 0
CD-RW
TOTAL TRACK
CD
R
L
dB-50 -30 -22 -16 -12 -8 -4 0
CD
Note:
If the disc
is blank or has
already been
finalized, “NOT
POSSIBLE” will
flash three times.
Now press the RECORD button.
Finalizing counts down for about 2 minutes and
automatically stops.
When done, the display shows the number of tracks
and their total playing time (example shown). Note:
Once a CD-R or CD-RW disc is finalized, the CD-R or
CD-RW icon in the display will be replaced with the CD
icon.
Once a CD-R disc is finalized it cannot be unfinalized or
recorded on further.
How to Unfinalize a CD-RW disc
The CD-RW (rewritable) format provides a way to
unfinalize a disc, erase the last track, or erase an entire
disc.
1. Push STOP on the disc drive.
2. Push ERASE three times. “UNFINALIZE” is displayed
for three seconds, then “PUSH ENTER” is displayed.
3. Push the SELECT jog wheel. The timer counts down
as the disc is unfinalized. When the display shows
the number of tracks and their total playing time,
the disc has been unfinalized but not erased.
How to Erase a CD-RW
You can only erase CD-RW discs. You can erase one or
more tracks from the end of the CD-RW disc, or you
can erase the entire disc. If finalized, erasing a track or
the disc automatically unfinalizes the disc.
•
To erase the
last track
of a disc, press the ERASE
button
once
. “ERASE TRACK” is displayed. After
two or three seconds, the display will read “PUSH
ENTER”. When you push the SELECT jog wheel, the
last track will be erased.
•
To erase the entire disc
, press the ERASE button
twice
in succession. “ERASE DISC” is displayed.
After two to three seconds, the display will read
“PUSH ENTER.” When you push the SELECT jog
wheel, the entire disc will be erased.


