


Chapter 6: Advanced Chassis Setup
6-5
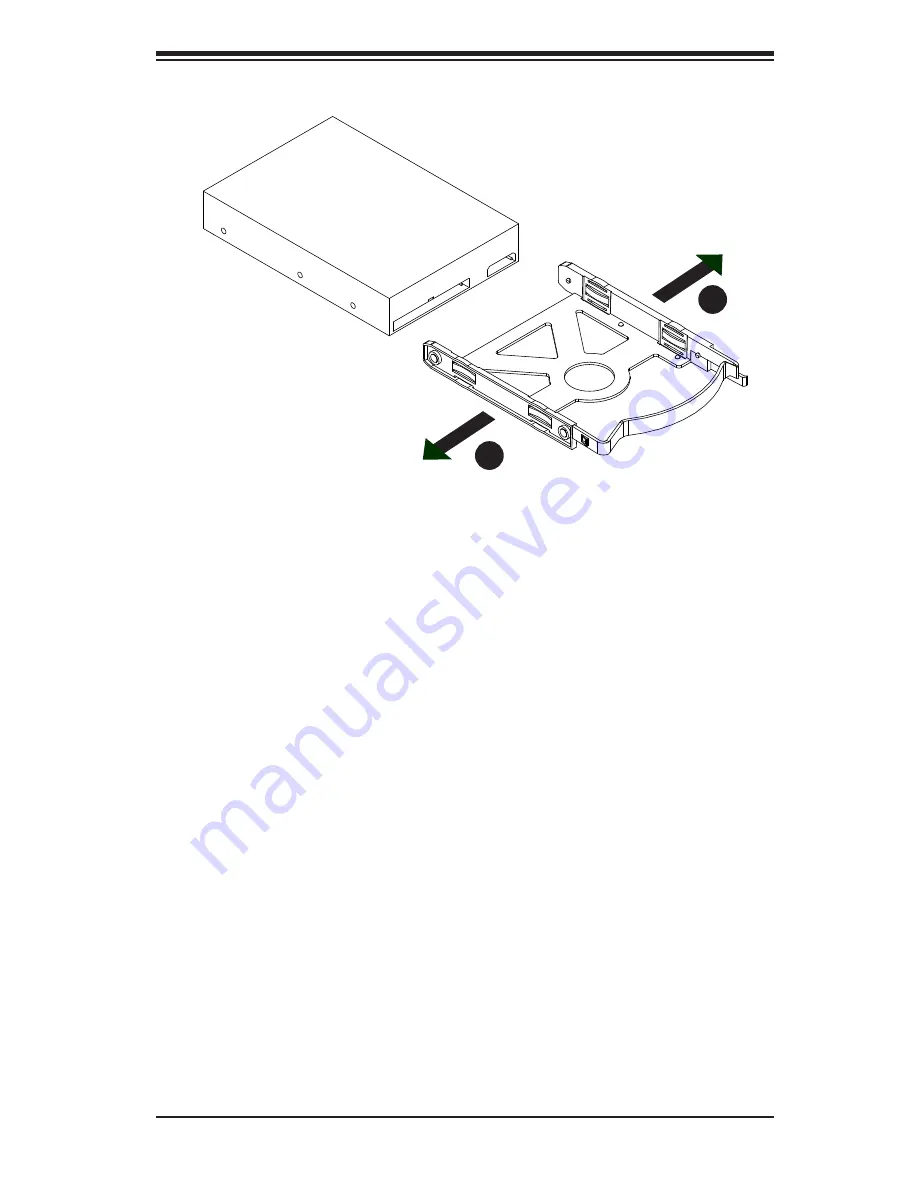
6. If a hard drive is already present, remove it by carefully pulling the sides of
the hard drive carrier outward.
7. Remove the hard drive from the hard drive carrier.
8. Insert the new hard drive into the hard drive carrier.
9. Insert the hard drive carrier into the hard drive cage, sliding it towards the
back of the the hard drive cage until it clicks into a locked position.
10. If desired, each hard drive carrier may be secured to the exterior of the hard
drive cage using one optional screw.
11. Rotate the hard drive cage 90 degrees inward, returning it to the closed,
operational position in the chassis.
12. Connect the related cables to the hard drives.
Figure 6-4. Removing a 3.5" Hard Drive from a Hard Drive Carrier
1
6
1
6
Warning:
Only enterprise level HDDs are recommended for use in this chassis.
Summary of Contents for SuperWorkstation 7038A-I
Page 1: ...SuperWorkstation 7038A I SUPER USER S MANUAL 1 0...
Page 5: ...v Preface Notes...
Page 14: ...SuperWorkstation 7038A I User s Manual 1 6 Notes...
Page 20: ...3 4 SuperWorkstation 7038A I User s Manual Notes...
Page 40: ...4 20 SuperWorkstation 7038A I User s Manual Notes...
Page 66: ...5 26 SuperWorkstation 7038A I User s Manual Notes...
Page 80: ...6 14 SuperWorkstation 7038A I User s Manual Notes...
Page 113: ...Chapter 7 BIOS 7 33 UEFI Application Boot Priorities UEFI Boot Order 1...
Page 116: ...7 36 SuperWorkstation 7038A I User s Manual Notes...
Page 118: ...A 2 SuperWorkstation 7038A I User s Manual Notes...


