SC823M Chassis Manual
5-6
5-5 Installing the Motherboard
This section describes how to install the motherboard into the chassis. Only the
SC823MTQ-R700LPB model requires that you first remove the DVD-ROM drive
and USB COM port unit. With all SC823 models, it is required that you first remove
the hard drive tray.
Component Removal
Before installing the motherboard into the SC823MTQ-R700LPB model only, you
must remove the hard drive tray, DVD-ROM drive and USB COM port unit.
Removing the Hard Drive Tray
1. Power down the system and remove the power cords from the rear of the
power supplies as described in Section 5-2. Remove the chassis cover as
described in Section 5-3.
2. Pull all three hard drives out of the hard drive tray as described in Section
5-4.
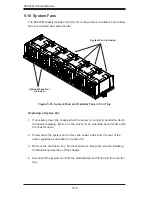
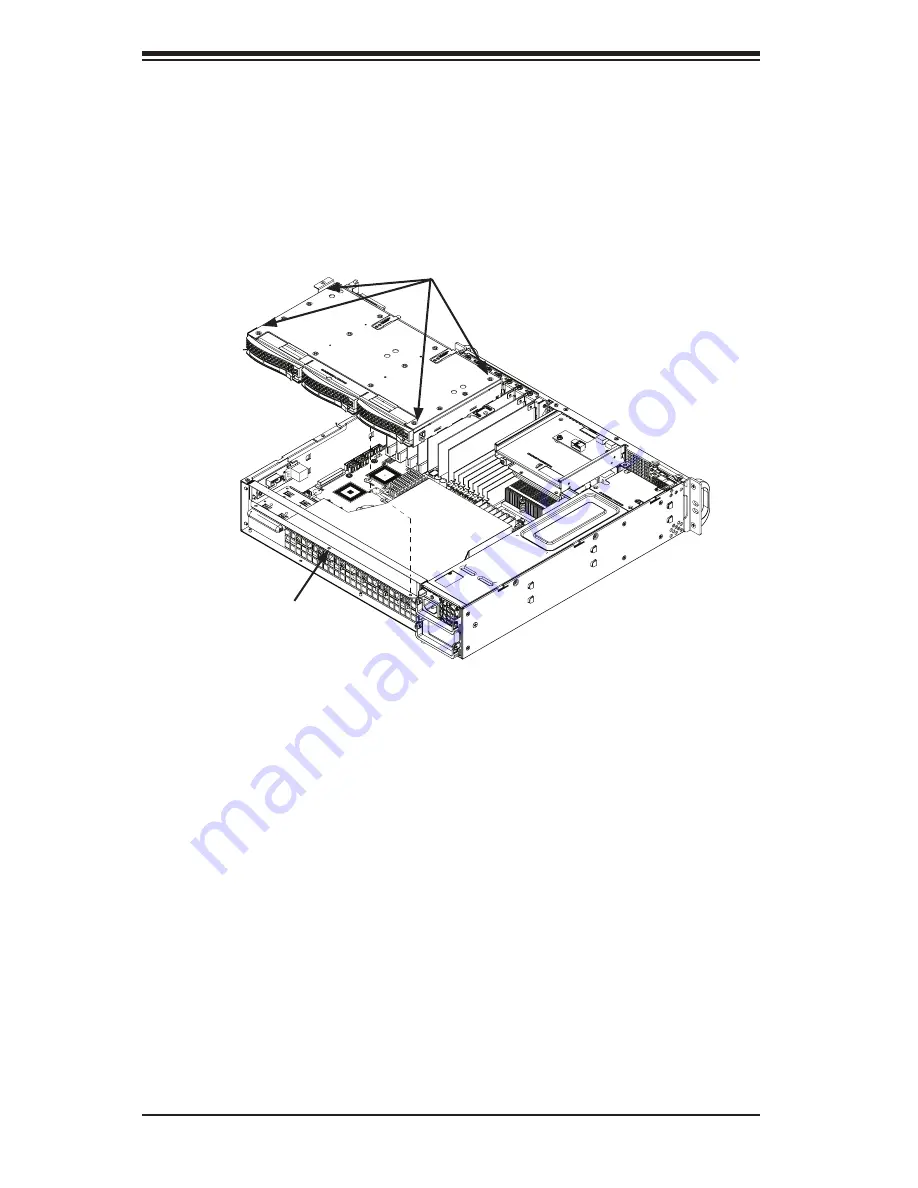
3. Remove each of the four exterior hard drive tray screws and then center
screw, which must be removed through the inside of the middle drive tray
compartment. For screw locations, see illustration above.
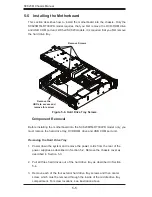
Figure 5-6. Hard Drive Tray Screws
Remove the
HDDs to access and
remove this screw
Remove Screws
Summary of Contents for SC823MTQ-R700LPB
Page 5: ...v Preface Notes ...
Page 12: ...SC823M Chassis Manual 1 4 Notes ...
Page 32: ...2 20 SC823M Chassis Manual Notes ...
Page 60: ...SC823M Chassis Manual 5 22 Notes ...
Page 70: ...SC823M Chassis Manual 6 10 Notes ...
Page 72: ...SC823M Chassis Manual A 2 Notes ...


