background image


67

1.  

ALL


Set all the settings back to factory default. 


2.  

SCREEN DISPLAY


 Set”SCREEN 

DISPLAY

” 

back to factory default. 


3.  

CAMERA COOLR SETUP


Set”CAMERA COLOR SETUP

” 

back to factory default. 


4.  

MOTION SETUP


 Set”MOTION 

SETUP

” 

back to factory default. 


5

.  PANTILT SETUP


 Set”PANTILT 

SETUP

” 

back to factory default. 


6.  

SCHEDULE SETUP


 Set”SCHEDULE 

SETUP

” 

back to factory default. 


7.  

CONFIGUATION


 Set”CONFIGURATION

” 

back to factory default. 


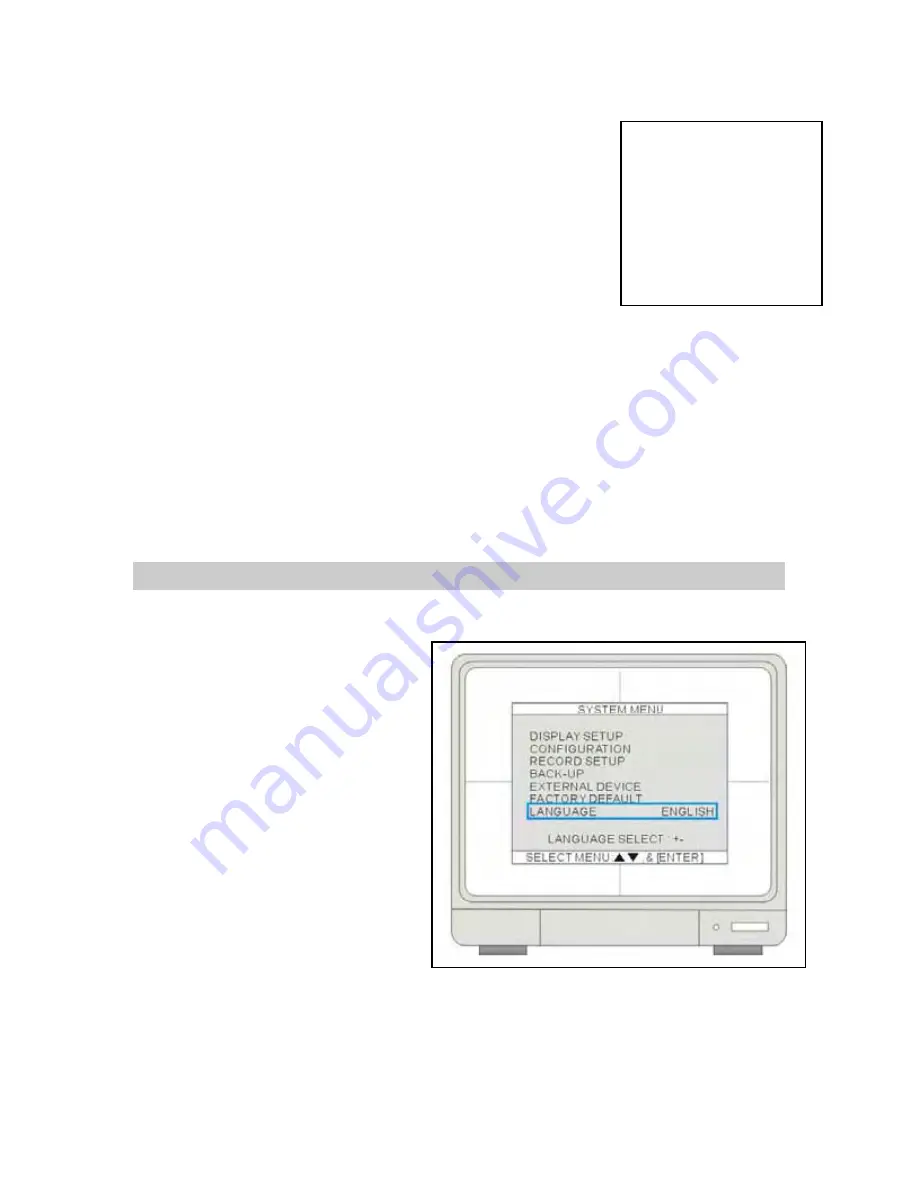
LANGUAGE 


Press 

[+] / [-]

 button to select a language 

setting. 


FACTORY DEFAULT 
ALL 
SCREEN DISPLAY 
CAMERA COOLR SETUP
MOTION SETUP 
PANTILT SETUP 
SCHEDULE SETUP 
CONFIGUATION 
RUN 

Summary of Contents for DMR16CD-3

Page 1: ...DVQ4CD 3 DMR8CD 3 DMR16CD 3 User Guide Volume 1 ...

Page 2: ...ER CIRCUITS 11000 NORTH MOPAC EXPRESSWAY SUITE 300 Austin TX 78759 Phone 800 335 9777 Fax 866 2567 9777 Please read instructions thoroughly before operation and retain it for future reference The product specifications and information may be updated without notification ...

Page 3: ... important operating and maintenance servicing instructions in the literature accompanying the appliance Use provided adapter Handle equipment with care Do not expose this equipment to open sunlight Do not spill liquid on equipment Do not use this equipment near water Please power down the unit before unplugging Do not Power on off quickly Give unit 15 to 30 seconds when powering off on Service an...

Page 4: ... Getting Started with Basic Menu Setup 18 System Menu 20 Factory Default 20 Clear HDD 21 Time Date Setup 23 Record In Motion 24 Advance Menu Setup 31 System Menu 31 Display Setup 32 Monitor Setup 34 Configuration 35 HDD Management 36 o Time Date Setup 37 o Camera Setup 38 Motion Setup 40 Interval Setup 46 o Alarm Setup 47 o Event Popup Setup 47 o Buzzer Setup 48 o Password Setup 48 o System Inform...

Page 5: ...71 PTZ Camera Installation and Operations 73 Microphone and Speaker Installation 75 HDD Installation 76 Operation 77 Display Configuration 77 Screen Switch 79 PIP View 79 Freeze View 79 View in Sequence 80 Zoom View 80 Key Lock 81 Switch Audio Channel 81 Record 82 Playback 83 Search Mode 84 Network and Client Software 88 Network Introduction 88 Network Installation and Setup 88 Installing Network ...

Page 6: ... to DVR R burner Selectable motion detection recording Instant search by time alarm events etc 2 internal hard drive bays Password protection Jog Shuttle dial allows frame by frame review On screen setup menu title and system timer Time Date stamp Time lapse and real time recording 2 Package Includes DVQ or DMR unit 1 Power Supply 1 Power Cable 1 Remote Controller 1 Manual 1 Software CD R 1 Access...

Page 7: ...7 Ca t DVR 1 CD Manual REMOTE Power cord Power Supply Package NOTE Check the package to make sure that you receive all accessories which include the components shown above ...

Page 8: ... Shuttle is ready for use o REC On while recording and flashes at stand by mode o PLAY On while playback o FULL On when HDD storage is full o NET On when the DVR is connected remotely 4 1 16 Channel Button Select channel for full screen display 5 MODE Switch to full or split screen display 6 K LOCK Security lock out to help prevent unwanted DVR access DO NOT PUSH THIS BUTTON unless you know what y...

Page 9: ...sequencing AUDIO Press to play the audio and press again to switch audio channels PIP Press PIP to enter the Picture in Picture mode NEXT o Go to the next PTZ command in PTZ mode o Switch from full screen display to split screen display ZOOM Press ZOOM key to enlarge specific picture area 13 REC Press to activate continuous record Record settings used for recording are Super fine quality and Best ...

Page 10: ...10 ...

Page 11: ...11 BACK PANEL INTRODUCTION 1 RS485 Relay Output Sensor Input RS485 for connection to PTZ cameras 16 sensor inputs and 1 relay output 2 VGA Output Connection to a VGA monitor or TFT LCD ...

Page 12: ... Audio input channels 1 Audio output channel IR remote controller introduction 1 MENU Enter menu or exit 2 Split OSD 4S 4 split screen 9S 9 split screen 16S 16 split screen AUDIO Press to play the audio press again to go to the next audio channel 3 1 16 Channel Switch channel in live or playback 4 Control function FRZ Freeze screen display SEQ Display screen sequence ZOOM Press ZOOM key to enlarge...

Page 13: ...play 7 Rec Continuous Record 8 Stop Stop the record and return to previous record setting Stop playback and return to the LIVE mode 9 Functions PLAY Play recorded video PAUSE Pause playback REW Fast rewind press again to adjust speed FF Fast forward press again to adjust speed STEP Play frame by frame SLOW Slow motion playback press again to adjust speed 10 ENTER Select option 11 Direction Navigat...

Page 14: ...a TV set with a video input if you don t have a monitor Plug your monitor into a 110 120 AC power source Do not mistake the antenna input on the TV for a VIDEO INPUT Monitors and TV s have video inputs clearly marked The TV RCA input will look some what like the image below labeled VIDEO INPUT This type of input connector is called an RCA female input jack 2 Remove your cameras and camera power su...

Page 15: ...ies are 100 ft long or more You will see all types of cable configurations here is one example of a cable option below 4 Test each component of your video system prior to installation Connect each camera directly to the video monitor using a new power adapter and cable for each camera This will test each component of your video system and confirm proper function prior to installation ...

Page 16: ...16 5 Connect the digital video recorder to cameras DVR and Camera Installation ...

Page 17: ...17 DVR and Monitor Installation DVR system diagram ...

Page 18: ...d and operational right away Connect the AC Power Cord with Power Adapter and plug into an electrical AC outlet Power switch is on the rear panel turn the switch on It will take approximately 5 to 15 seconds for the system to completely finish initializing Caution Only use 100 240VAC 50 60HZ 12VDC 8A or 5A power supply Chapter 3 ...

Page 19: ... FACTORY DEFAULT 2 CLEAR HARD DRIVE 3 SYSTEM TIME BASIC MENU SETUP 1 Press the MENU key on the front panel to login 2 Use CH SELECTORS 1 16 to key in the password 3 Press ENTER to confirm and you will enter the Menu system NOTE You don t have a password in the system if this is your first install Your password is blank or ___________ do not enter a password at this time and hit the ENTER key ...

Page 20: ...Y DEFAULT 4 Press UP and DOWN arrow keys and hit the ENTER key for selection Move the cursor to FACTORY DEFAULT and hit the ENTER key 1 DISPLAY SETUP 2 CONFIGURATION 3 RECORD SETUP 4 BACK UP 5 EXTERNAL DEVICE 6 FACTORY DEFAULT 7 LANGUAGE ...

Page 21: ...aults ON Move the cursor to RUN and press the ENTER key to execute the Factory Default All options will turn to OFF 6 Hit MENU Key to exit 7 Let s CLEAR the HDD CLEAR HDD In the SYSTEM MENU select CONFIGURATION and hit the ENTER key Go to HDD MANAGEMENT and hit the ENTER key ...

Page 22: ... move the cursor to HDD CLEAR and hit the ENTER key Enter a password which at this time is blank _________ just hit the ENTER key again HHD CLEAR will show EMPTY 9 Hit the MENU Key twice to exit to CONFIGURATION MENU 10 Go to TIME DATE SETUP ...

Page 23: ... time set by the manufacturer maybe different from your time zone It is very important to set up the system date and time before the DVR starts recording Set the date and time by using direction buttons and button or Jog shuttle NOTE DO NOT change the date and time after the recording starts it may and cause playback errors ...

Page 24: ...ove on to MOTION SETUP Exit TIME DATE SETUP and go to SYSTEM MENU RECORD IN MOTION 15 Under SYSTEM MENU select REORD SETUP and hit the ENTER key Select RECORD CONFIGURATION Date format Asia American European Time format 12 hours 24 hours Month format English Numeric ...

Page 25: ...writing starts from the Master drive For this exercise leave OVERWRITE in the ON position 17 Set MUTIPLEX to DUPLEX this will allow record and remote connection simultaneously The DVR stops recording while the DVR enters playback Leave in DUPLEX mode 18 Move on to QUALITY and RECORD IN MOTION QUALITY RECORD IN MOTION Review the charts below they will help you decide what options to go with for QUA...

Page 26: ... digital video recorder will take in 1 second A good example of IPS is to imagine taking 30 pictures with a digital camera of some one walking across a room If you laid out the 30 pictures what you will have is a smooth flowing sequence of pictures of someone crossing a room If you take out every other picture you have 12 pictures and you would have a snap shot picture affect A 12 picture sequence...

Page 27: ...mate to get you close to your time target Do a test run of your QUALITY and RECORD IN MOTION settings and review your results NOTE TEST YOUR SETTINGS BEFORE FINAL INSTALL 4 Ch QUALITY Low Mid High Super Hyper 1 1 4 2 3 1 2 5 2 1 1 8 1 2 8 4 6 3 5 4 2 3 6 IPS 1 3 12 6 9 4 7 5 6 3 5 4 1 4 16 8 12 6 10 1 8 4 7 2 1 5 21 15 8 12 6 10 5 9 1 6 25 2 18 9 15 1 12 6 10 8 8 Ch QUALITY Low Mid High Super Hype...

Page 28: ...ding time To start find the nearest date you would like for example lets take the 16 channel DVR and I m looking for 30 days You would start by looking at LOW QUALITY and an IPS of 1 6 Take the 6 3 days divide 30 days by 6 3 and this will give us 4 76 Multiply 4 76 by the denominator 6 and this will give us 28 57 take it to the nearest whole number Enter an IPS of 1 29 and LOW QUALITY to get you i...

Page 29: ...29 SCHEDULE SETUP 20 Hit the ENTER key 21 Hit the minus key Your monitor screen should look like this showing all M s indicating motion detection 22 If not press the MODE key ...

Page 30: ...e for now and your system should be up and running The letter M will display on your monitor indicating you are recording in motion Exit MENU and turn the DVR off for about 20 seconds THIS CONCLUDES BASIC SETUP AND YOU SHOULD BE OPERATIONAL PLEASE CONTIUNE READING THE USER MANUAL FOR FURTHER OPTIMAL CONFIGURATION SETTINGS IF YOU HAVE ANY QUESTIONS PLEASE CONTACT OUR TECHNICAL SUPPORT GROUP AT 800 ...

Page 31: ... 3 RECORD SETUP Includes RECORD CONFIGURATION SCHEDULE SETUP and HOLIDAY 4 BACK UP Recorded data back up using CD R or DVD R 5 EXTERNAL DEVICE TCP IP SETUP RS232C SETUP PAN TILT SETUP and AUDIO SETUP 6 FACTORY DEFAULT Reset the DVR to factory defaults 7 LANGUAGE Change the OSD language Use or key to select the items and press ENTER to go into selection Press MENU to go to the previous setup page o...

Page 32: ...32 DISPLAY SETUP 1 SCREEN DISPLAY Set up your screen display for Live and Playback mode 2 MONITOR SETUP Adjust the VGA display resolution and the monitor color ...

Page 33: ...F DVR STATUS Display the recording status on screen ON or hide OFF REC PLAY BAR Display HDD recording percentage ON or hide OFF CAMERA TITLE Display camera title ON or hide OFF 2 PLAYBACK Set up PLAYBACK mode TIME DATE Display time and date ON or hide OFF DVR STATUS Display cue icons on the screen ON or hide OFF REC PLAY BAR Display HDD recording percentage ON or hide OFF CAMERA TITLE Display came...

Page 34: ...TOR SETUP 1 VGA SETUP Set up the VGA resolution 2 COLOR BAR TEST Adjust monitor colors with monitor controls VGA resolution setup 1024 768 60HZ 800 600 60HZ 640 480 60HZ 1024 768 75HZ 800 600 75HZ 640 480 75HZ ...

Page 35: ...IVE SETUP and MOTION SETUP 4 INTERVAL SETUP Set up switch interval for Full screen and PIP screen 5 ALARM SETUP Set up Alarm mode N C or N O and Alarm Output Duration 6 EVENT POPUP SETUP Set up POP UP function for selected cameras ON or OFF When ON will display full screen on alarm trigger or motion detection 7 BUZZER SETUP Set Buzzer ON or OFF for ALARM or MOTION options 8 PASSWORD SETUP Setup th...

Page 36: ...9 SYSTEM INFORMATION System information version of S W and H W HDD model number and CD R model number HDD MANAGEMENT 1 HDD SETUP 2 HDD INFORMATION 1 HDD SETUP BEGIN Displays recorded start date time for HDD RECORD Displays recorded end date time for HDD PLAY Displays playback date time for HDD STATUS Displays HDD status EMPTY NORMAL OVER WRITE CLEAR HDD Clears HDD data ...

Page 37: ...EM MENU select CONFIGURATION and go to TIME DATE SETUP Hit the ENTER key The date and time set by the manufacturer maybe different from your time zone It is very important to set up the system date and time before the DVR starts recording Set the date and time by using direction buttons and button or Jog shuttle ...

Page 38: ... NOTE DO NOT change the date and time after the recording starts it may corrupt DVR data and cause playback errors If it is necessary to change date and time after the recording starts please run the above steps to avoid playback errors CAMERA SETUP 1 CAMERA TITLE Set up the camera title 2 CAMERA COLOR SETUP Set up the camera color 3 CAMERA ACTIVE SETUP Turn the camera ON or OFF 4 MOTION SETUP Pro...

Page 39: ... or Jog shuttle to adjust the values CHANNEL Select the camera to be modified BRIGHTNESS Adjust image brightness 32 31 CONTRAST Adjust color contrast 32 31 SATURATION Adjust color saturation 32 31 HUE Adjust color hue 32 31 3 CAMERA ACTIVE SETUP Use the direction buttons to select an item and press ENTER to select ON and OFF Example If you set LIVE OFF and RECORD ON After your setup the playback w...

Page 40: ...tus ACTIVE means video input status is normal and LOSS means the video is lost 2 LIVE Set channel to display live video ON or OFF 3 REC Set channel to record video ON or OFF 4 MOTION SETUP 1 MOTION CONFIGURATION 2 MOTION MASK SETUP ...

Page 41: ... 3 MOTION DISPLAY TYPE Use MOTION DISPLAY TYPE to setup visual indicators to give you more visibility to help identify motion targets BOX display block CELL display green lattice OFF Will not indicate motion area with BOX or CELL display CELL display green lattice ON Hit ENTER key to activate BOX display block ON Hit ENTER Key to activate ...

Page 42: ...ording MOTION MASK SETUP Set up area to detect motion Select the number button to select the channel Set motion detection area Use the Direction buttons to move the cursor and press the ENTER key to mark the area Press the MODE Key to change the editing mode The editing modes are below 1 Cell Move to the desired location and press the ENTER key to activate or deactivate the motion detection in the...

Page 43: ...ll the cells by selecting ALL OFF and use the BLOCK ON function to activate the desired area for motion detection 5 BLOCK OFF This function is the opposite of the BLOCK ON function You should turn on all the cells by selecting ALL ON and use the BLOCK OFF function to deactivate the desired area ...

Page 44: ... SETUP SCHEDULE SETUP and change record mode to MOTION to activate the motion settings SCHEDULE SETUP 20 Hit the ENTER key 1 Hit the minus key Your monitor screen should look like this showing the character M s indicating motion detection ...

Page 45: ...45 2 If not press the Mode key MODE Press MODE to select an editing mode Continue till you see MODE ALL at bottom of screen then press and to select a recording mode M ...

Page 46: ...to cancel 2 EVENT RECORD EVENT UPDATE TIME is used to avoid recording the same event The event types include alarm motion and video loss Example when an event is triggered the same event keeps on being triggered for a period of time With the help of EVENT UPDATE TIME whenever there is an event the DVR records the starting time and the information of the event in the Event Log ignores the following...

Page 47: ... 300 seconds Note Alarm output can be triggered by an alarm input and video loss Internal Motion detection cannot trigger an alarm output EVENT POPUP SETUP 1 CHANNEL Use and to select a channel 2 POPUP ON OFF Set up the POPUP function ON OFF Use and to select ON or OFF When there is an event the screen display will switch to a full screen of the corresponding channel 3 EVENT Use and to select the ...

Page 48: ...ETECT Turn beep on off when motion is detected 1 To turn buzzer off press any key on the front panel 2 The beeping sound can only be turned off manually PASSWORD SETUP The password consists of 1 to 8 digits Press the number keys on the front panel to enter the password 1 USER ID Press or to set User ID 2 USER PW Key in the current password NOTE DEFAULT password is blank ________ so leave blank whe...

Page 49: ... the firmware version 2 H W VERSION Displays the PCB version 3 PRODUCT ID Displays the product ID number 4 MASTER Displays MASTER HDD information 5 SLAVE Displays SLAVE HDD information 6 CD R Displays CD R information NOTE The product ID is not the MAC address MAC address can be found in EXTERNAL DEVICE TCP IP setup ...

Page 50: ...ive OFF The system stops recording when the hard drive is full If the DVR has two hard drives the system stops recording when the Master and Slave drive both are full 2 MUTIPLEX Set up the multiplex mode Duplex allows recording and remote connection simultaneously Stops recording when you enter playback During the remote connection the DVR keeps recording if the client stays in the LIVE mode Stops...

Page 51: ...ALARM Set the recording speed when alarm is triggered 6 RECORD IN MOTION Set the recording speed when motion is detected 7 CONTINUOUS RECORD Set the recording speed for continuous recording RECORDING SPEED 1 The recording speed is expressed in fractions 1 1 ratio is recording at full speed 1 2 ratio is recording at half of the recording speed At 1 2 the recording duration will be two times longer ...

Page 52: ...els to maximize your video recording quality and performance To turn off camera channels refer to SYSTEM MENU CONFIGURATION CAMERA SETUP CAMERA ACTIVE SETUP Please note that channels with video loss are still active recording and sharing the recording speed and reducing optimal performance SCHEDULE SETUP Program a recording schedule MODE Press MODE to select an editing mode Use the direction keys ...

Page 53: ...et ALARM to record when triggered M Set MOTION to record when motion is detected C Set CONTINUOUS record to record continuously AM Set AlARM MOTION to record when activated A C Set AlARM CONTINUOUS record Records continuously at the speed set in CONTINUOUS RECORD and switches to the speed set in RECORD IN ALARM when there is an alarm triggered MC Set MOTION CONTINUOUS record The DVR records contin...

Page 54: ...Set up holidays You can program up to 100 days for holidays The recording schedule of the holidays is the same as the settings for SUNDAY in SCHEDULE SETUP Press MODE Key and set the editing mode as EDIT HOLIDAY Use direction keys to select and press the ENTER key to mark the day as a holiday To clear the settings press MODE to set the editing mode to CLEAR ALL DATA or CLEAR MON DATA clear month b...

Page 55: ... the value Press the ENTER key and the DVR calculates the end date and time for backup automatically Use CD R or DVD R CD RW and DVD RW discs will not work CD s only for backup Note Reads CD R and DVD R disc CD RW discs will not work with this unit Does not read DVD R DVD RW DVD RW NOTE 1 Use a new blank CD Do not format or reuse a CD Do not reuse rewritable CD s RW discs will not work 2 When choo...

Page 56: ... 1 Insert software CD 2 Click Install backup player to start the installation 3 Select a Destination Folder 4 Copy files to the Destination folder System will build a new icon for CD BACKUP PLAYER Double click on icon for CD Backup Player located in Desktop 5 You don t necessarily need to use the backup player software to view your CD backup data When you burn a CD using the DVR the DVR will autom...

Page 57: ...indicate the CD s start end time and date and the backup video quality resolution 4 Speed Adjustment Select a playback speed 2X 4X 8X 16X 32X 64X and press Fast Rewind and Fast Forward Select a speed to play slow motion 1 2X 1 4 1 8X 1 16X and press for Rewind and for Forward 5 Select a 1 4 9 16 Screen display 6 Go to the next page Go to the previous page ...

Page 58: ...o function Click ON and then select a channel to play audio ON Start playing audio and it will automatically switch to full screen 1 4 Select Audio channel SKIP To synchronize video and audio play speed When DVR recording is set to a lower speed adjust SKIP to synchronize the video and audio o Example 1 The DVR recording is set to 1 3X set SKIP at 3 o Example 2 When the DVR recording is set to 1 4...

Page 59: ...e video and start saving the AVI file Select AVI SAVE to open the AVI SAVE dialog window 2 Select the channel frame rate and AVI image size 3 Select START to save and END to stop the process 4 Click AVI SAVE again to close the AVI SAVE dialog window 1 CHANNEL Select a channel to save 2 Frame Rate Select how many frames to save every second 3 SIZE Set the resolution as 360 240 or 720 480 4 START St...

Page 60: ...cord and play TCP IP SETUP 1 MAC ADDRESS MAC address is not editable 2 IP ADDRESS Set up IP address 3 IP PORT Set up IP Port 4 GATEWAY Set up GATEWAY 5 SUBNET MASK Set up SUBNET MASK 6 DHCP SETUP Set DHCP mode to Manual or Automatic When DHCP is set to Automatic you can not change IP settings To turn off the DHCP automatic detection exit this page and go to DHCP SETUP to change the setting DDNS SE...

Page 61: ... selection 4 REGISTER Connect to DDNS server and register the DVR information Press ENTER to start the registration 5 DNS STATUS Displays the current status of DDNS connection IP ADDRESS Set the server IP address IP PORT Set the server IP port REMAIN TIME Set time for reporting to the server 6 LAST REGISTRATION DATE Indicate the time of the last registration CONNECTION SETUP Use arrow keys to sele...

Page 62: ...t RS232 SETUP to communicate with serial devices Through the DVR RS232 port users can connect to a PC or other serial control devices The ASCII Code guide is located in Advance Hardware Installation under Serial Hardware 1 SPEED The transmission baud rate is 19200bps 2 LENGTH The transmission length is 8 bits 3 STOP BIT The stop bit is 1 4 PARITY The parity is none ...

Page 63: ...P and DOWN arrow keys to select and to change the value 1 CHANNEL Select PTZ channel 2 MODEL Select PTZ protocol 3 PTZ ID Select PTZ ID 4 BUADRATE Select Baud Rate 5 CMD DELAY Set up delay time to send the command 6 COMMAND Perform PTZ CMD ...

Page 64: ...EED Set the Panning speed 2 TILT SPEED Set the Tilting speed 3 ZOOM SPEED Set the IN OUT speed for ZOOM 4 FOCUS SPEED Set the speed for FOCUS SPOT SETUP SPOT monitor setup 1 Sequence interval time To set up the interval time for sequence display 2 Alarm pop up Output to SPOT monitor when alarm is triggered 3 Motion pop up Output to SPOT monitor when motion is triggered 4 Pop up time Time duration ...

Page 65: ...cord AUDIO under the following conditions 1 When the recording resolution is configured to QUAD mode in RECORD CONFIGURATION 2 When the MUTIPLEX mode is configured to TRIPLEX in RECORD CONFIGURATION 3 When playback is in rewind or fast forward The DVR plays AUDIO only when the playback is in forward at 1X speed 4 The DVR does not transmit AUDIO to the client ...

Page 66: ...AULT Press to select and ENTER for selection Move the cursor to FACTORY DEFAULT and hit ENTER Move the cursor to ALL and hit ENTER to turn all ON Move the cursor to RUN and press ENTER to execute the Factory Default ...

Page 67: ...ION SETUP Set MOTION SETUP back to factory default 5 PANTILT SETUP Set PANTILT SETUP back to factory default 6 SCHEDULE SETUP Set SCHEDULE SETUP back to factory default 7 CONFIGUATION Set CONFIGURATION back to factory default LANGUAGE Press button to select a language setting FACTORY DEFAULT ALL SCREEN DISPLAY CAMERA COOLR SETUP MOTION SETUP PANTILT SETUP SCHEDULE SETUP CONFIGUATION RUN ...

Page 68: ...68 ADVANCE HARDWARE INSTALLATIONS SPOT SPOT Second monitor output Once alarm or motion is triggered it will automatically pop up or display in sequence according to the set up Chapter 5 ...

Page 69: ...P To monitor a single channel connect the loop out of the corresponding channel to a monitor VCR To record a specific channel connect the loop out of the corresponding channel to a DVR VCR or recording device ...

Page 70: ...RM INSTALLATION Input Output 4 Channel 8 Channel 16 Channel 1 D1 D16 Alarm Input GND for Location 16 Sensor inputs for sensor input installation 2 Relay Output NO NC COM The application of relay output is NO COM NC COM ...

Page 71: ...and COM terminals are open circuit and closed circuit when alarm triggered NC COM the NC and COM terminals are closed circuit and open circuit when alarm triggered SERIAL PORT SETUP Connect PC COM port or other device to the DVR RS232 RS232 settings baudrate parity length stop bit are NOT adjustable The transmission baud rate is 19200bps length 8 bits stop bit 1 and the parity is none ASCII CODE i...

Page 72: ...72 To connect DVR to a PC users must use a twisted RS232 cable ...

Page 73: ...73 PTZ CAMERA INSTALLATION OPERATION Connect the PTZ D to the DVR D PTZ D to DVR D 4 Channel 8 Channel 16 Channel ...

Page 74: ...s specified by manufacturer 3 BAUD RATE enter the PTZ s transmission baud rate specified by the manufacturer 4 CMD DELAY the delay time of the command transmission between bytes Please refer to the PTZ user manual for the manufacturer s suggestion PTZ CAMERA OPERATION PTZ controls on front panel of DVR Press PTZ key and use MENU and NEXT key to select a PTZ command and to select the channel Then p...

Page 75: ...PTZ function keys to control the PTZ camera MICROPHONE SPEAKER INSTALLATION AUDIO INPUT IN1 IN4 4 audio inputs MIC to the audio input IN1 IN4 to record audio Tip Use Amplifier to obtain better sound recording PTZ command set using MENU and NEXT keys 1 ZOOM OUT or IN 2 FOCUS FAR NEAR or AUTO 3 IRIS OPEN CLOSED or AUTO 4 AUTO SCAN 5 PRESET GOTO SET CLEAR 6 USER 1 2 3 ...

Page 76: ... set to MASTER Two HDDs installation Insert the first HDD shown in 1 set up jumper as MASTER insert the second HDD shown in 2 set up jumper as SLAVE Caution 1 Power off the DVR before HDD installation 3 Suggested HDD brands to use Maxtor or Hitachi 7200 RPM or above ATA 100 Maxtor Hitachi and Seagate if firmware version is above V1 46 DVR Firmware version can be found in SYSTEM MENU CONFIGURATION ...

Page 77: ...system time or the recorded time in playback 2 Date Current system date or the recorded date in playback 3 Camera title Camera title of the displayed channel Camera title can be modified in SYSTEM MENU CONFIGURATION CAMERA SETUP CAMERA TITLE Chapter 6 ...

Page 78: ...8 120IPS 360X240 8 16CH 200IPS 360X144 480IPS 360X120 6 Quality To show record quality LOW HYPER 7 Network LED To show if there is a client connected Disconnected Connected 8 HDD record search percentage In LIVE mode Recorded HDD Space In Playback mode Percentage of the data played 9 Record status To show the record status Emergency record Red scheduled record Green Stop record White 10 Audio outp...

Page 79: ...t modes 4 6 8 9 13 16 splits Press button to adjust the order PIP VIEW FREEZE VIEW Freeze in split mode Split screen mode press FREEZE and press a number button to select the corresponding channel to freeze Press the number again to cancel Freeze in Full mode In full screen mode Press FREEZE to freeze the channel and press FREEZE again to cancel ...

Page 80: ...for 2 3 seconds again to cancel it Sequence order A B C D A B Sequence time is adjustable in system setup Please see SYSTEM MENU CONFIGURATION INTERVAL SETUP for details ZOOM VIEW Select channel zoom and press ZOOM to enlarge to 200 Use the direction buttons to select area and press ENTER to zoom Press ZOOM again to cancel ...

Page 81: ...and disable all front panel controls To unlock press and hold K LOCK and enter Admin password SWITCH AUDIO CHANNEL Press AUDIO you will see The number indicates the current audio output channel Press AUDIO again for next audio channel and continue to turn OFF ...

Page 82: ...ion record records when motion is detected Continuous record records continuously When power is cut off will automatically resume its recording schedule after power is back Record percentage or numeric or bar graph Shows HDD storage available NOTE Stops recording 1 In Menu mode 2 No video input 3 Cameras are set to record off 4 No motion is detected while in MOTION record mode 5 Record schedule is...

Page 83: ... panel to start playback Press PLAY during playback to choose play forward or backward Press STOP key to stop playback SWITCH AUDIO CHANNEL Press SEQ AUDIO to switch to other audio channels o You will see the number represents audio output channel ...

Page 84: ...d EVENT LIST 1 SEARCH BAR Search by recording percentage Using Jog shuttle to change percentage value 2 TIME DATE Search by appointing a time and date 3 EVENT LIST Search by Event list SEARCH BAR Use Jog shuttle or keys to select the recording percentage of the search bar Press ENTER key to confirm and start the playback ...

Page 85: ...ed time and date to start playback Select the time and date by key to adjust numbers and by key to adjust the cursor position Then press Enter to start playback EVENT LIST CH shows the channel in which the event happened EVENT shows the type of events Motion detection MOT Image lost LOS Alarm trigger ALM TIME DATE shows the event time and date Keeps up to 1000 events in its EVENT LIST Using key to...

Page 86: ...o continue the playback Adjust Playback speed by JOG SHUTTLE While in playback press J SHUTTLE key to adjust the playback speed 1 High speed playback Low speed playback Forward Playback Rewind Playback Using the outer circle of Jog shuttle to adjust the playback speed Turn clockwise for forward direction and turn counter clockwise for Rewinding Playback step by step Using inner circle of Jog shutt...

Page 87: ...ind Play in forward direction Adjust speed using REW key High speed backward playback or FF key High speed forward Playback Press the keys repeatedly to adjust the speed rate Adjust speed using SLOW Motion keys Slow playback in backward or forward mode Press the keys repeatedly to adjust the speed rate Playback picture by picture using STEP keys Step playback in backward or in forward ...

Page 88: ...OFTWARE Network Introduction View video from your PC anywhere in the world by connecting your DVR LAN connection to your network system Network installation and setup 1 Connect DVR LAN connection to your LAN router Chapter 7 ...

Page 89: ...ernet Service Provider Note Static IP address is highly recommended because of the video connection reliability 3 Make sure you have DirectX 9 0c or later on your computer If not go to www microsoft com directx Go into Search to see if DirectX file is on your computer Just verify it is on your computer and exit ...

Page 90: ...ss your DVR network settings Enter SYSTEM MENU EXTERNAL DEVICE TCP IP SETUP IP CONFIG SETUP SYSTEM MENU DISPLAY SETUP RECORD SETUP BACK UP EXTERNAL DEVICE FACTORY DEFAULT LANGUAGE EXTERNAL DEVICE TCP IP RS232C SETUP PANTILT SETUP AUDIO SETUP TCP IP SETUP IP CONFIG SETUP DDNS SETUP CONNECTION SETUP DHCP SETUP IP CONFIG SETUP MAC ADDRESS XX XX XX XX XX XX IP ADDRESS XXX XXX XXX XXX IP PORT 08000 GAT...

Page 91: ...ystem The setup is the same as the next session Via ADSL with Dynamic IP 9 The Gateway IP is your router s IP address and the Subnet Mask should match the Subnet Mask IP of your router 10 To connect to the world wide area network for remote viewing you must configure your router to allow port forwarding Super Circuits does not provide technical support for router setup Contact your service provide...

Page 92: ...computer if they are connected to the same router In addition the first 3 segments of the local IP Address should be the same as well For example if your computer s local IP address is 192 168 1 100 your DVR s IP address should be 192 168 1 XXX NOTE Your DVR should have a dedicated IP address provided by your IP provider or IT department 13 Exit the setup menu Turn DVR power off for ten seconds or...

Page 93: ...eceived 3 or 4 and Lost 0 This will tell you that you ve successfully connected to your DVR and we can proceed Like FIG 1 below FIG 1 16 If you re seeing Request timed out and Packets Sent 3 or 4 Received 0 Lost 3 or 4 like FIG 2 below then you have not established a LAN connection between the DVR and the computer FIG 2 ...

Page 94: ...using an Ethernet crossover cable which is available at any electronics store such as Radio Shack or Best Buy Circuit City etc eliminating all other cables and equipment And repeat the pinging process PC Ethernet Crossover Cable DVR 18 If you re looking at FIG 1 and this is the case then you have demonstrated that a Local Area Connection LAN has been made between the DVR and the computer Proceed t...

Page 95: ...atus To show the current status 3 PTZ Camera Control To control PTZ Camera Zoom Focus Direction Remote Control of PTZ 4 Screen Split Select Full 4 9 16 split screen display 5 Channel Selection Select CAM1 16 in full or split screen display 6 Connect Select DVR IP address from IP list for connection ...

Page 96: ...or name 2 IP LIST Show list of saved DVR IP addresses 3 IP ADDRESS Enter DVR IP address 4 PORT Enter DVR s port number 5 USER ID Enter the user ID as ADMIN 6 PASSWORD Enter DVR Admin s password 7 MANUAL DDNS If you have static IP address or are not using DDNS service select MANUAL If you are using DDNS service select DDNS and click the tab DDNS on the top and enter DDNS setup page If your setting ...

Page 97: ...you use to enter the DVR MENU Password cannot be blank or ________ If you have not changed your password from blank or ________ on your DVR do so at this time Change your DVR Admin password 4 Press SAVE and OK The name of the DVR must be highlighted before clicking on OK or the DVR will not connect Click CONNECT from Remote Viewer Interface Click CONNECT NOTE Highlight the IP address and click on ...

Page 98: ...orded Images Set path to save video clip 6 Run in Full Screen Mode Check box for full screen mode Remote Viewer Setup 1 Screen Division Split mode 2 Network Speed value To set up the transmission rate for split screens as default value PTZ control 1 ZOOM Use to adjust PTZ Zoom 2 FOCUS Use to adjust PTZ Focus 3 PAN TILT CONTROL Click the direction buttons to control Pan Tilt 4 PTZ ID Show the PTZ I...

Page 99: ... Select time date of playback 3 Record and Playback Status START To show the record START Time Date END To show the record END Time Date REQUEST To show the record DISPLAY Time Date 4 Screen Split Select Full 4 split screen display 5 Search Button Operate the search function 6 Time Selection Select the time of playback 7 Channel Selection Select CAM1 16 when full screen display ...

Page 100: ... Fast Reward RW 2 Fast Forward FF 3 RW Speed 1X 4 Stop Pause 5 Playback Speed 1X 6 Start at the beginning of recording 7 Jump to the previous hour 8 Jump to the next hour 9 Go to the end of recording Remote Playback Operation Drag the mouse over the time bar to select a playback time Select a Year Month Day to playback Click RW or PLAYBACK to start the playback If the DVR cannot find the selected ...

Page 101: ... Back up via Client software Save the recorded data as single JPEG picture or AVI format Press STOP at starting point of video your wanting to save and press SAVE Print the recorded data Press STOP and PRINT to print picture SAVE AS AVI During playback press RECORD to start saving to AVI and press RECORD again to stop A message Saving OK pops up when you successfully save the video to AVI ...

Page 102: ...Solutions click the link for Dynamic DNS Then under More Info select the link How To Then under Dynamic DNS How To select the link for account From this point follow the instructions on the screen to set up your account DDNS setup and operation DDNS SERVER setup 1 Connect to DDNS SERVER http advr com tw or http 59 124 143 151 by IE browser Select REGISTER to register a new account 2 Add a new acco...

Page 103: ...ormation 5 Add DVR information DVR NAME Set a DVR name MAC ADDRESS Enter the DVR s MAC address DVR s MAC address can be found in DVR s SYSTEM MENU EXTERNAL DEVICE TCP IP SETUP IP CONFIG SETUP IP Enter the DVR s current IP address PORT Enter the DVR s port number It is required to enter DVR NAME and MAC ADDRESS DVR s IP and PORT number can be left blank Press OK to save the settings ...

Page 104: ...ete the DVR information Go to SYSTEM MENU EXTERNAL DEVICE TCP IP SETUP DDNS SETUP DVR setup SYSTEM MENU CONFIGURATION RECORD SETUP BACKUP EXTERNAL DEVICE FACTORY DEVICE LANGUAGE EXTERNAL DEVICE TCP IP SETUP RS232C SETUP PANTILT SETUP TCP IP SETUP DDNS SETUP CONNECTION SETUP DHCP SETUP ...

Page 105: ...onnect to DDNS server and register the DVR information to DDNS database DNS STATUS Indicates the current status of DDNS connection IP ADDRESS Indicates the current IP address in DDNS server IP PORT Indicates the current IP address in DDNS server REMAIN TIME Indicates the remaining time to update IP address LAST REGISTRATION DATE Indicates the last date of registration 1 Run Client software and ent...

Page 106: ... INFO 1 GROUP Enter Group name registered on DDNS Server 2 DVR NAME Enter DVR name registered on DDNS Server If the DVR name is entered and saved before click LOAD to browse the list 3 Save Load Save Save the setup into the DDNS list Load Open the DDNS list ...

Page 107: ... 5 User ID Enter ADMIN 6 Password Enter the DVR Admin s password and click OK to complete the DDNS setup 7 Click CONNECT to get the connection with DVR NOTE Highlight the IP address and click on OK Users can also access to the DVR from Internet Explorer for remote viewing remote backup and playback the backup file Log on to DDNS server and go to the DVR List ...

Page 108: ...eo 2 DVR info IP IP address of DVR PORT Enter PORT ID Use ADMIN PW Enter the ADMIN password 3 CONNECT DISCONNECT CONNECT Connect to DVR DISCONNECT Disconnect connection 4 Status Window Shows the current status of connection 5 Selection of multi screen Switch to different multi screen displays ...

Page 109: ...ontrol Control PTZ camera 8 Scalability Adjust transmission speed PTZ Select the protocol BAUDRATE Select the baud rate CH Select the ID of PEZ camera ZOOM Zoom in out FOCUS Focus near far IRIS IRIS open close Web Network Backup Click Backup to open the web page Web Network Backup ...

Page 110: ...tus Unlock Get record Start End time Set Backup Time Set the start end time size and path of file backup Start Backup Start Backup 3 DVR Server information Record Start Time Indicate the recorded start time Recorded End Time Indicate the recorded end time Update Update the recorded time 4 Backup Status Message Display the backup status Receive Rate Percentage of backup video received Backup Rate C...

Page 111: ...ckup file 3 Set the file size of backup file 30 700MB 4 Set the start end time of file backup 4 Click Apply to apply all setup 5 Select Start Backup to active the backup function User can stop anytime during backup Web backup player Click Backup Player to open the web page of Backup Player ...

Page 112: ...tart end time of backup file 4 Switch to different multi screen displays 5 Channel selection Ch1 Ch16 6 SPEED Adjust fast forward DELAY speed Adjust rewind speed 7 Function bar on playback Start at beginning Fast Rewind Rewind Pause Forward Fast Forward Start at the end ...

Page 113: ... To start the audio function Ch1 4 to select the channel with audio Save AVI file 1 Click to open the backup file and select single channel 2 Click to open the AVI SAVE function 3 CHANNEL Select a single channel FRAMERATE Set the frame rate SIZE Set the AVI file size START Start SAVE STOP Stop SAVE The AVI file path will be saved in C WEB_BACKUP ...

Page 114: ...114 Specifications ...

Page 115: ...115 ...

Page 116: ...116 Appendix 1 Record time table 4ch DVR ...

Page 117: ...117 The numbers are for reference only The recording duration is calculated under the continuous recording mode Record speed 1 1X No recorded audio 8 16ch DVR ...

Page 118: ...wing situations To playback a hard drive from another DVR To playback deleted video after running HDD CLEAR Enter PLAY ONLY MODE 1 DVR must be off 2 Turn on the DVR 3 The DVR will start booting up at this point pay close attention to DVR display 4 When you see HDD DETECT press PLAY and System enters PLAY ONLY MODE ...

Page 119: ... search the data by percentage 7 NOTE You cannot use Time Date and EVENT LIST to search the data Appendix 4 Play only mode Under PLAY ONLY MODE 1 You cannot record 2 Cannot backup video to CD R 3 You can still connect to DVR remotely You can enter Playback remotely to search the data 4 No remote LIVE display ...

Reviews: