55
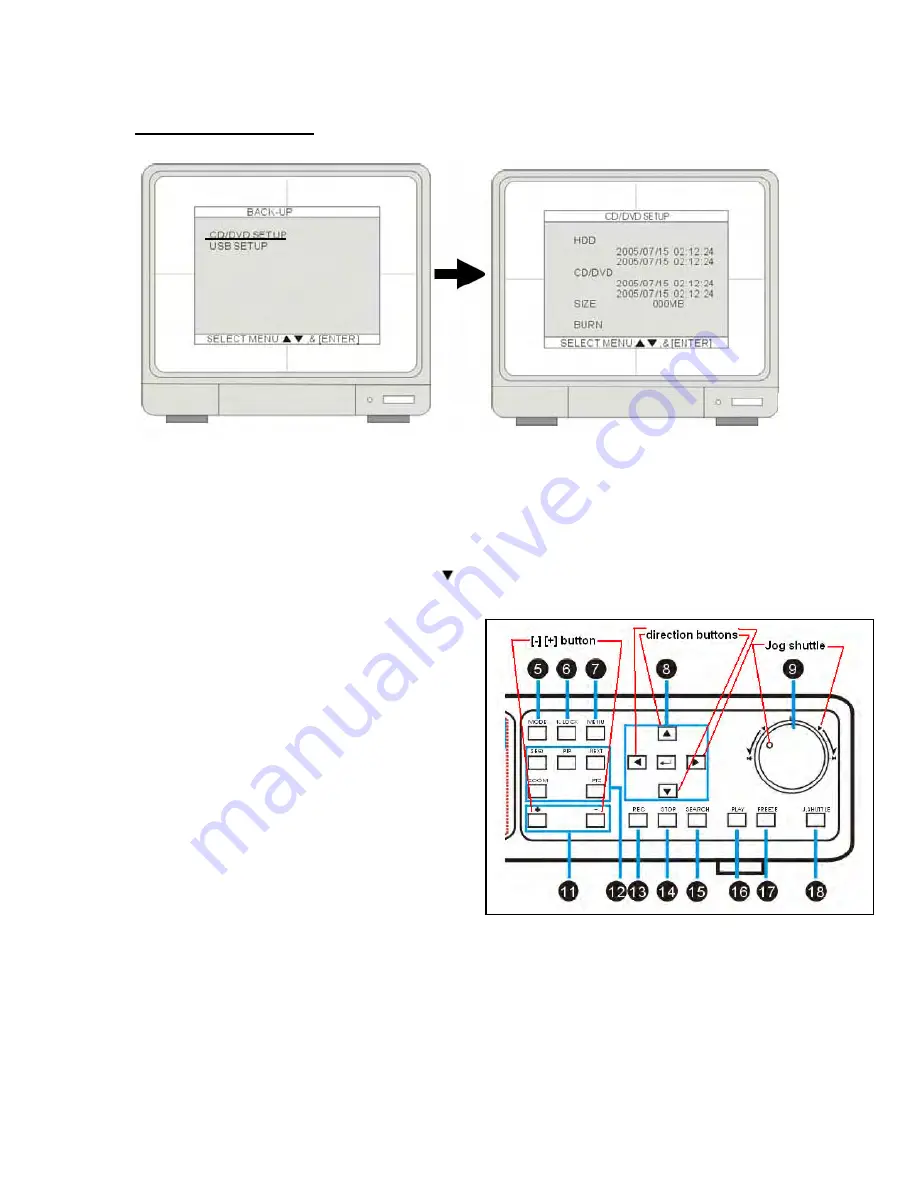
CD/DVD SETUP
1. HDD
•
Displays HDD start and end recording time and date.
2. CD/DVD
•
Select a starting date and time for backup. Press the
ENTER
key and use the
UP
and DOWN arrow keys to move the cursor. Use
[+] [-]
or
J.Shuttle
to change the value.
Press the
ENTER
key and then press
the down arrow key and go to
SIZE
to choose a
backup size.
3. SIZE
•
Insert a blank CD/DVD disk. Disk size will
display on screen. Press the
ENTER
key
to enter the
SIZE
selection. Use
[+] [-]
or
J.Shuttle
to change the value. Press the
ENTER
key and the DVR calculates the
end date and time for backup
automatically.
※
Use
CD-R
or
DVD+R
(CD-RW and DVD-RW
discs will not work)
CD’s only for backup.
Note:
Reads CD-R and DVD+R disc (CD-RW
discs will not work with this unit). Does not read
DVD-R, DVD+RW. DVD-RW.
NOTE:
1. Use a new blank CD. Do not format or reuse a CD. Do not reuse rewritable CD’s. (RW discs
will not work).
2. When choosing a backup size, leave
20MB
as a buffer and do not use entire CD capacity.
For example, if your CD size is 700M enter 650 in
SIZE
setup.
3. Once the DVR starts burning CD do not press any keys to stop process. When the burning
is completed, the DVR will eject CD automatically.
Summary of Contents for DMR16CD-3
Page 1: ...DVQ4CD 3 DMR8CD 3 DMR16CD 3 User Guide Volume 1 ...
Page 10: ...10 ...
Page 16: ...16 5 Connect the digital video recorder to cameras DVR and Camera Installation ...
Page 17: ...17 DVR and Monitor Installation DVR system diagram ...
Page 72: ...72 To connect DVR to a PC users must use a twisted RS232 cable ...
Page 114: ...114 Specifications ...
Page 115: ...115 ...


