


MID POWER
4 x 37dBm Output
5G NR Compliant
© Sunwave CG_CF_M2 v2.1.0 | 13 of 47
Contact us today:
www.sunwave.com
[email protected]
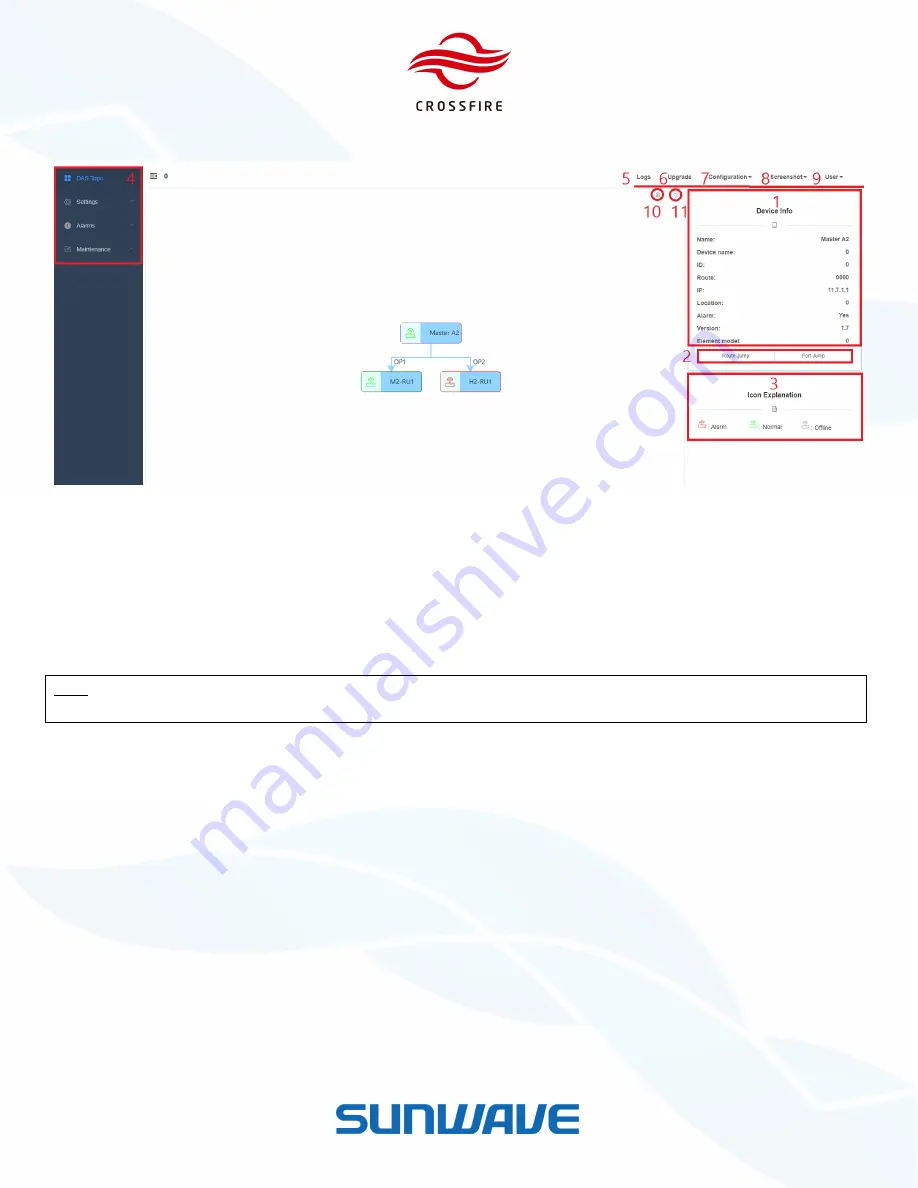
Homepage and Basic Functions
Figure 11.
WebOMT Homepage
The OMT homepage includes System Topo, tabs, and fields (refer to corresponding numbers in Figure 11):
1.
Device Info:
After clicking to select the element’s icon in DAS Topo, it s
hows Element Type, Element ID, Internal IP
address, Location and status
2.
Jump Button:
After clicking to select the
element’s icon in DAS Topo, click Jump Button to switch to the element’s
OMT in the new tab.
Note:
A common issue is that internet browsers cannot transfer to other devices from current OMT when your laptop is
multi-connected to device and wireless network at the same time. Use
Port Jump
to skip this issue.
3.
Icon Explanation:
Shows that device icons in the topology have 3 colors to display different statuses.
4.
Element Configuration:
Tabs that access the page for parameter configuration and query.
5.
Logs:
Records the operating status of the devices. The logs can be downloaded and deleted on the Logs page.
6.
Upgrade:
Used to upgrade the software.
7.
Configuration:
Used to save and load factory or engineering configuration.
8.
ScreenShot:
One step to download all current parameters, information, and device operating status. When
Sunwave assistance is required to troubleshoot the system, it will be helpful to send the ScreenShot files(.json) to
Sunwave technicians.
9.
User:
Account management and logout
10.
Remove Slave:
used to remove all slave devices in Topo.
11.
Refresh:
refresh DAS Topo


